Copying data to other display via lan, Display [setup] menu pressing Page 132: Select [lan data cloning] with and press
Page 132: Select [lan data cloning] with and press

132
English
9
After data cloning has finished,
remove the USB memory device from
the USB terminal.
10
Press the power button on the remote
control to turn the power off, and
then turn the power on. Or remove
the power plug from the outlet once,
wait for 30 seconds or more, and then
insert the power plug.
The cloned content is applied to the display.
●
When USB memory is not removed in the step 9,
the message [Select copy type] is displayed when
the display is turned on again.
Note
●
When the data is copied with [POWER button
lock] set to [On]
If the power is turned off using the power button of
the main unit in step 10, the power button of the main
unit is locked, and the power cannot be turned on
again. In this case, remove the power plug, wait for
30 seconds or more, then connect the power plug
again, and wait for a few minutes. Power indicator:
Lights up in red (standby). Turn the power on using
the remote control, and set [POWER button lock] to
[Off]. Then, turn the power off using the power button
of the main unit, and turn the power on again.
Copying data to other display via
LAN
1
Display [Setup] menu pressing
2
Select [Options] with
and press
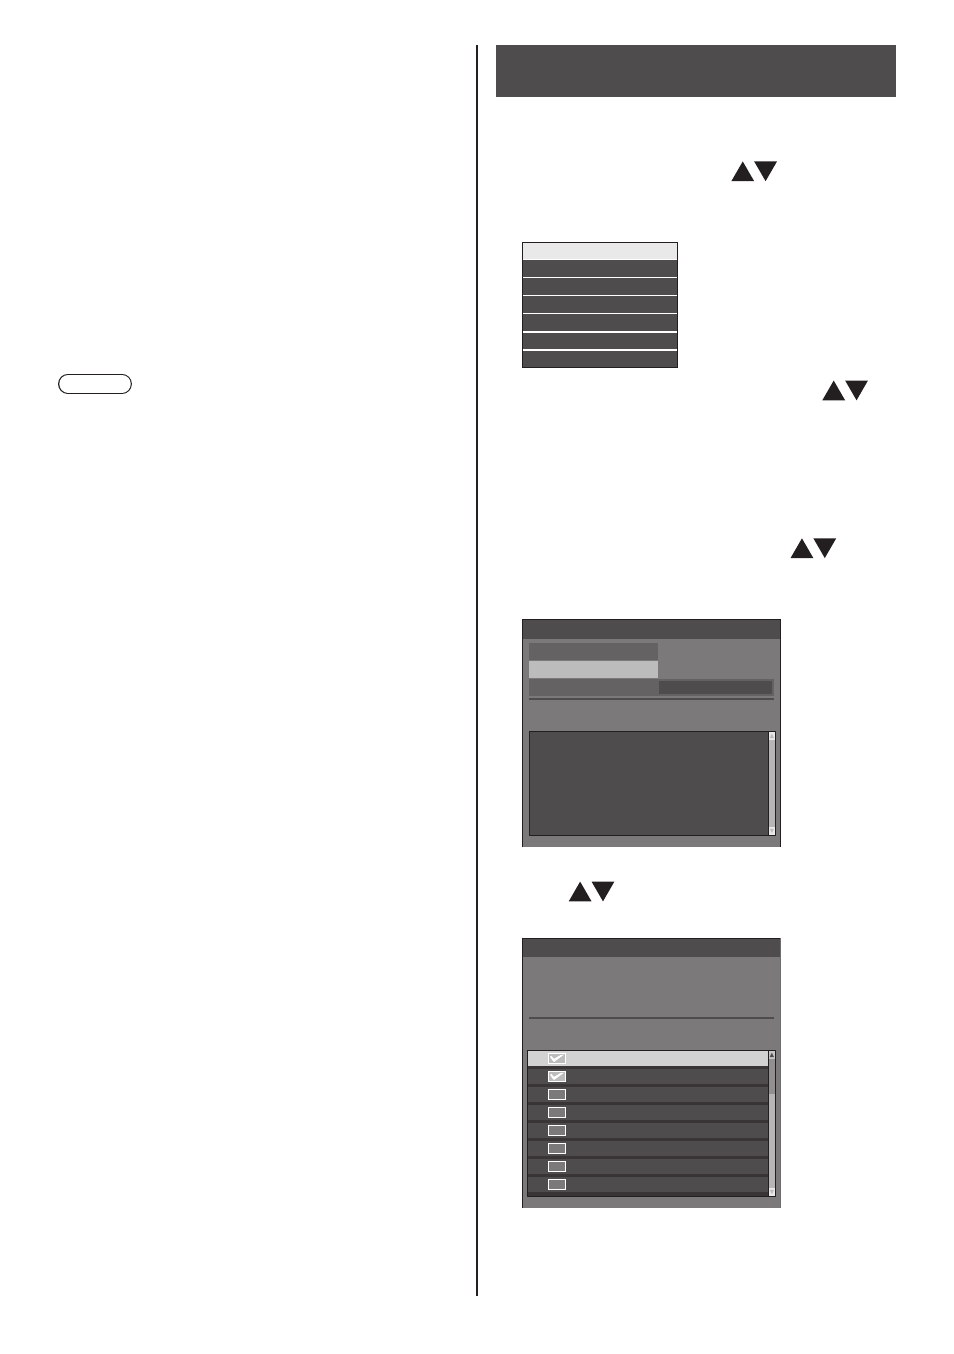
The following display appears.
Display information
Software licenses
Cloning password
USB data cloning
Shipping
LAN data cloning
Output log data
3
Select [LAN data cloning] with
and press
[Cloning password] screen is displayed.
4
Enter the cloning password, and then
press
[LAN data cloning] screen is displayed.
5
Select [Select display] with
and
press
Displays on the same subnet are listed.
LAN data cloning
Execute
Select display
Write protect
Status
Display name
IP address
Off
6
Select the display to copy the data to
with
and press <
VOL +
>.
Select all the displays to copy the data to.
SQ1-001
192.168.
0. 1
192.168. 0. 2
192.168. 0. 4
192.168. 0. 25
192.168. 0. 31
192.168. 0. 7
192.168. 0.124
192.168. 0.211
SQ1-002
SQ1-004
SQ1-005
SQ1-014
SQ1-006
SQ1-041
SQ1-009
Select display
Please check the display to register.
Check
Display name
IP address
7
Press
