Display, Panel descriptions – Roland HandSonic HPD-20 Digital Hand Percussion Instrument User Manual
Page 7
W
ha
t is
the
HandS
onic?
Q
uick
G
uide
Frequen
tly
U
sed
Func
tions
Par
amet
er
G
uide
A
ppendix
Panel Descriptions
7
Number Name
Explanation
Page
1
[PHONES] knob
Adjusts the volume of the headphones connected to the PHONES jack.
2
[VOLUME] knob
Adjusts the volume of the OUTPUT jacks.
3
[KIT] button
Displays the Kit screen (the screen you use for performance).
–
Hold down the [SHIFT] button and press the [KIT] button to UNDO an operation.
4
[QUICK REC] button
Displays the QUICK REC screen, where you can record and play back your performance.
Hold down the [SHIFT] button and press the [QUICK REC] button to turn the
metronome on/off.
5
Display
Shows the number and name of the currently selected kit.
Menu screens are also shown here, allowing you to edit a variety of settings.
–
6
D-BEAM
This is the D-BEAM sensor area. By positioning your hand above this sensor you can
play sounds or modify them.
7
[D-BEAM] button
Turns the D-BEAM on/off. The button will light if this is on.
8
[MENU] button
Accesses the menu screen.
9
Cursor buttons
[ ] [ ] [ ] [ ]
Move the cursor (the selected item) in the screen up, down, left, or right.
10
Value knob
Turn this knob to change the kit number or parameter value.
The knob has the same function as the [-][+] buttons.
If you turn it while holding down the [SHIFT] button, the value will change in larger steps.
11
[
] button
Turns the power of the HandSonic on/off.
12
Function buttons
[F1] [F2] [F3]
The function of these buttons will change depending on the screen. The names of the
current functions are shown in the bottom of the screen. From the left, these are called
the [F1], [F2], and [F3] buttons.
13
[ROLL] button
Turns the Roll function on/off. When the function is on the button will be lit, and a roll
will be heard when you apply pressure to the pad.
14
[PITCH] button
[EFFECT] button
Choose what will be controlled by the realtime modify knob.
[PITCH]:
The pitch will be controlled.
[EFFECT]
: The multi-effect will be controlled.
15
Realtime Modify knob
Turn this knob to temporarily modify the sound.
16
[ENTER] button
Confirms a selection, such as in a menu.
17
[EXIT] button
Returns to the previous screen.
–
18
[-] [+] buttons
Modify the kit number or parameter value. This has the same function as the value knob.
If you use the [-][+] buttons while holding down the [SHIFT] button, the value will
change in larger steps.
19
[SHIFT] button
You can access a variety of functions by using this in conjunction with other buttons.
20
Pads
Strike these surfaces (pads) to play. By varying your striking force and pressure, you can
obtain a variety of performance expressions.
These pads are referred to as M1–5 (Main) and S1–8 (Sub).
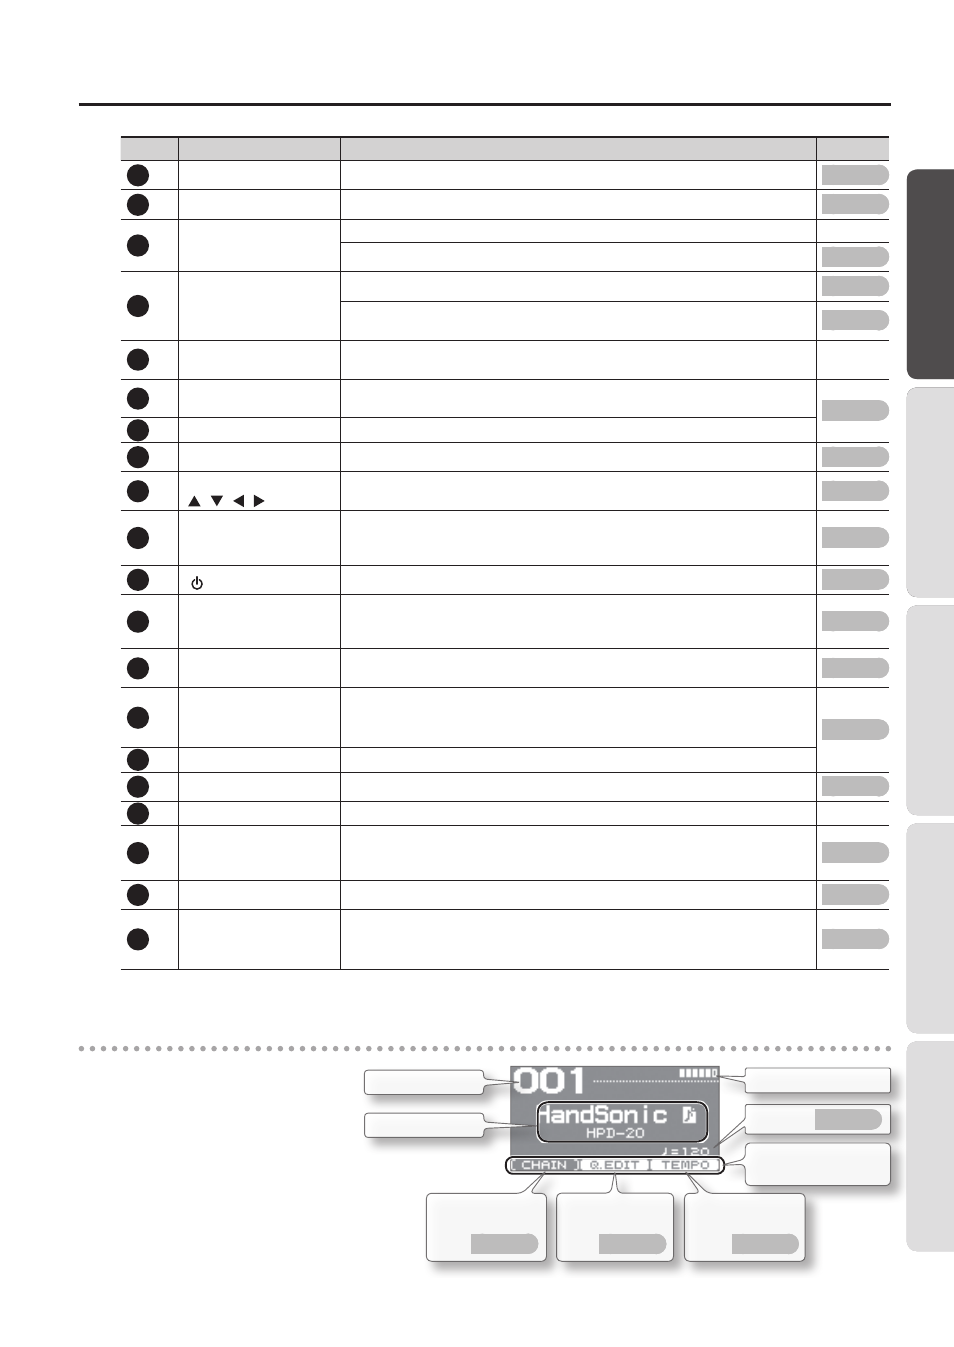
Display
When you turn on the power, the
display will show a
“
kit screen
”
like
the one shown at right.
Kit number
Tempo
Kit name
Pad strike force
Indicates the function of the
[F1]
–
[F3] buttons
Access the TEMPO
screen
Access the Q.EDIT
screen
Kit chain on/off
* The explanations in this manual include
illustrations that depict what should typically be
shown by the display. Note, however, that your
unit may incorporate a newer, enhanced version
of the system (e.g., includes newer sounds), so
what you actually see in the display may not
always match what appears in the manual.