Scan the image to the specified destination – TA Triumph-Adler 2256 User Manual
Page 141
5-35
Operation on the Machine > Scanning
Scan the Image to the Specified Destination
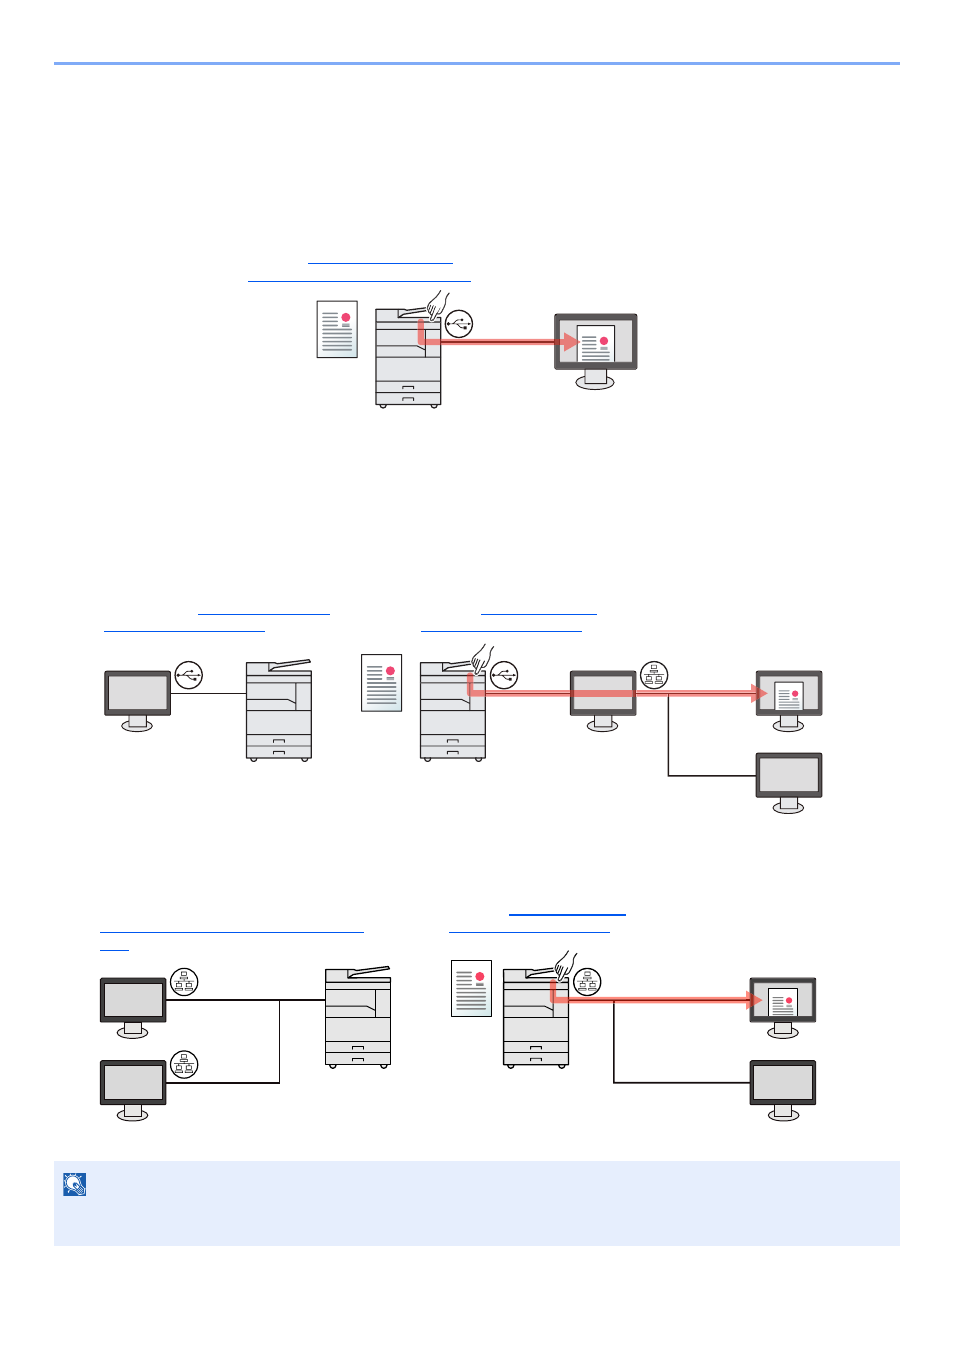
Use the Preset Scan Destination (When Connecting the Machine to the PC via USB)
If originals are scanned after selecting [Local PC] as the destination, an image is saved in "My Documents" in the
computer (Host PC) connected to the machine via USB. If Client Tool is activated on the Host PC, originals can be
scanned only by operating the machine.
Use Your Desired Destination
When saving an image in a location other than "My Documents", the destination needs to be set beforehand by using
Client Tool.
• When Connecting the Machine to the PC via USB
When the shared folder in the computer (Client PC) on the network is selected for the destination, an image can be
saved on the computer that is not connected to the machine via USB.
• When Connecting the Machine to the PC on the Network
*1
When the machine is connected to the PC on the network, an image can be saved in the PC on the network.
*1 The optional Network Interface Kit is required.
NOTE
The administrator of the machine needs to set the destination number in such a manner that the destination number
does not overlap on the network.
Scan the originals at the machine.
(Refer to
Specified Destination on page 5-37
.)
1
An image is saved in "My
Documents."
2
Host PC
USB
Scan the originals at the machine.
(Refer to
3
Configure the destination by using Client
Tool. (Refer to
An image is saved in the
folder set by Client Tool.
Host PC
Client PC
USB
Network
Network
Host PC
USB
2
1
1
3
An image is saved in the
folder set by Client Tool.
Scan the originals at the machine.
(Refer to
2
Configure the destination on the PC on the
network by using Client Tool. (Refer to
Setting Up the Scan Destination on page
2-41
Network
Network
Network
Network