N r b m, Ab b – MCZ PowerTherm User Manual
Page 27
Chapter 3
INSTALLATION AND USE MANUAL
page
27
Installation and fitting
Technical service - Rights reserved MCZ S.p.A. - Reproduction prohibited
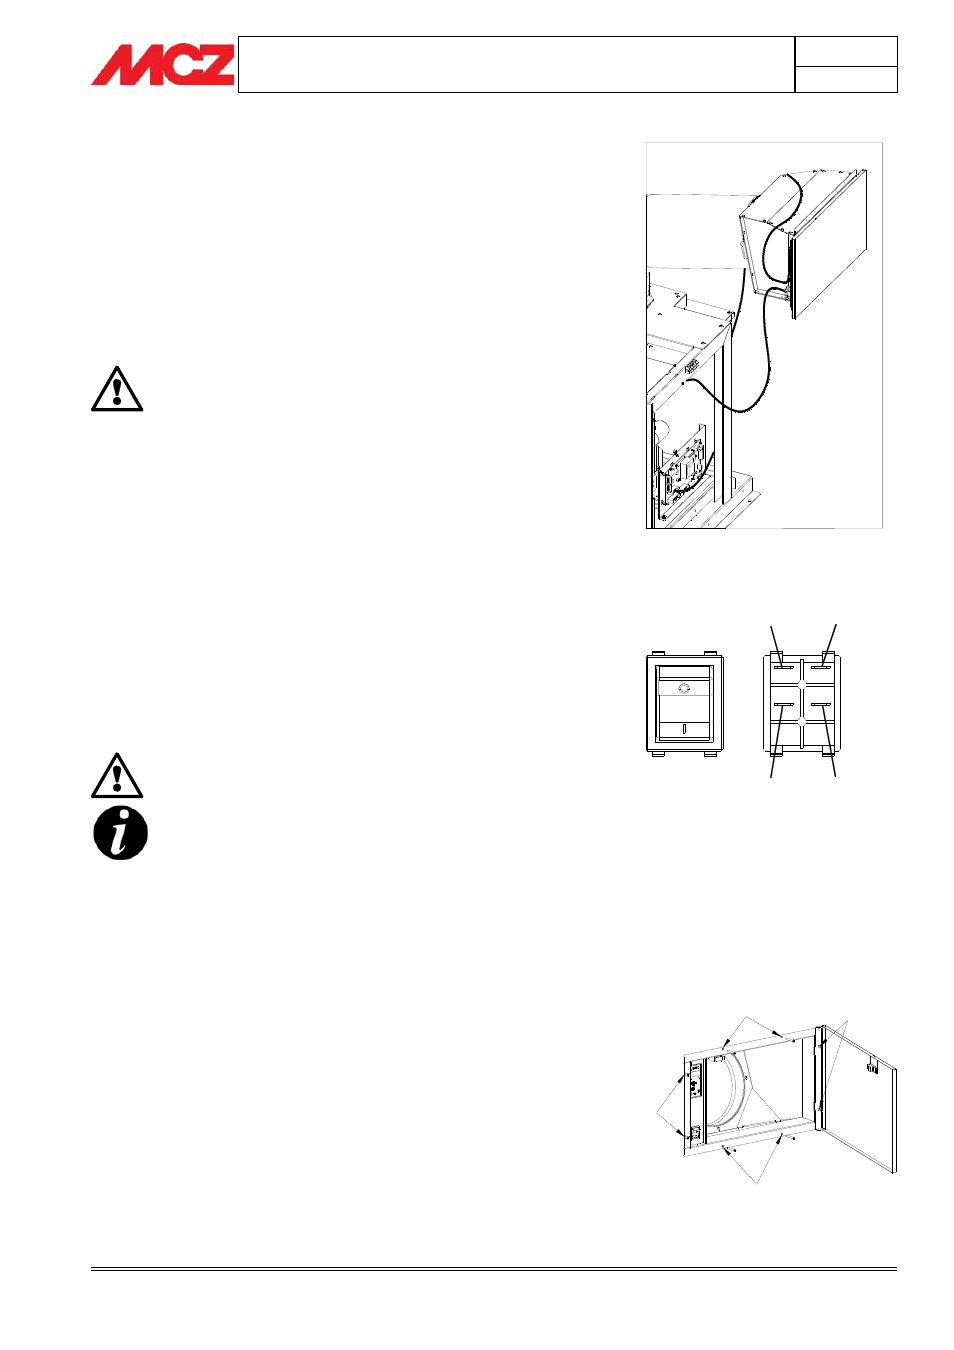
3.16.1. Assembling the emergency panel and main
switch
As shown previously, the emergency panel and the main switch have
already been connected to the respective wiring by the manufacturer
and wound and temporarily placed on the right hand side of the unit
(see figure).
Without disconnecting them, move the cables and panels near the
hole in the hood intended to house the door. Once the hood has been
completed, install the panels on the door frame.
Be very careful when handling the panels connected
to the relative cables.
Wiring must be kept in areas far from heat and
where they cannot be damaged if the unit is
extracted.
To fasten the control panels, proceed as follows:
x
Hold the door frame and work from the back side.
x
Take the emergency panel (2), insert the panel into the largest
slot making it pass over the loader chute and passing the
receiver antenna into the apposite compartment without
damaging it.
x
Take the main switch (1), momentarily disconnect the wires and
lock it into its housing.
x
Reattach the wires to the relative terminals, as per figure, from
point 1, making them pass as far away as possible from the flat
cable.
For correct operation, pass the flat cable and the
switch cable far between them, using different
routes.
Never force the connector when inserting it.
Do not bend or twist the cables.
Do not modify the connectors, wiring, or panel
supports.
The cables must pass far from sources of heat.
3.16.2.
Door assembly
x
When electrical wiring is complete, before permanently
attaching the door to the hood, test operation.
x
If the test is successful, fasten the door to the hood with the
four screws. Use the four holes on the frame of the door
marked (B).
x
The holes marked on the horizontal profiles of the door (A) are
used to fasten the frame of the door to the frame of chute in
order to permanently attach both parts, with the wall of the
hood in the middle.
x
In advance, on the hood, you will need to make a rectangular
hole at a height determined by the manner in which the legs
are attached (see chap.3.4 of the manual).
Fastening of wired door to hood
1
2
N= black
R= red
B- blue
M= brown
A
A
B
B
N R
B M