Press cancel/esc to close remaining menu windows, Figure 17.1 schedule recording, From the schedule menu, select mode1~4 – Epson TOUCH DH200 User Manual
Page 36: Figure 17.2 split the overnight recording time, Under mode, select mode1, Repeat steps 1~8 for tuesday~friday, Stopping scheduled recording overnight recording, Example, Stopping scheduled recording, Overnight recording
26
Using the Main Menu
5. Press the
ENTER
button to save your
settings. The Schedule sub-menu closes.
The assigned mode appears in the main
Schedule window.
6. Press
CANCEL/ESC
to close remaining
menu windows.
7. To enable the recording schedule, press
/
on the front panel or
on the
Virtual Remote.
Stopping Scheduled Recording
If you need to stop a recording schedule, press
/
on the front panel or
on the Virtual
Remote and enter your 6-digit system
password (by default, 000000).
NOTE:
Always look for the
icon in the
status bar. If you do not see the
icon,
schedule recording is NOT ENABLED.
Overnight Recording
If you want to program an overnight recording
schedule, you will need to split the time using
the available time slots in the Schedule
sub-menu.
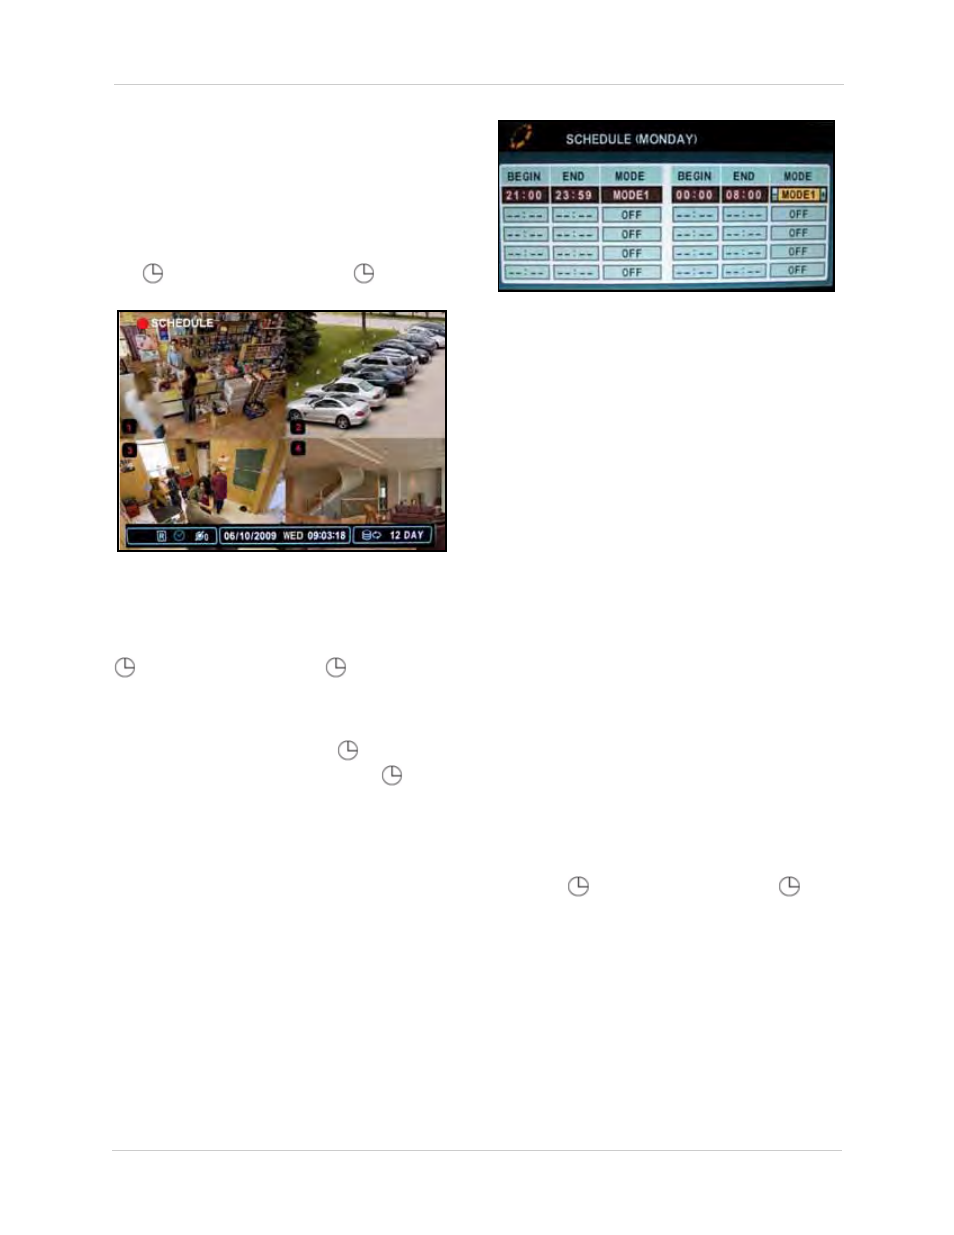
Example
You are a small business owner that wants
your custom recording schedule to record
from 9 PM to 8 AM, Monday to Friday.
To set the schedule:
1. From the Schedule menu, select
MODE1~4
.
2. Customize the
video quality
,
frame
rate
, and
motion
detection
for the desired channels.
For this example, Mode 1 will have
cameras 1 and 2 set to ULTRA and 15 fps,
while the remaining cameras will be set to
HIGH and 7 fps.
3. Select the
CHART
tab and select
MON
and
then press the
ENTER
button. The
Schedule sub-menu opens.
4. Under BEGIN, press the
number buttons
on
the front panel or remote control to enter
21:00
. Under END, enter
23:59
.
NOTE: If using the front panel, you can select
digits by pressing + / -. You need to press + / -
to select 0.
5. Under MODE, select
MODE1
.
6. Press
X
to move the cursor to BEGIN in
the right-hand column. Enter
00:00
. Under
END, enter
08:00
.
7. Under MODE, select
MODE1
.
8. Press the
ENTER
button to save your
settings and return to the main Schedule
menu. Mode 1 (red) will appear in the
designated time block in the schedule.
9. Repeat steps 1~8 for Tuesday~Friday.
10. Press
/
on the front panel or
on
the Virtual Remote to enable scheduled
recording.
Figure 17.1 Schedule recording
Figure 17.2 Split the overnight recording time