2 display, 1 initial setup via lcs tool – SMA STP 60-US-10 Installation User Manual
Page 30
3 Initial Setup and Start
SMA Solar Technology AG
30
STP60-10-IA-xx-10
Installation Guide
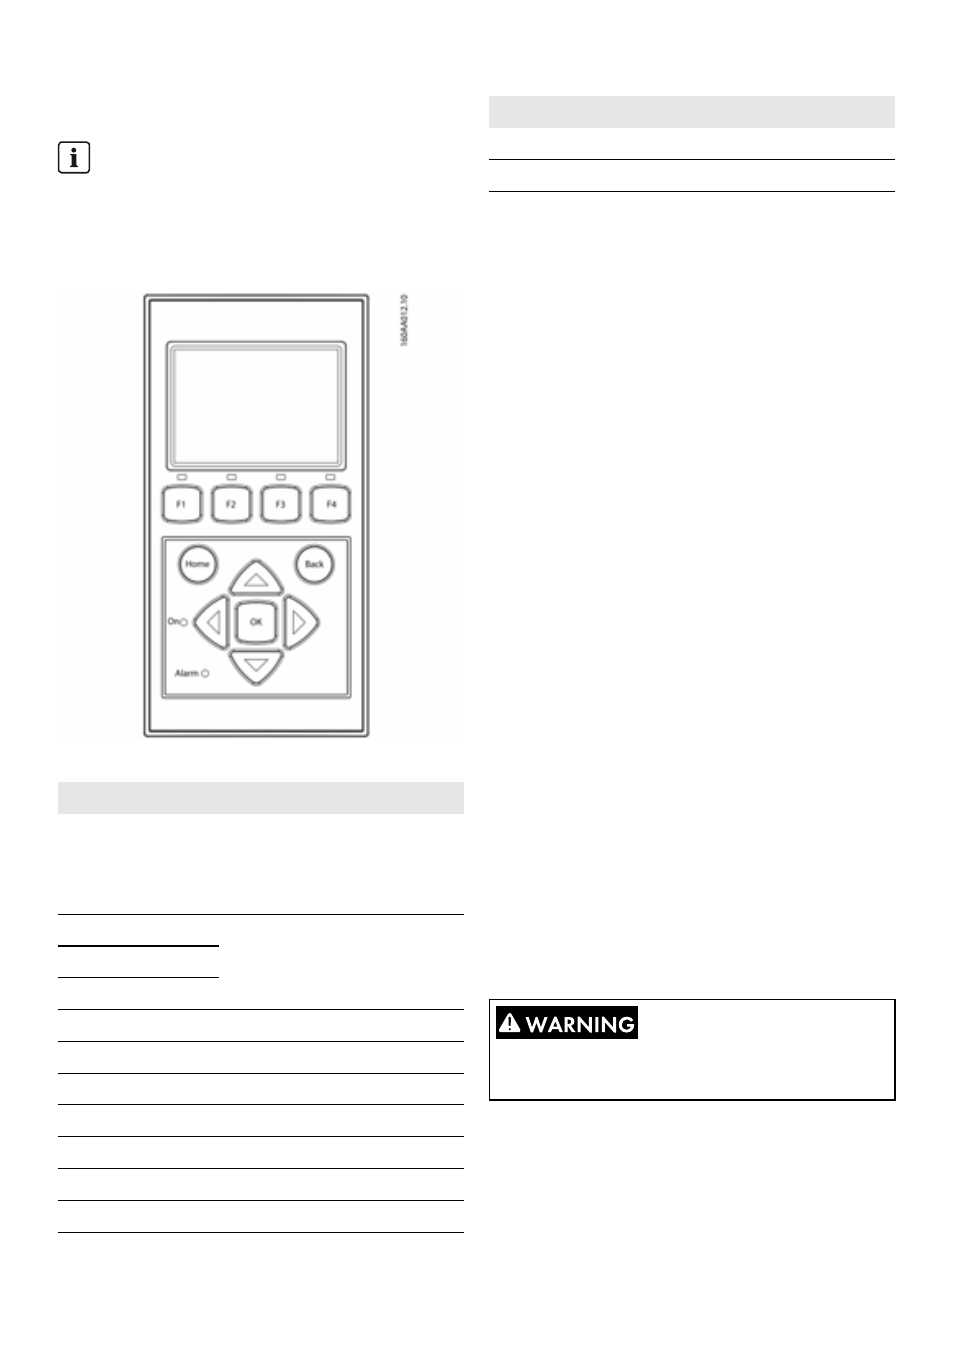
3.2 Display
The integrated display on the inverter front gives the user
access to information about the PV system and the inverter.
Figure 3.1 Overview of display buttons and functionality
Display buttons and functionality
Table 3.2: Display buttons and functionality
The screen structure is divided into three sections:
1. Main screen. Current and daily yield. This section
contains:
– Actual output power (kW)
– Yield of the current day (kWh)
– Total yield (kWh)
– Current date
– Current time
– Operating mode (#)
2. Inverter information. This section contains:
– Inverter device type
– Inverter name
– Serial number
– IP address
– MAC address of the SMA Inverter Manager
– Inverter software version
3. Actual values. This section contains:
– PV voltage and current
– Phase-to-phase voltages
– Phase currents
– Power frequency
3.2.1 Initial Setup via LCS tool
The LCS tool makes it possible to chose from a list of
predefined settings for different grids. All grid-specific limits
must be configured using the LCS tool.
After installation, check all cables and close the inverter.
Turn on AC power.
INFORMATION
It can take up to ten seconds until the display
activates, after start-up.
Button
Function
F1
Adjust the contrast level of
display. Use arrow up/down
button while pressing the F1
button.
F2
No function
F3
F4
Home
Return to main screen
OK
No function
Arrow up
A step up
Arrow down
A step down
Arrow right
Toggles screen right
Arrow left
Toggles screen left
Back
Return to main screen
On - green LED
Alarm - red LED
The correct selection of the grid code is essential to
comply with local and national standards.
Button
Function