3 mounting the inverter – SMA STP 60-US-10 Installation User Manual
Page 23
SMA Solar Technology AG
2 Installation
Installation Guide
STP60-10-IA-xx-10
23
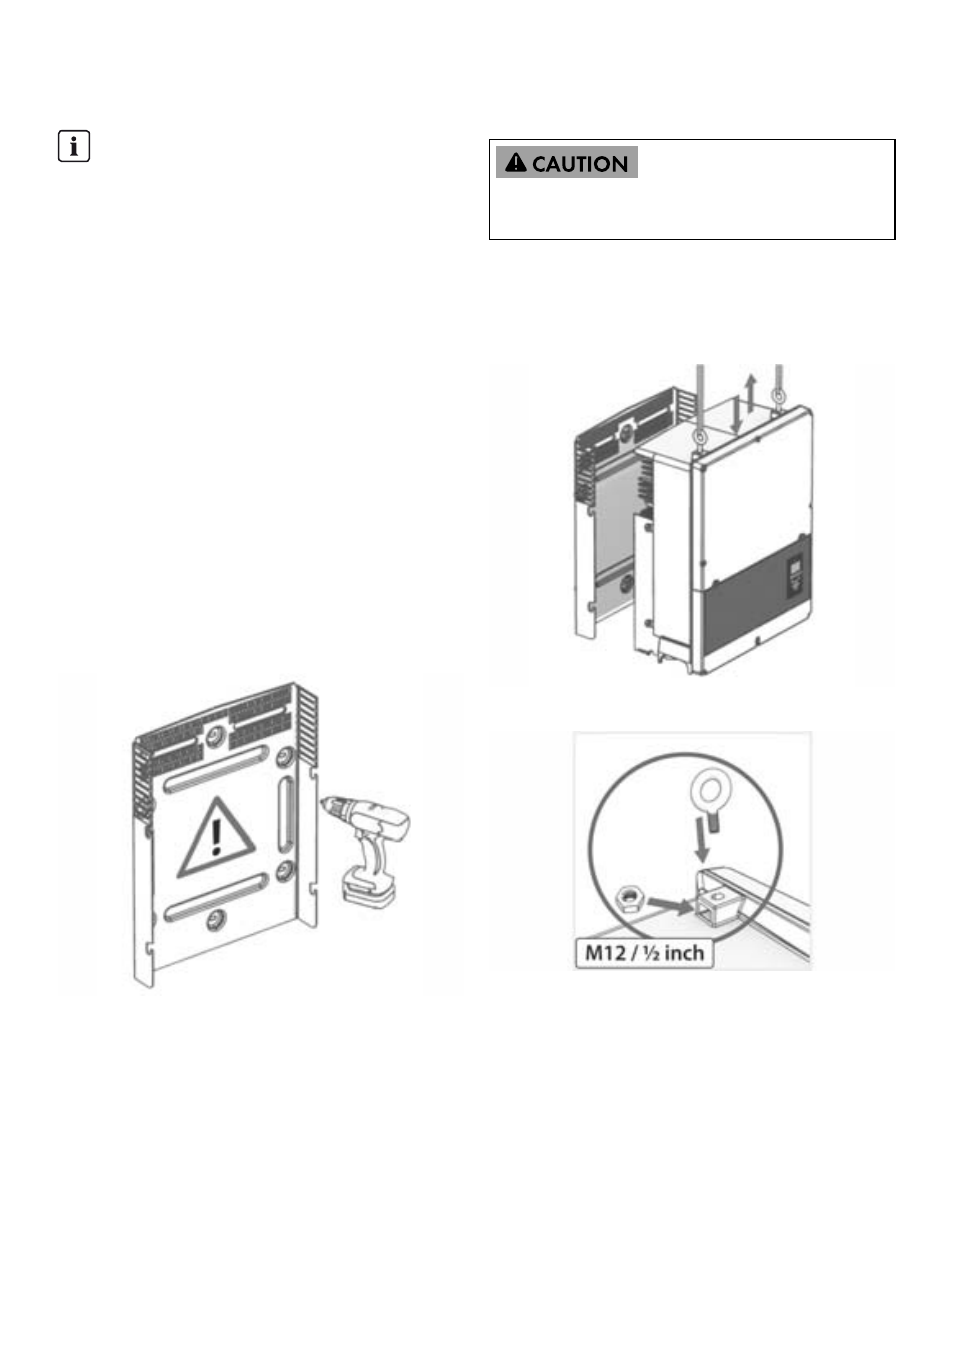
Figure 2.9 Wall mounting bracket
Mounting of the wall mounting bracket:
• Mount the wall mounting bracket in the defined
environment
• Use screws and wall plugs that can safely carry the
weight of the inverter.
• Ensure that the mounting plate is correctly aligned.
• Observe safe clearances when installing one more
inverters, to ensure adequate airflow. Clearances are
specified in figure 2.8 and on the mounting plate label.
• Mounting multiple inverters side by side in a single row
is recommended. Contact the supplier for guidelines
when mounting inverters in more than one row.
• Ensure adequate clearance at the front, for safe
installation and service access to the inverter.
Figure 2.10 Mounting of the wall mounting bracket
2.3 Mounting the Inverter
Procedure:
1. Lift the inverter. Locate the slots on the side of the wall
mounting bracket. Use M12 or ½ in lifting bolts and
matching nuts (not included in the scope of delivery).
Figure 2.11 Position the inverter
Figure 2.12 Lifting bolts
2. On the inverter, position the side screws against the
wall mounting bracket slots.
3. Push the inverter as shown so the side screws slide into
the two lower slots and the two upper slots. See figure
2.13 and figure 2.14
INFORMATION
Use of the wall mounting bracket delivered with the
inverter is mandatory. If the inverter is mounted
without the wall mounting bracket, the warranty
becomes void. It is highly recommended to use all six
mounting holes.
Refer to local health and safety regulations when
handling the inverter.