Connecting encoders and probes – HEIDENHAIN ND 1200R User Manual
Page 53
ND 1200R Radial
53
2.2 Har
d
w
a
re
Installation
Connecting encoders and probes
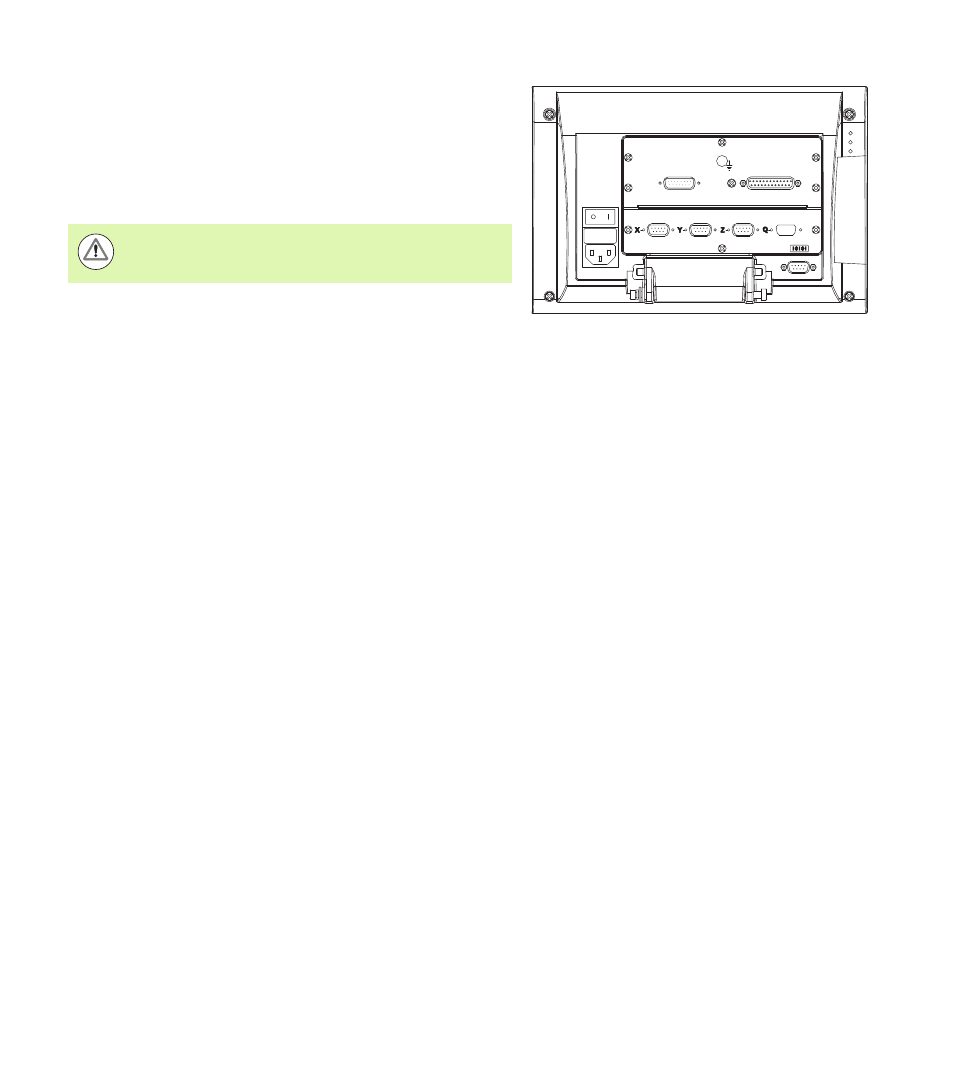
Axis encoders and probes are attached to interface connectors on the
rear of the ND 1200R. Many encoder interfaces are available to match
the wide variety of encoders that can be used with the ND 1200R. The
type and number of axis encoder connectors will vary depending on
the application. The ND 1200R shown in this photo includes
connectors for the X, Y and Z axes and a touch probe. Encoder inputs
are specified as analog or TTL at the time of purchase and cannot be
changed in the field.
The encoder connector locations are:
To connect the encoder cables and probe:
Verify that the ND 1200R is off.
Connect the axis encoders tightly to their connectors. An axis label
is provided near each connector. If the connectors include mounting
screws, do not overtighten them.
Encoder axis connectors
1
4
2
3
Do not locate encoder cables where they can be walked
on or will create a tripping hazard.
1
X-axis
2
Y-axis
3
Z-axis
4
Touch probe
- TNC 122 User Manual (63 pages)
- TNC 122 Technical Manual (70 pages)
- TNC 360 Service Manual (157 pages)
- TNC 416 Technical Manual (510 pages)
- TNC 335 Technical Manual (581 pages)
- TNC 360 User Manual (237 pages)
- TNC 360 ISO-Programmierung (2 pages)
- TNC 415 (280 540) User Manual (227 pages)
- TNC 370D (92 pages)
- TNC 416 (289 pages)
- TNC 415 (280 540) Technical Manual (752 pages)
- TNC 415 (259 96x) Service Manual (195 pages)
- TNC 407 (280 580) User Manual (376 pages)
- iTNC 530 (340 420) Pilot (104 pages)
- TNC 407 (280 580) ISO Programming (333 pages)
- TNC 415 (280 540) Service Manual (252 pages)
- PT 880 Installation (112 pages)
- ND 100 User Manual (116 pages)
- ND 287 User Manual (147 pages)
- ND 280 Quick Start (12 pages)
- ND 200 (156 pages)
- ND 282 (10 pages)
- ND 287 Quick Start (26 pages)
- ND 282 B (39 pages)
- ND 281 A (44 pages)
- ND 281 B v.1 (53 pages)
- ND 281 B v.2 (65 pages)
- ND 221 v.2 (10 pages)
- ND 231 B v.2 (56 pages)
- ND 231 B v.1 (44 pages)
- ND 221 B v.2 (45 pages)
- ND 550 v.2 (8 pages)
- NDP 560 (10 pages)
- ND 523 (93 pages)
- ND 570 (8 pages)
- ND 750 v.2 (46 pages)
- ND 760 v.3 (72 pages)
- ND 770 v.1 (40 pages)
- ND 770 v.3 (41 pages)
- ND 760 E (44 pages)
- IOB 49 (21 pages)
- NDP 960 (68 pages)
- ND 780 Installation (132 pages)
- ND 970 (47 pages)
- ND 1100 Quick Start (36 pages)