Unit description, Operation, Cb a – REMKO MHP-Manager Wireless Remote Control User Manual
Page 5
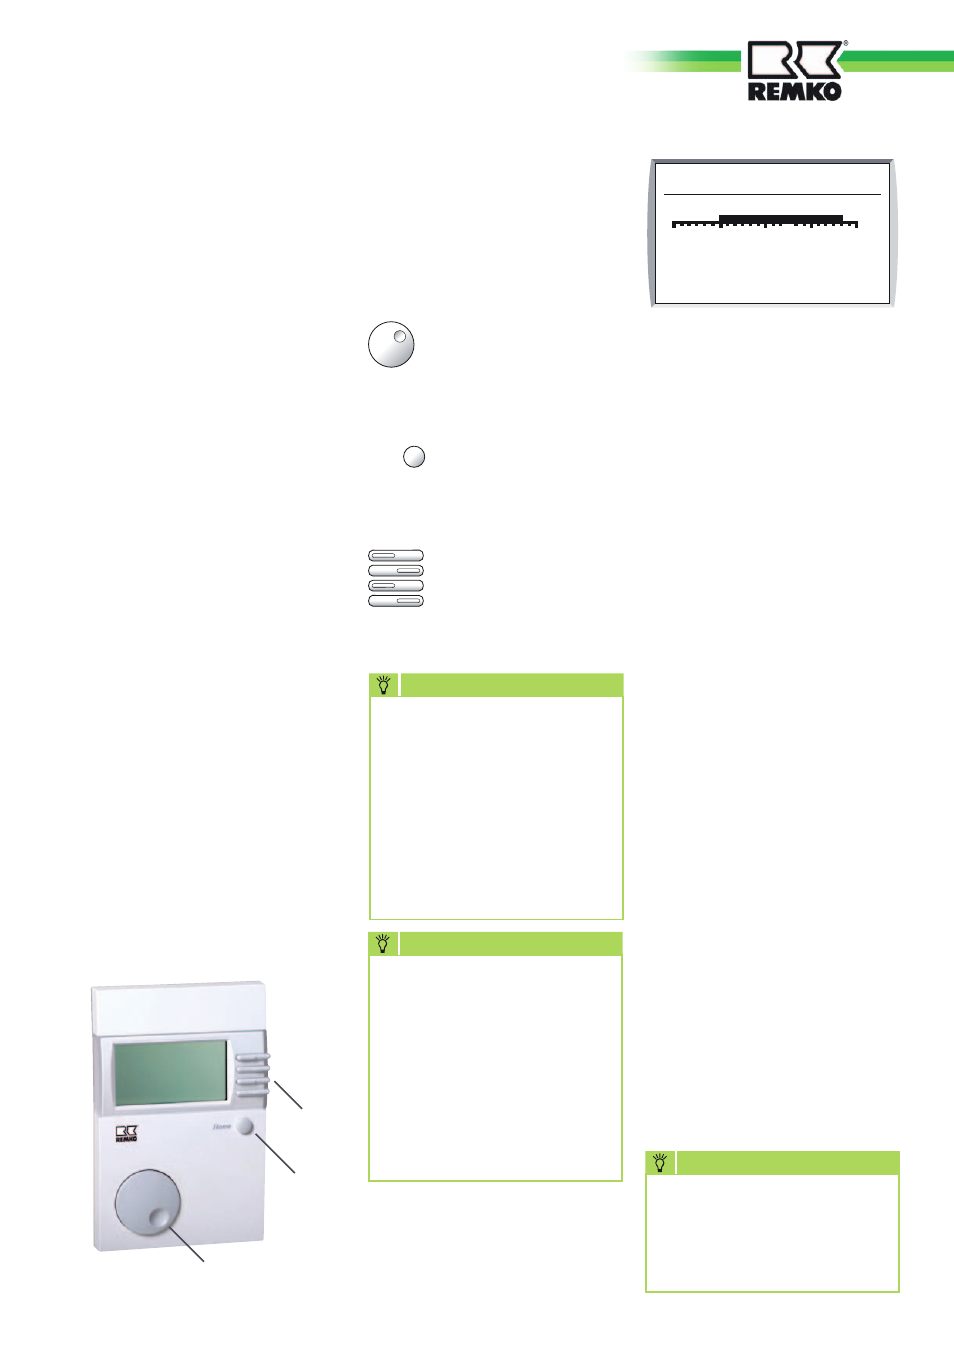
Controls during
normal operation
The wireless remote control is
controlled with the following keys.
The rotary knob (A)
can be used to toggle
between the displayed
menu points or to change
the settings.
Pressing the Home key
(B) always returns you to
the standard display.
Each of the four function
keys (C) stands for one
of the four rows on the
display. Pressing an F-key
serves to select a menu
item or setting.
Row 1:
This displays the day of the
week, the date and time.
By pressing the F-key you can
adjust the date, time and holidays.
Row 2
: Display the favourites.
You can select from the currently
displayed favourites with the
rotary knob (A).
By pressing the F-key you can
adjust the Favourites or the
additional indicator.
The following predefined options
are stored:
- Hot water programme
- Heating programme (HC number)
- Outdoor temp.
- HA temp.
- HW temp.
- Supply temp.
- Enable heating circuit
- HW demand
- Burner 1
Row 3:
Room temperature
indicator.
Pressing the F-key allows you
to adjust the selected room
temperature.
Row 4:
Displays the operating
mode and the current situation
(Heating, Reduction, Party, eco or
Holiday).
By pressing the F-key, you can
adjust the operating mode and
select the Party, Reduction, or
Holiday function (this applies to all
internal heating circuits).
Unit description
The wireless remote control allows
the Multitalent heat pump manager
to be regulated by weather
conditions or room temperature.
It makes it possible for the owner
to easily input and view system
parameters (e.g. time, current hot
water target temperature) and
heating circuit parameters (e.g.
heating times and desired room
temperature) from their living
space. This allows the heating
system to be regularly monitored
and optimised.
With the wireless remote control, it
is also possible to make a correction
to the weather-driven control
system by means of a room-
temperature-controlled cutout.
Operation
C
B
A
After inserting the batteries, the
Installation menu appears once
only. After adjusting the values
contained on the menu, the
controller is ready for operation.
If the menu appears later, e.g.
after a power cut, the function can
simply be exited.
Installation is initiated by
pressing “OK” (see the chapter
“Installation”).
Installation can be cancelled by
pressing “Cancel”.
The current heating
programme and hot water
programme for the room
controller are permanently
displayed on row [2] of
the Favourites menu.
The associated heating circuit
number of displayed in
brackets. You can program all
the other favourites yourself.
NOTE
Due to the tolerances
of the sensors, deviations of
+/- 2K (2°C) between different
temperature indicators are
normal. In the case of rapid
temperature changes, these
deviations will intermittently
be higher due to the differing
time response of different
sensors.
NOTE
Room temp.
1
Standby
Mon
08:30
30 Mar 09
20.5 °C
External
0
12
24
(1)
Home
Display / function keys
The standard display of the
wireless remote control of the
heat pump manager is comprised
of four rows.
Deviations in the respective
parameters can no
longer be displayed after
the wireless remote control is
commissioned.
NOTE
5