Counter/timer window, Digital i/o window, Charts and the spreadsheet's "reading" column – Measurement Computing TempBook rev.3.0 User Manual
Page 22
3-4 Using TempView (16-bit)
11-16-00
TempBook User’s Manual
actual scan frequency and number of scans, but the perceived scan frequency and number of scans (which is
set by TempView) does not change.
No. of Scans - The number of scans can range from 1 to 100,000. A scan includes all of the channels that
are marked as "On" in the analog input configuration spreadsheet.
Data Destination - This section contains the file name and type of file(s) that exist after an acquisition-to-
disk is complete. A file name can be typed in directly or the Browse Files button can be pressed to open a
file-selection dialog box. The selected file will be placed directly into the filename field. During an
acquisition, a raw binary file is created and updated as data is read. After the acquisition is complete, an
ASCII text file and PostView binary file can be created if the appropriate checkbox is enabled. Both of
these files can be read by PostView (described later in this chapter). If the raw binary checkbox is not
enabled, the raw binary file will be deleted after creating the PostView or ASCII file.
After the acquisition is started, these parameters can not be altered.
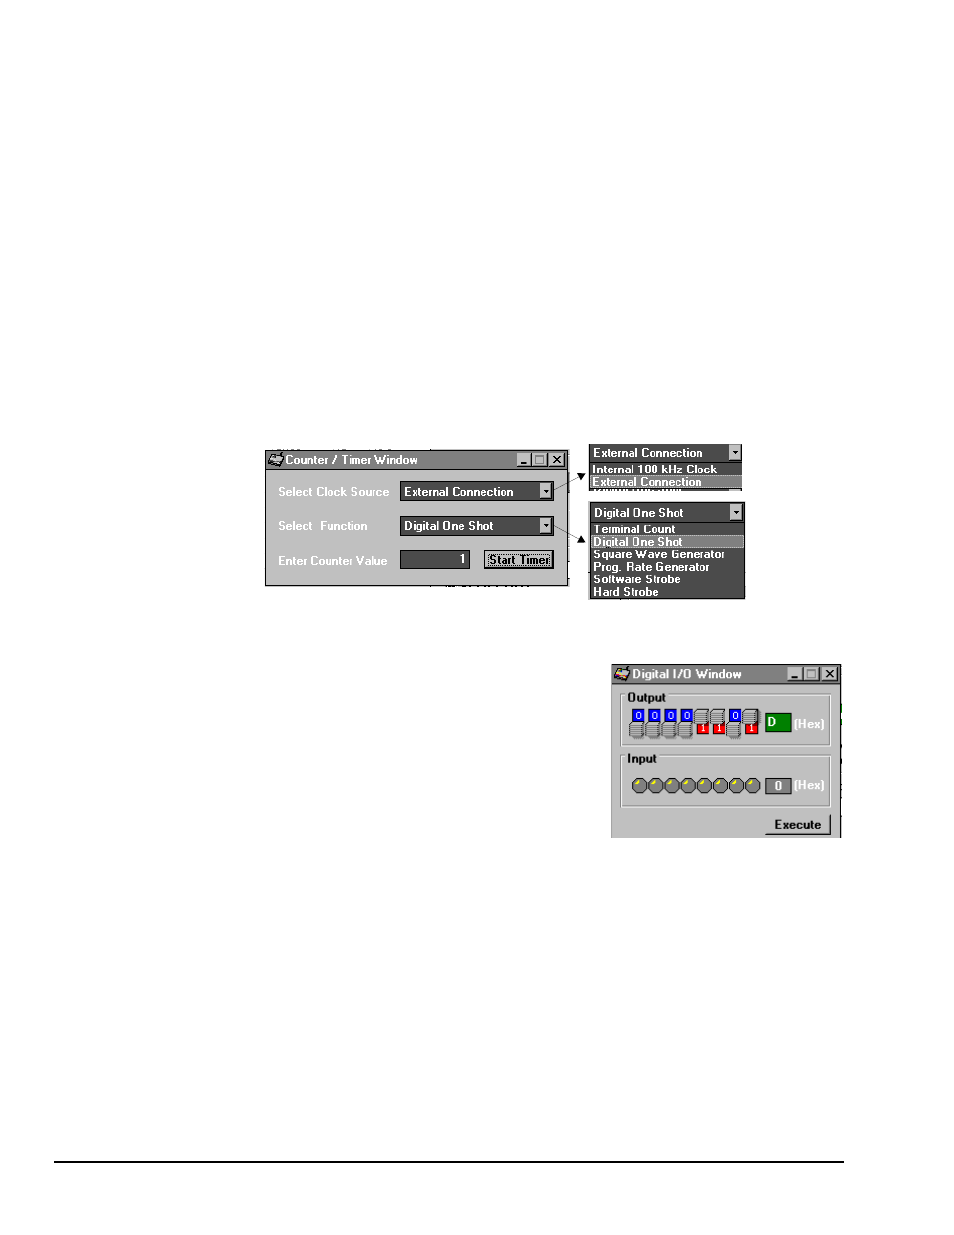
Counter/Timer Window
The counter/timer window is displayed when ctr/tmr is selected under the Windows pull-down menu. This
window allows configuration of the 8254's counter 0. Counter 0 is configured by selecting its function,
clock source and initial count. When the Start Timer button is clicked, the counter configuration will take
place.
Counter/Timer Window
Digital I/O Window
The digital I/O window is displayed when digital I/O is selected
under the windows menu. This window provides interactive control
of the 8 digital input lines and 8 digital output lines on the
TempBook termination card. Select output values by clicking on the
output witches which toggle between 0 and 1—or you can enter the
hex value and
new setting. When the Execute button is pressed, all output lines
will be updated and all input lines will be read.
Charts and the Spreadsheet's "Reading" Column
Up to 4 charts can be displayed by selecting charts under the Window menu. Before the charts can be
enabled, at least one chart must be assigned a channel through the channel’s drop-down list. When a
channel is selected, you can change the minimum and maximum values displayed in the chart (see figure).
This can be done whether or not the charts are currently enabled.
The charts and the spreadsheet Readings column are independently enabled. The charts can be enabled
under the Charts menu of the Charts window. The Readings column can be enabled under the Acquisition
menu of the main TempView window. These windows provide instant feedback of the analog input
readings.
Data is read and displayed in the charts and Readings column as fast as the computer will allow. When an
acquisition to disk has begun using the Go command under the Acquisition menu, the charts and the
spreadsheet Reading column take a lower priority, updating only when there is sufficient time in the
acquisition-to-disk task. Therefore, the data seen in the charts may not be an accurate reflection of the data