2 remounting – Flowserve MX Limitorque User Manual
Page 81

73
Limitorque MX Maintenance and Spare Parts FCD LMENIM2314-00 – 07/08
flowserve.com
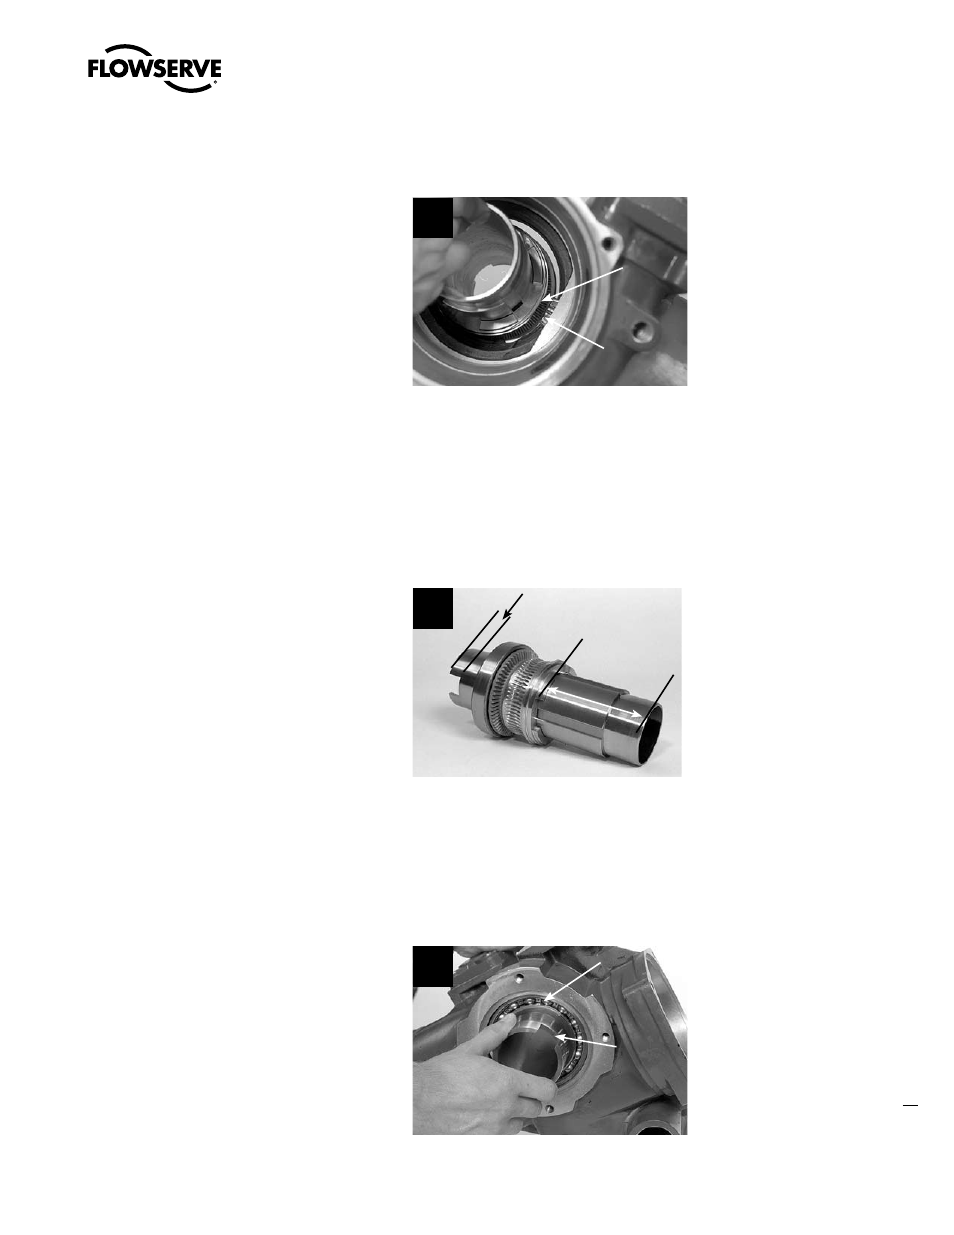
STEP 3 (VIEWED FROM TOP-MOUNTED HANDWHEEL SIDE OF ACTUATOR)
a
CAUTION: (MX-20 and -40 only) When
removing or remounting drive sleeve
assembly, take precaution not to bump
drive sleeve assembly against encoder
drive cartridge (subassembly #14).
TIP: Worm gear flat turned parallel with
encoder drive cartridge (subassembly #14) to
permit drive sleeve assembly removal.
3
Worm
Gear
Flat
Encoder
Drive
Cartridge
(14)
4.12.2 Remounting
STEP 4
NOTE: Before remounting drive sleeve assembly, ensure that bearing (#3-5) is in place in the
actuator housing. (Refer to motor subassembly #3 Step 1 for details.)
Lightly lubricate the top and bottom of the drive
sleeve assembly as shown.
Lubricate areas between
lines
4
STEP 5
a
CAUTION: (MX-20 and -40 only) When removing or remounting drive sleeve assembly,
take precaution not to bump drive sleeve assembly against encoder drive cartridge
(subassembly #14).
Push the drive sleeve assembly into the base
of the actuator housing until the lower bearing
(#2-4) is fully engaged in the housing up to
the shoulder. If the bearing is a tight fit, gently
tap the bottom of the drive sleeve (#2-1) with a
mallet to properly seat.
MX-85, -140, and -150: See Section 4.12.4
for optional remounting of drive sleeve and
baseplate.
5
2-1
2-4
