Tutorial #3: how to select font, Figure 78: font name box – Daktronics Venus 1500 Ver 3.x User Manual
Page 72
The Venus 1500 Message Studio
Tutorial
58
1.
Click
to open a new message.
2.
Click on the configuration for the display type and click OK or double-click on the
corresponding display type configuration.
3.
A text frame will open by default or click
to add a new text frame.
4.
Type the desired text in the frame.
5.
Highlight the text that requires a font change by clicking in front of the text, holding the
mouse button down, and dragging over the text that will be changed (the text will be
highlighted in white).
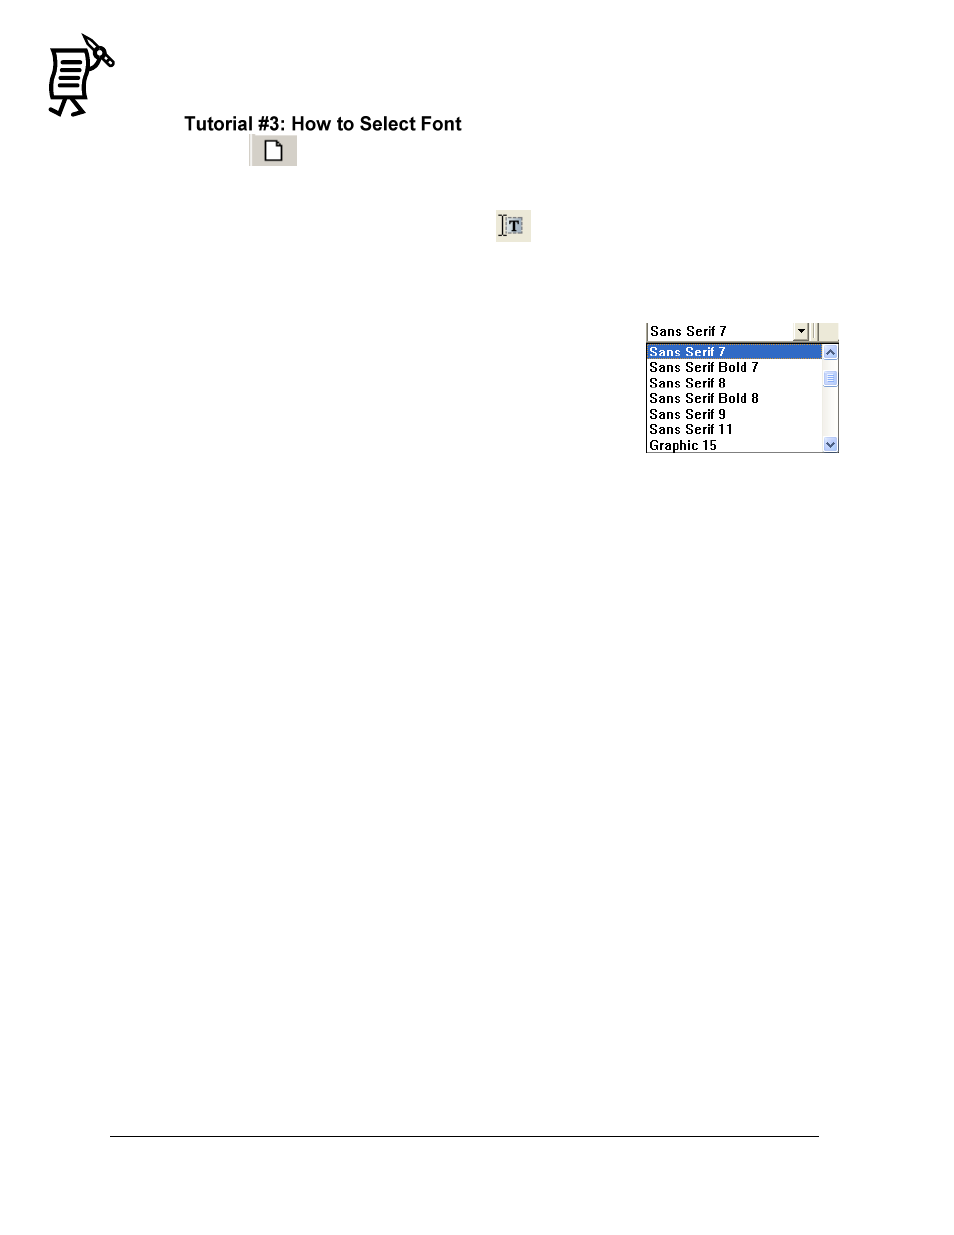
6.
Click on the down arrow in the font name box (Figure 78).
7.
Select the desired font. The text line will automatically adjust
for the font height (indicated by the number next to the font
type).
8.
The name of the newly selected font will now appear in the
font box.
Note 1: If the font is changed by highlighting one line at a time, this
will change the font of that line only.
Note 2: The font names correspond to their pixel height and line thickness. For example,
―Sans Serif 7‖ is seven pixels high, a typical character is 4 pixels wide, and the line thickness
is one pixel. ―Fixed Width‖ fonts are ideal for use with time and temperature fields.
―Graphic‖ indicates a graphic character font. Available fonts will vary with display type and
size.
CAUTION: Selecting large fonts for a line of text can “bump” following lines off the
display. Text on these “bumped” lines will automatically be removed from the frame.
Figure 78: Font Name Box