Temperature sensor replacement – Daktronics Galaxy AF-3500 Series 46 mm User Manual
Page 41
Part Replacement
37
Note: Align the new circuit board so that the lens lines up with the
1
/
2
"circular
opening in the bottom left edge of the display when the assembly is in place.
Temperature Sensor Replacement
Tools required:
1
/
4
" Nut driver, Phillips screwdriver
The temperature sensor is a small board inside a plastic housing; typically mounted outside,
either near the display or near the building.
To replace a temperature sensor:
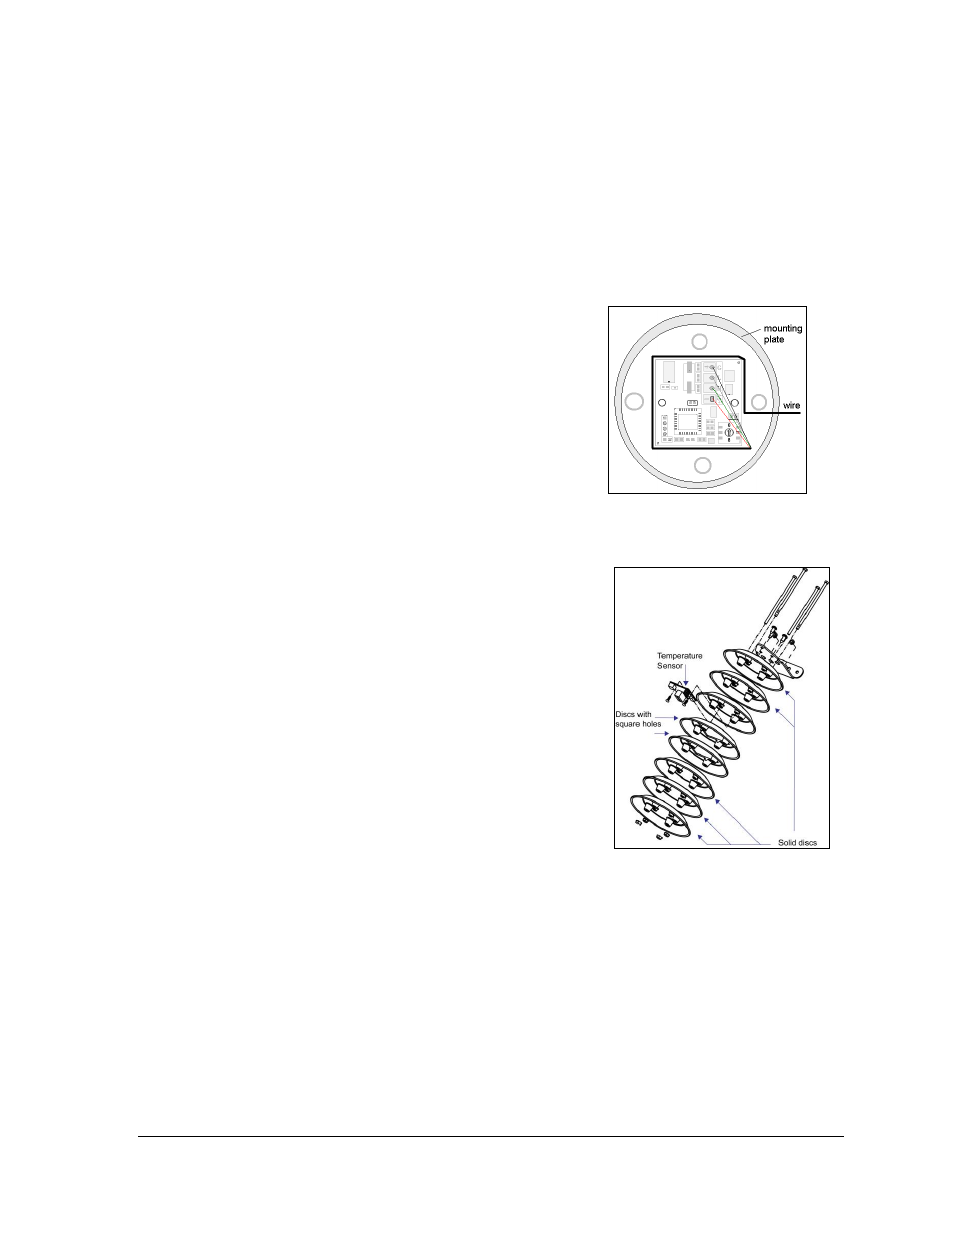
1. Remove the four #8-32 nuts from the bottom,
and then remove the lower five discs. Three of
the discs are solid, while the two in the center
have a square hole to fit around the sensor.
2. Label the wires connected to the temperature
sensor board, and then disconnect the cable from
the temperature sensor terminal block in the
sensor housing.
3. Remove the two screws holding the board to the
plastic disc.
4. Install the new board, and replace the two
screws.
5. Reconnect the cable to the temperature sensor
board, and ensure all the wires make a good
electrical connection.
6. Route cable around the sensor board as shown in
Figure 38, and then reassemble the sensor
enclosure.
Figure 38: Wire around Sensor
Board
Figure 39: Temperature Sensor
(Disassembled)