Fan replacement – Daktronics Galaxy AF-3500 Series 46 mm User Manual
Page 37
Part Replacement
33
7. Check that the weather stripping is in place. The weather stripping on the back edge
of the module must be in good condition and returned to its proper position in order
to prevent water from entering the display.
8. Latch the module tightly both top and bottom by turning the hex wrench a quarter
turn clockwise. The module latches must be fully engaged to create a watertight seal
around the edge of the module.
Fan Replacement
Tools required: None
1. Disconnect the fan from the wiring harness by pulling the harness’ female plug end
from the fan’s male prongs.
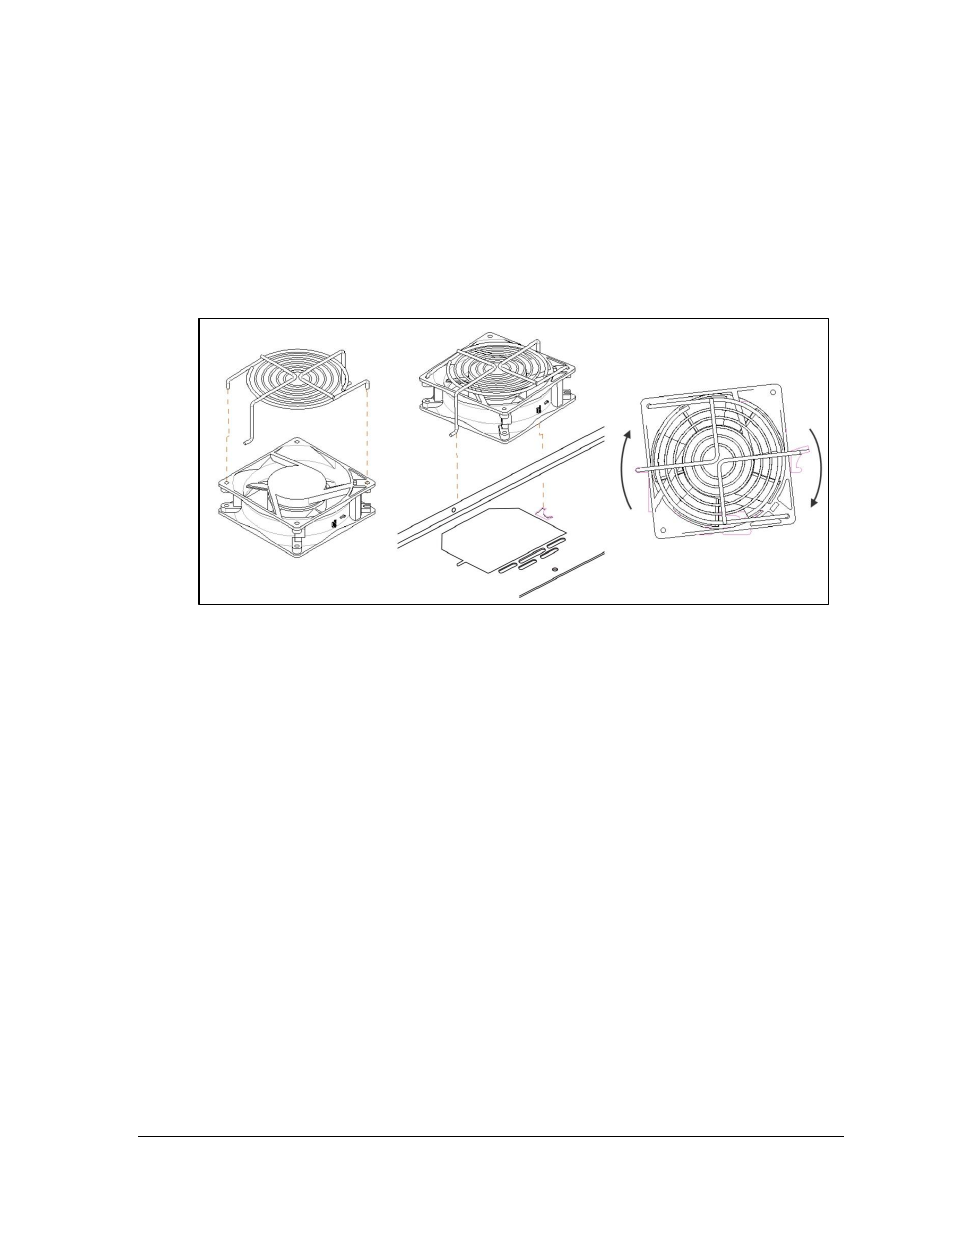
2. Press the wire extensions on the finger guard, and then rotate the fan assembly
counter-clockwise.
3. Remove the fan guard from the fan and set it aside.
4. Remove the fan from the display.
5. Insert the replacement fan into the display. Refer to Error! Reference source not
found.. When installing the replacement fan note the airflow directional arrows. The
vertical arrow should be pointing up, indicating airflow in to the display.
6. Place the fan guard on top of the fan and align the finger guard as shown.
7. Place the assembly back on the false bottom surface with the wire extensions into the
cutouts. Push the assembly down and rotate it clockwise.
8. Reconnect the fan to the wiring harness by pushing the harness’ female plug end
onto the fan’s exposed prongs.
Figure 32: Fan Assembly