Dmv-pro rear panel controls and connections, Power jack input, Midi in and midi out – ART Pro Audio DMV-Pro - Dual True-Stereo Effects Processor User Manual
Page 16: Midi in & midi out, Dmv-pro rear panel connections
- 12 -
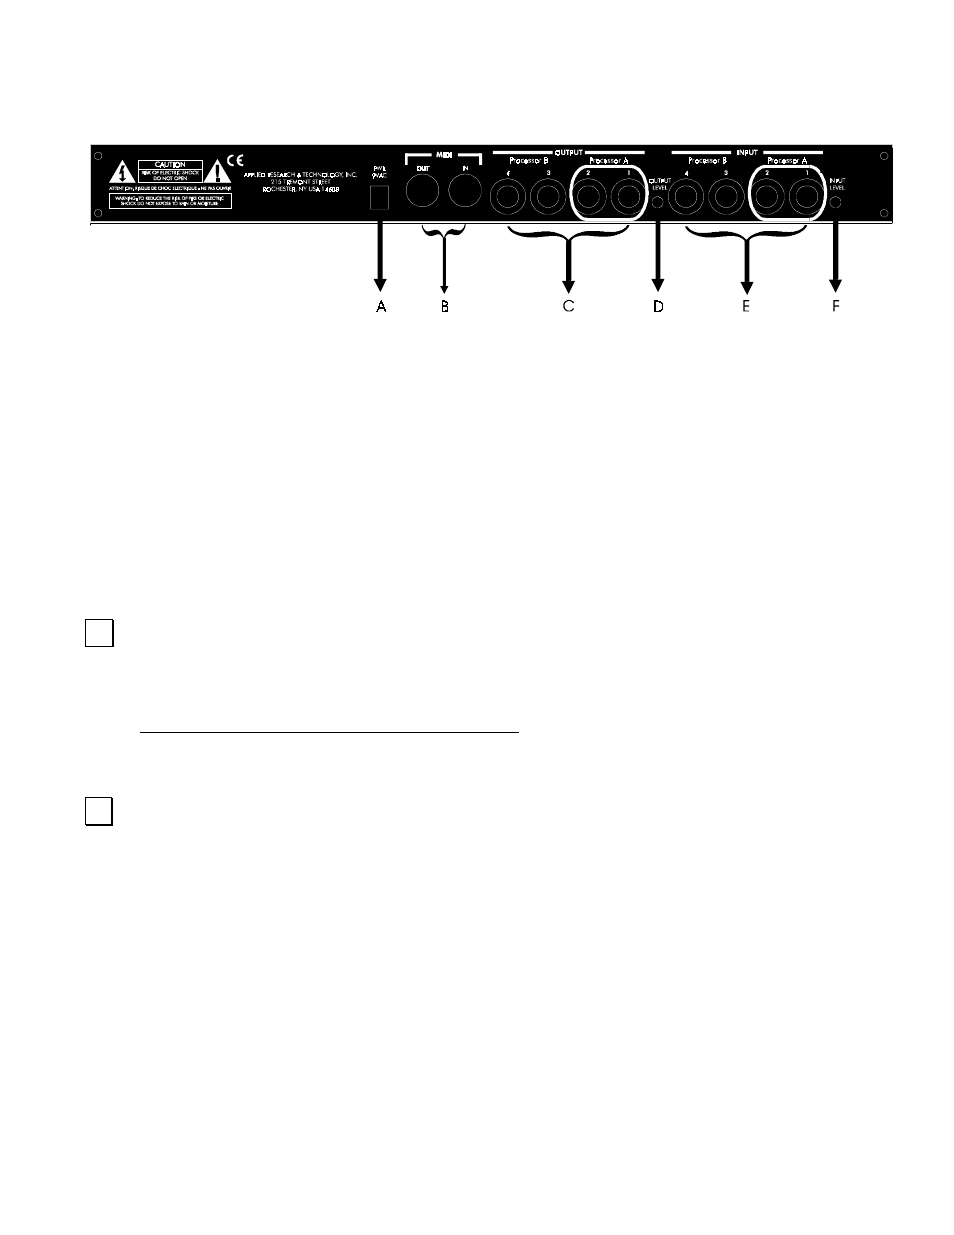
DMV-PRO REAR PANEL CONNECTIONS
Despite the DMV-PRO’s sophistication, it’s easy to interface the unit with other equipment. All inputs and outputs are
located on the rear panel. Standard ¼” inputs and outputs make patching simple.
Note: For best audio quality, always use high-quality cables.
The DMV-PRO is designed for line level or instrument operation. We don’t recommend plugging microphones directly
into the processor. Instead, either use a preamp, a mixer, or an amp’s preamp section to first boost the mic’s level,
then use the effects loop output or reverb send. High signal level from a preamp or effects loop assures an optimum
signal-to-noise ratio in the DMV-PRO, keeping hiss and distortion to a minimum.
$
POWER JACK INPUT
An external AC adapter powers the DMV-PRO. Plug the adapter into this jack and then into a power outlet.
Only use the adapter that came with the DMV-PRO. If the adapter ever becomes damaged, immediately
discontinue use.
%
MIDI IN & MIDI OUT
The MIDI In jack enables you to “talk” to the DMV-PRO from an external source such as A R T’s X-11 or X-15
Ultrafoot, an outboard sequencer, or a computer equipped with MIDI ports and associated software. Use this
jack for receiving program change, continuous controller, note, and system exclusive messages.
Use the MIDI Out jack for performing a MIDI data dump. It connects to any external device capable of
recording MIDI data and allows the DMV-PRO to off-load the contents of its memory. The MIDI Out jack does
not act as a MIDI Thru, so the DMV-PRO should be placed at the end of your MIDI chain.