Airplane model function descriptions – HITEC Optic 6 User Manual
Page 17
Airplane Model Function Descriptions
Airplane Model Function Descriptions
CAMB - Camber Control
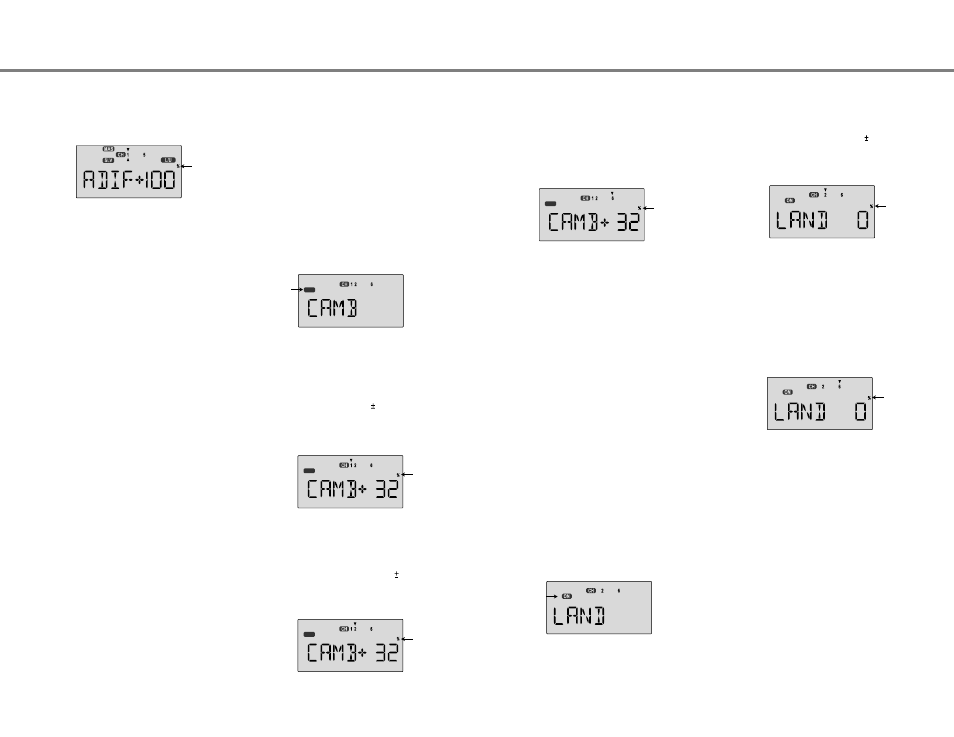
Setting Up Differential
1. Press one of the Up Down Edit buttons repeatedly to select
the ADIF window. To begin with, the function is already
activated, but it's set to 100% on both sides so there is no
differential.
Setting up Camber function
1. Use the Edit Up Down arrow keys to select the CAMB
window. Depending on the position of the FLT MODE
(SW-3) switch, the display will show a flashing OFF or ON.
The FLT MODE (SW-4) switch turns CAMB on when all the
way forward.
Setting up Landing function
1. Use the Edit Up Down arrow keys to select the LAND
window. Depending on the position of the landing switch,
the display will show a flashing OFF or ON. The Flt. Mode
(SW-4) switch turns on LAND when all the way AFT.
Note: At first, be very cautious using the CAMB function when you are
flying slowly, as there could be a loss of roll authority.
Check out how it works at high altitude first.
Your Optic system contains a special mixing function called
"Camber." You may use the Camber function to select a group
of preset positions for channels 1, 2, and 6 (1, 2, 5, and 6 if
ADIF is activated). This is used for models requiring these
presets for certain flying conditions. For example, many
sailplanes use drooped ailerons and flaps to maximize their
climb during launch. Scale models might drop ailerons and
flaps for slower, more realistic flight.
LAND - Landing Function
The LAND function simultaneously moves the flap and
elevator servos to defined positions to help make steep
descents or limit airspeed in dives. The controls move to the
defined positions by flipping the FLT MODE SW-4 switch fully
AFT. If your model has a single flap servo on CH6, the flap is
dropped. If flaperons are active, you'll want to raise both to
prevent tip-stalling with some up-elevator to compensate, but
you may want to experiment with small values of down
flaperons to slow the model down. Use the elevator offset to
maintain pitch trim when the landing function is turned on.
2. A small arrow is displayed under the numeral 1, showing
that CH1 is the affected channel. To set the differential for
the right aileron (CH1) down travel, hold the aileron stick to
the left side (display shows L/U), and press the Data
Decrease key (the right aileron moves down when left
aileron stick is commanded). Continue reducing the
percentage until you reach about 60% to 70%.
3. Make sure that the up travel for the first aileron (CH1) stays
at 100% by holding the aileron stick to the right side (display
shows R/D) and verifying that the display shows 100%.
4. Press the Cursor Right key once, to get to the left aileron
(CH5) setting menu. A small arrow is displayed under the
numeral 5, showing that CH5 is the affected channel.
5. Move the aileron stick to the right (display shows R/D), and
press the Data Decrease key reducing the percentage until
you reach about 60% to 70%.
6. Make sure that the up travel for the second aileron (CH5)
stays at 100% by holding the aileron stick to the left side
(display shows L/U) and verifying that the display shows
100%.
7. If for some reason you want a 0% setting, press the Active
/Inhibit (Clear) key. This is the maximum amount of
differential you can get, but will reduce the roll rate if
selected.
Note: At first, be very cautious using the LAND function when you are
flying slowly, as there could be a loss of roll authority.
Check out how it works at high altitude first.
Airplane Model Function Descriptions - Page 33
Airplane Model Function Descriptions - Page 32
3. Next, the amount of elevator offset is programmed. A small
arrow is displayed over the numeral 2 (representing elevator).
You may adjust the amount of travel with the Data +Increase
and -Decrease keys. You may use anywhere between
-100% and +100%, but a small value of 10% or less is the
recommended starting value. Be careful as this has a very
powerful effect on the model's trim. Press the Active/Inhibit
(Clear) key if you wish to reset to 0%.
4. To get to the flap travel setting, press the Cursor Right key.
The small triangle is now displayed above the numeral 6,
indicating the flap channel. You may input any desired flap
travel with the Data +Increase and -Decrease keys. The
default is 0%, and you may set this anywhere from -100 to
+100% (check that there is no binding with large flap
deflections and aileron commands). You may return to the
0% settings by hitting the Active/Inhibit (Clear) key.
2. First the amount of elevator offset is programmed. A small
arrow is displayed over the numeral 2 (representing elevator).
You may adjust the amount of travel with the Data +Increase
and -Decrease keys. You may use anywhere between
-100% and +100%, but a small value of
10% or less is the
recommended starting value. Be careful as this has a very
powerful effect on the model's trim. Press the Active/Inhibit
(Clear) key if you wish to reset to 0%.
3. To get to the flap travel setting, press the Cursor Right key.
The small triangle is now displayed above the numeral 6,
indicating the flap channel. You may input any desired flap
travel with the Data +Increase and -Decrease keys. The
default is 0%, and you may set this anywhere from -100 to
+100% (check that there is no binding with large flap
deflections and aileron commands). With flaperons, large
motions should also be avoided because of reduced aileron
effectiveness. You may return to the 0% settings by hitting
the Active/Inhibit (Clear) key.
OFF
OFF
OFF
OFF
2. First the amount of Right or first aileron offset is programmed.
Press the Cursor Right key to get a small arrow displayed
over the numeral 1 (representing first aileron). You may
adjust the amount of travel with the Data +Increase and
-Decrease keys. You may use anywhere between -100%
and +100%, but a small value of 10% or less is the
recommended starting value. Be careful as this may have
a significant effect on the model's trim. Press the Active/
Inhibit (Clear) key if you wish to reset to 0%.
Flashing
Flashing
Flashing
Flashing
Flashing
Flashing
Flashing
Flashing