Hanna Instruments HI 4521 User Manual
Page 39
39
• Press
to confirm your selection or press
to cancel operation.
Note: If an ISE calibration was performed and the Temperature Compensation option is changed, a warning
message appears on the LCD informing the user to perform a new calibration or to set the previous option
in order to perform accurate measurements.
Calibration
This option allows the user to set all the data regarding the Ion calibration process.
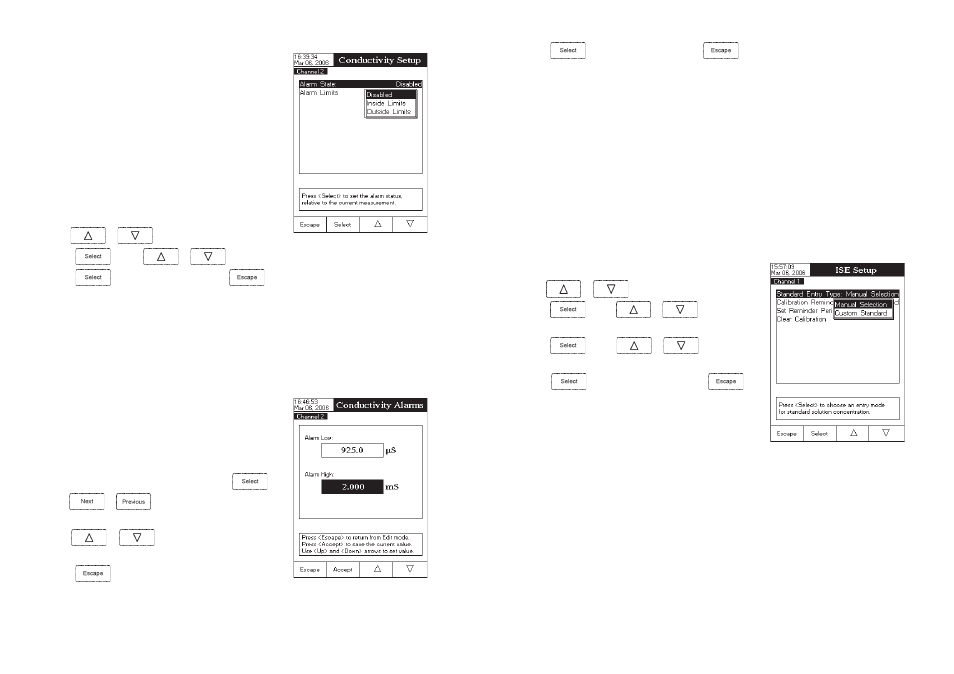
Standard Entry Type
Two entry modes for the standard solutions used for calibration are available:
Manual Selection
–
when the calibration is started, the desired standard solution can be manually selected from
a standard solutions list (0.1 ppm, 1 ppm, 10 ppm, 100 ppm and 1000 ppm).
Custom Standard
–
when the calibration is started, each standard solution can be manually set (in ppm units)
in a displayed pop-up menu.
To set the Standard Entry Type:
• Use
or
to select the Calibration option.
• Press
and use
or
to highlight the
Standard Entry Type option.
• Press
and use
or
to highlight the
desired option.
• Press
to confirm your selection or press
to
cancel operation.
Calibration Reminder – See pH Setup section.
Set Reminder Period – See pH Setup section.
Clear Calibration – See pH Setup section.
Electrode Type
This option allows the user to select the desired Ion Selective Electrode used for measurements from a list:
Ammonia, Bromide, Cadmium, Calcium, Carbon Dioxide, Chloride, Chlorine, Cupric, Cyanide, Fluoride, Iodide,
Lead, Nitrate, Potassium, Silver, Sodium, Sulfate, Sulfide and five custom ISE. For the standard ISE it is possible
to view the Ion constants (Name, Molar Weight and Electric Charge/Slope), while for the custom ISE all these
constants can be manually set.
78
Alarm Limits
This option allows the user to set the alarm limits for the measured
value.
Note: The alarm high value cannot be lower than the alarm low
value.
To set the alarm limits:
• Hightlight the
Alarm Limits option and then press
.
• Use
or
to select the low /high alarm limit and
then press (Edit) .
• Use
or
to increase / decrease the selected
alarm value.
• Press
to return to the Alarm options.
Alarm
This option allows the user to define two alarm limits.
Alarm State
The following options are available:
Disabled – the alarm will be disabled.
Inside Limits – the alarm will notify the user when the measured
value is inside the preset limits.
Outside Limits – the alarm will notify the user when the measured
value is outside the preset limits.
To set the alarm state:
• Use
or
to highlight the
Alarm State option.
• Press
and use
or
to highlight the desired option.
• Press
to confirm your selection or press
to cancel operation.