Hanna Instruments HI 4521 User Manual
Page 18
18
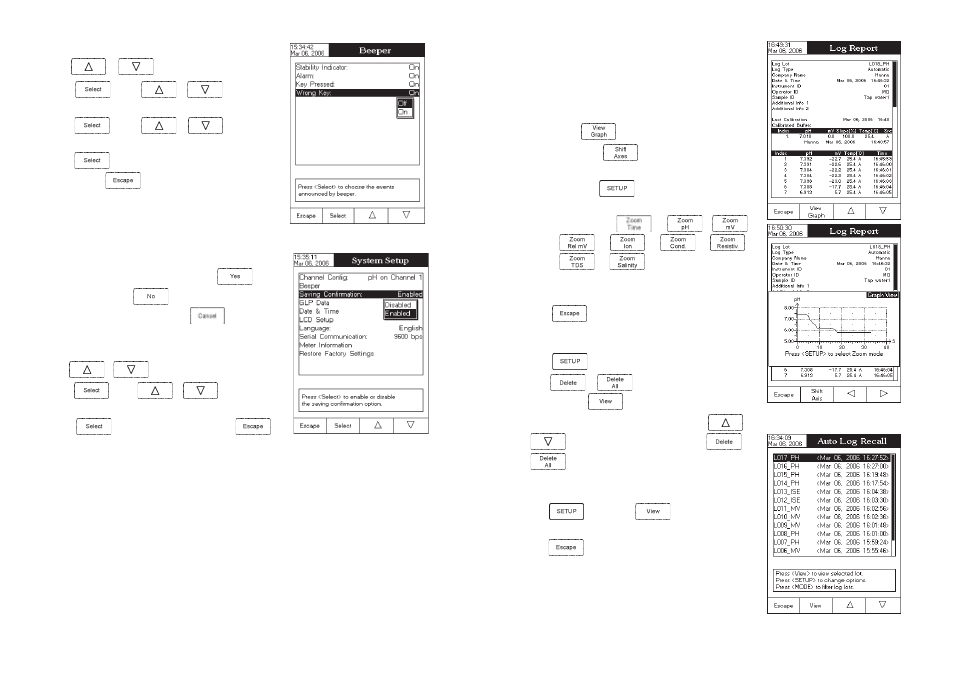
To set the Beeper:
• Use
or
to select the Beeper option.
• Press
and use
or
to highlight the
desired beeper associated parameter you want to modify.
• Press
and use
or
to highlight the
beeper status option.
• Press
to confirm your selection and return to the Beeper
menu or press
to return without changing.
Saving Confirmation
When enabling this option, a prompt will appear on the LCD alerting
the user to save the modified values by pressing
, exiting
without saving by pressing
or canceling the saving operation
and return to the editing mode by pressing
. If disabled, the
modified values will be saved automatically.
To enable / disable the saving confirmation:
• Use
or
to select the
Saving Confirmation option.
• Press
and use
or
to choose enabled
/ disabled.
• Press
to confirm your selection or press
to
cancel operation.
GLP Data
This option allows the user to set general information which will appear in the log reports. The options can have
a max of 10 characters.
Operator ID – this option allows you to edit the name of the operator.
Instrument ID – this option allows you to edit an identification name/number for the instrument.
Company Name – this option allows you to edit the company name.
Additional Info 1 & Additional Info 2 – for general purpose notations.
99
highlighted lot. The “Please wait...” message will be dis-
played on the LCD for a short period. The user customised
report will be displayed on the LCD.
Note: For automatic logging only, it is possible to view the
plotted graph.
• Press
to display the graph.
• By pressing
it is possible to move the graph
along the horizontal or vertical axis with the arrow keys.
• If pressing
while the graph is displayed, the
zoom menu for the horizontal and vertical axes will be
accessed. Press
, or
/
/
/
/
/
/
/
to switch between the active
zooming axes and then zoom in or out on the selected
axis by pressing the appropriate virtual key.
• Press
to return to the previous menu at any time.
To delete lots:
• Press
while in
Log Recall mode.
• Press
or
to access delete or delete all mode.
Otherwise, press
to return to
Log Recall view mode.
• After selecting one of the deleting modes, use
or
to select one lot and then press
or
to delete the selected lot or all lots. The “Please
wait...” message will be displayed on the LCD until the
selected lot or all lots are deleted.
• Press
and then press
to exit deleting mode and
return to
Log Recall view mode.
• Press
to exit
Log Recall mode and return to Measure mode.
Note: Logged lots should also be deleted whenever “Please Delete
Old Log Files” or “Low Data Logging Space” message appears
on the LCD, in the Reminder messages area.