Hanna Instruments HI 4521 User Manual
Page 32
32
after the logging session was started.
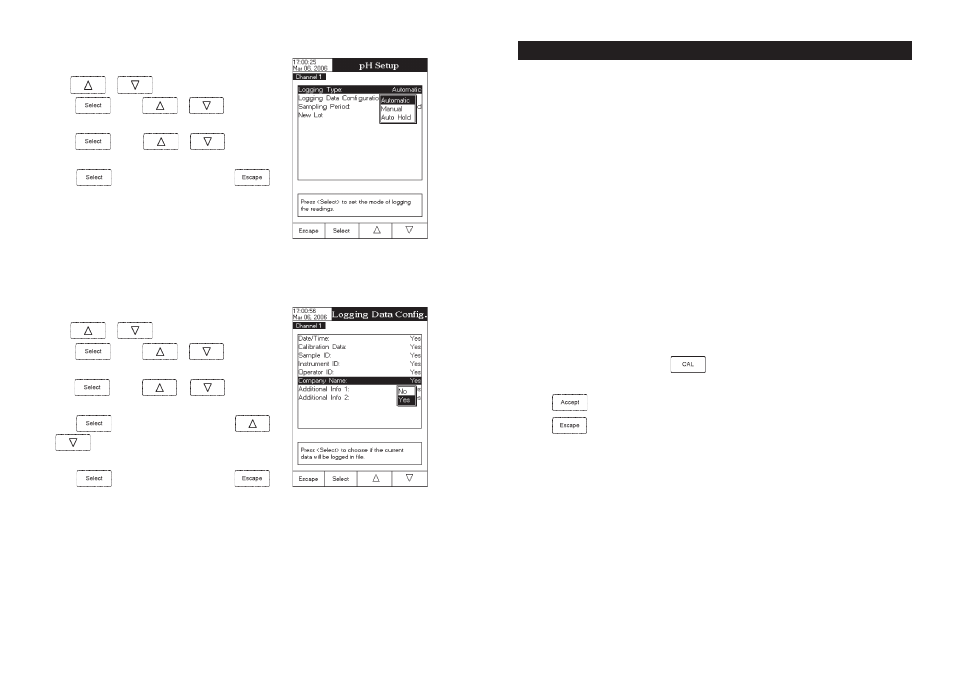
To set the Logging Type:
• Use
or
to select the
Log option.
• Press
and use
or
to highlight the
Logging Type option.
• Press
and use
or
to highlight the
desired option.
• Press
to confirm your selection or press
to
cancel operation.
Logging Data Configuration
This option allows the user to select the parameters that accompany a logged value:
Date / Time, Calibration Data,
Sample ID, Instrument ID, Operator ID, Company Name, Aditional Info 1 and Aditional Info 2.
To set the Logging Data Configuration:
• Use
or
to select the Log option.
• Press
and use
or
to highlight the
Logging Data Configuration option.
• Press
and use
or
to highlight the
desired parameter to be logged in file.
• Press
to confirm your selection and use
or
to enable the parameter by selecting Yes or to disable
it by selecting No.
• Press
to confirm your selection or press
to
cancel operation.
85
C O N D U C T I V I T Y C A L I B R A T I O N
C O N D U C T I V I T Y C A L I B R A T I O N
C O N D U C T I V I T Y C A L I B R A T I O N
C O N D U C T I V I T Y C A L I B R A T I O N
C O N D U C T I V I T Y C A L I B R A T I O N
It is recommended to calibrate the instrument frequently, especially if high accuracy is required.
The conductivity range should be recalibrated:
• Whenever the conductivity probe is replaced.
• At least once a week.
• Before USP measurements.
• After testing aggressive chemicals.
• When calibration reminder is activated (“Conductivity Cal Expired”).
• If the readings are far from the calibration point.
Note: TDS and Resistivity readings are automatically derived from the conductivity readings and no specific
calibration is needed.
OFFSET CALIBRATION
The meter allows the user to calibrate the probe for the offset.
• Set the meter for conductivity range;
• Select the automatic standard recognition (see
Conductivity Setup -> Calibration);
• Leave the dry probe in the air;
• Enter in calibration mode by pressing
;
• Wait to stabilize. The 0.000
µ
S calibration point will appear on the screen;
• Press
to finish the probe offset calibration.
• Press
to exit calibration mode or continue calibration in the other standard solutions.
Note: The offset calibration can be performed only if it is perfomed first (no other calibration points present).
Clear the old calibration if it is present.
CELL CONSTANT CALIBRATION (in solution)
Single Point Calibration
• Select the single point calibration (see
Conductivity Setup -> Calibration);
•
Pour a small quantity of the standard solution into a clean beaker. If possible, use plastic beakers to
minimize any EMC interferences.
•
For accurate calibration and to minimize cross-contamination, use two beakers for each standard solution.
One for rinsing the probe and one for calibration.