Dillon Precision SL 900 User Manual
Page 31
when it was built and adjusted at the factory. If you
have selected a wad that uses a lighter or heavier load
of shot, you’ll need to readjust the position of the shot
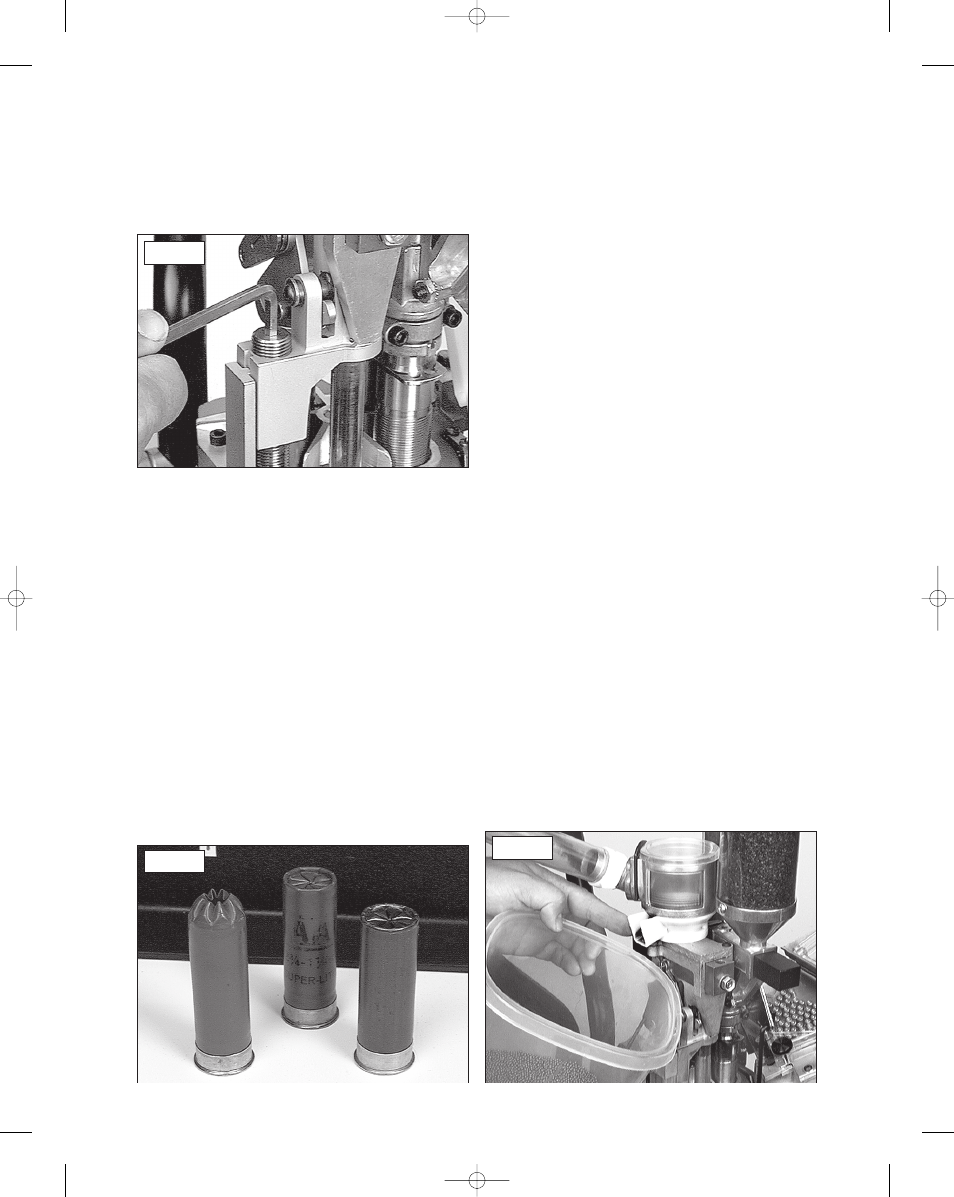
dispenser. Using a 5/32” Allen wrench, loosen the
two screws on the collar guide/clamp (#16737). Fig.
62 A 3/16” Allen wrench is used to rotate the body
collar adjustment screw (#10641).
When reloading with light shot load plastic wads
it may be necessary to adjust the shot dispenser
position. Rotate the body collar adjustment screw
(#10641) clockwise to raise the shot dispenser.
Tighten all the collar screws, then test the changes.
Fig. 63
When reloading with heavy shot load plastic wads
it may be necessary to adjust the shot dispenser
position. Rotate the body collar adjustment screw
(#10641) counterclockwise to lower the shot
dispenser. Tighten all the screws, then test the
changes.
5. Adjusting the starter crimp Die – This die has been
adjusted at the factory using Winchester AA hulls. If
you have another brand of hull you’d like to reload, it
may be necessary to readjust this die. Test run a hull
through the machine to decide if any changes are
needed.
What we like to see is a 60% closure of the top,
formed and folded. This is important so that station
five’s final crimp/seat can produce a uniform folded
crimp.
Fig. 64
We found that when we reloaded Remington hulls
and wads, we would need to adjust the starter crimp
die (#10640) down. The heavier walled Remington
hulls appear to be somewhat more resistant to being
formed and folded. Turn the starter crimp die
(#10640) down approximately one-half turn
clockwise as needed.
Reloading with Federal hulls and wads requires a
little readjusting as well. Raise the starter crimp die
(#10640) approximately one-half turn counter-
clockwise. This will help produce a uniform folded
crimp/seat.
Winchester hulls and Versatile wads loaded fine
and required little or no adjustment at all. Remington
hulls and Versatile wads also loaded fine. Remington
hulls and Figure 8 wads require adjustment. The stiffer
style Figure 8 wad needs to be compressed; do so by
lowering the wad seated depth 1 to 2 full turns (as
detailed under step 4 of Changes and Adjustments).
Also, reducing the shot charge weight may be
necessary when using this wad. Follow the above
changes with a readjustment of the starter crimp die
(#10640), turn the die down approximately one-half
turn clockwise as needed (as detailed under step 5 of
Changes and Adjustments).
6. Adjusting the final crimp Die – Two adjustments
are available here on the final crimp die. Example, if
some of the reloads you have just finished appear
shallow as shown, then turn the seat plug clockwise
(down), using 1/4 turn increments.
Or, you can turn the whole die clockwise (down)
using 1/4 turn increments. You will then see the next
reload with more taper on its end and the seated
depth will be deeper.
Another example relating to the final crimp die
adjustment when reloading different shotshells:
“When I have made some reloads, some of the
shotshells have buckled in the middle, but it doesn’t
happen all the time.” You will need to raise the whole
die by turning the assembly counterclockwise (up) at
least 1/4 to 1/2 a turn.
Removing the Shot from the Machine:
Fig. 63
Fig. 64
Fig. 65
31
SL 900, May 2007 5/21/07 11:51 AM Page 31