Dillon Precision SL 900 User Manual
Page 18
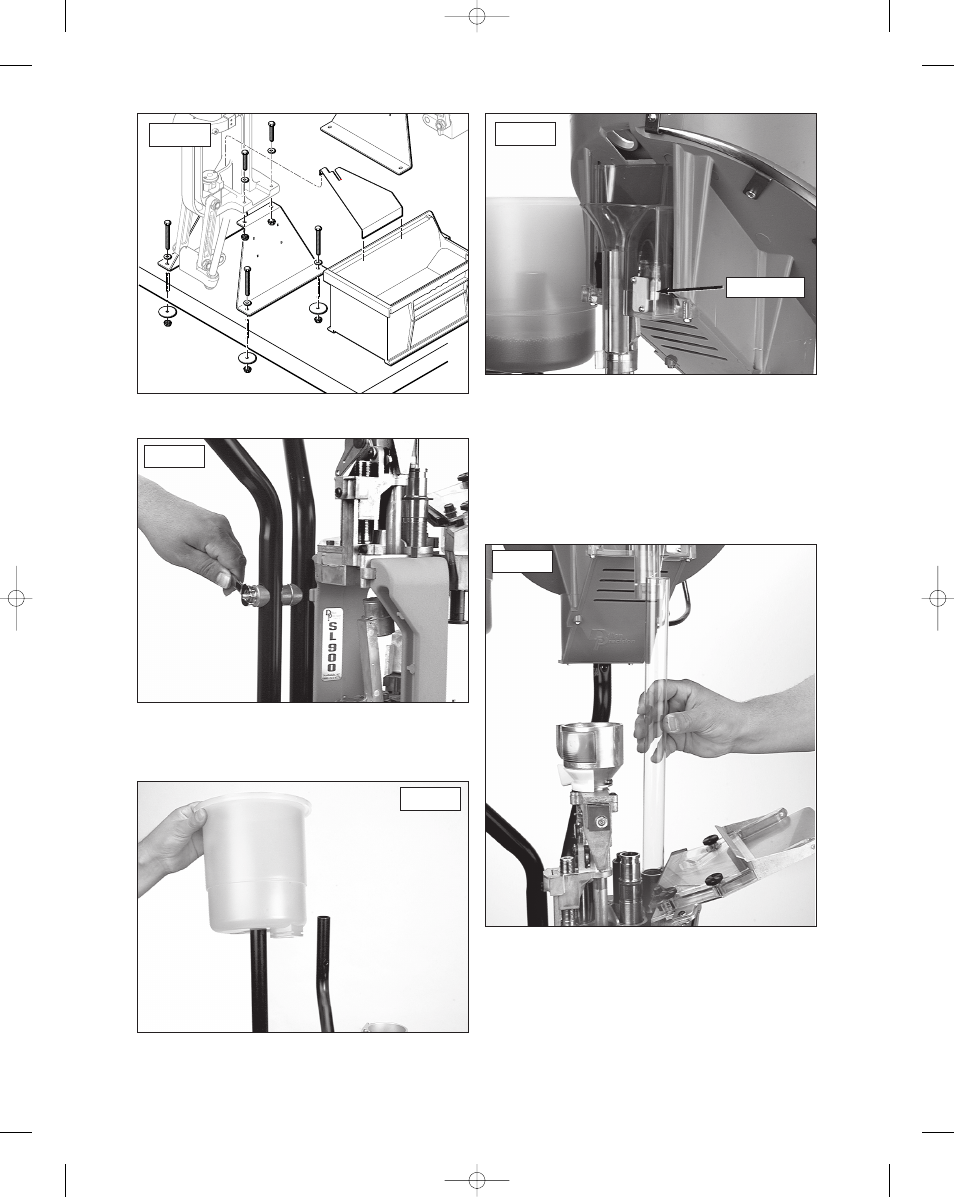
2. Lift the machine up and fasten the machine
securely to the forward edge of the bench. Fig. 3
3. Install the casefeed post (#17123) and the shot
post (#17124) to the frame of the machine using the
two long 4 1/2" bolts, 6 clamps (#13613), 2 - 1/4"
washers and 1/4-20 nuts.
Fig. 4
4. Locate the shot container and place it on its
post. Fig. 5
5. Open the casefeeder box. Place the feeder on
your bench and plug it into a 110v AC outlet (220v for
European casefeeders). Place a handful of empty hulls
into the casefeeder (approximately 10). Turn the unit
on and familiarize yourself with its operation. Notice
how every time an empty hull exits the casefeeder, it
passes a microswitch. Later in the loading process, you
will see that every time the hull is next to the
microswitch the motor will shut off. Fig. 6
6. Place the casefeeder on its post. Find the clear
feed tube and place the bottom of the tube into the 12
Ga. casefeed sleeve (#17130). Align the casefeeder on
the post with the clear feed tube and snap the feed
tube into its receiver. Snug the 1/4-20 screw on the
rear of the casefeeder to secure the position of the
casefeeder. Please do not fill the clear feed tube with
empty hulls. This step will be completed later. Fig. 7
18
Fig. 3
Fig. 5
Fig. 7
Fig. 4
Fig. 6
Microswitch
SL 900, May 2007 5/21/07 11:51 AM Page 18