Dillon Precision SL 900 User Manual
Page 30
are needed when adjusting the 12 Ga. collet sizer die
(#16743). A 3/16” Allen wrench and a dial caliper.
Loosen the die lock bolt (#17351) located in the
bottom of the toolhead (#16667). Fig. 57
Using a fired hull, measure the diameter of the
brass base. Place the hull into the machine’s
shellplate at station one and resize the hull. Remove
the hull from the machine and again measure the
diameter. The brass base should be .804 diameter. Fig.
58 See page 17 for shotshell dimensions.
To make the brass base smaller, turn the die
clockwise using one-quarter turn increments. Using
another fired hull to test the new setting, resize the
hull in the machine. Again, measure the diameter of
the brass base. When you’re finished, tighten the die
lock bolt (#17351)
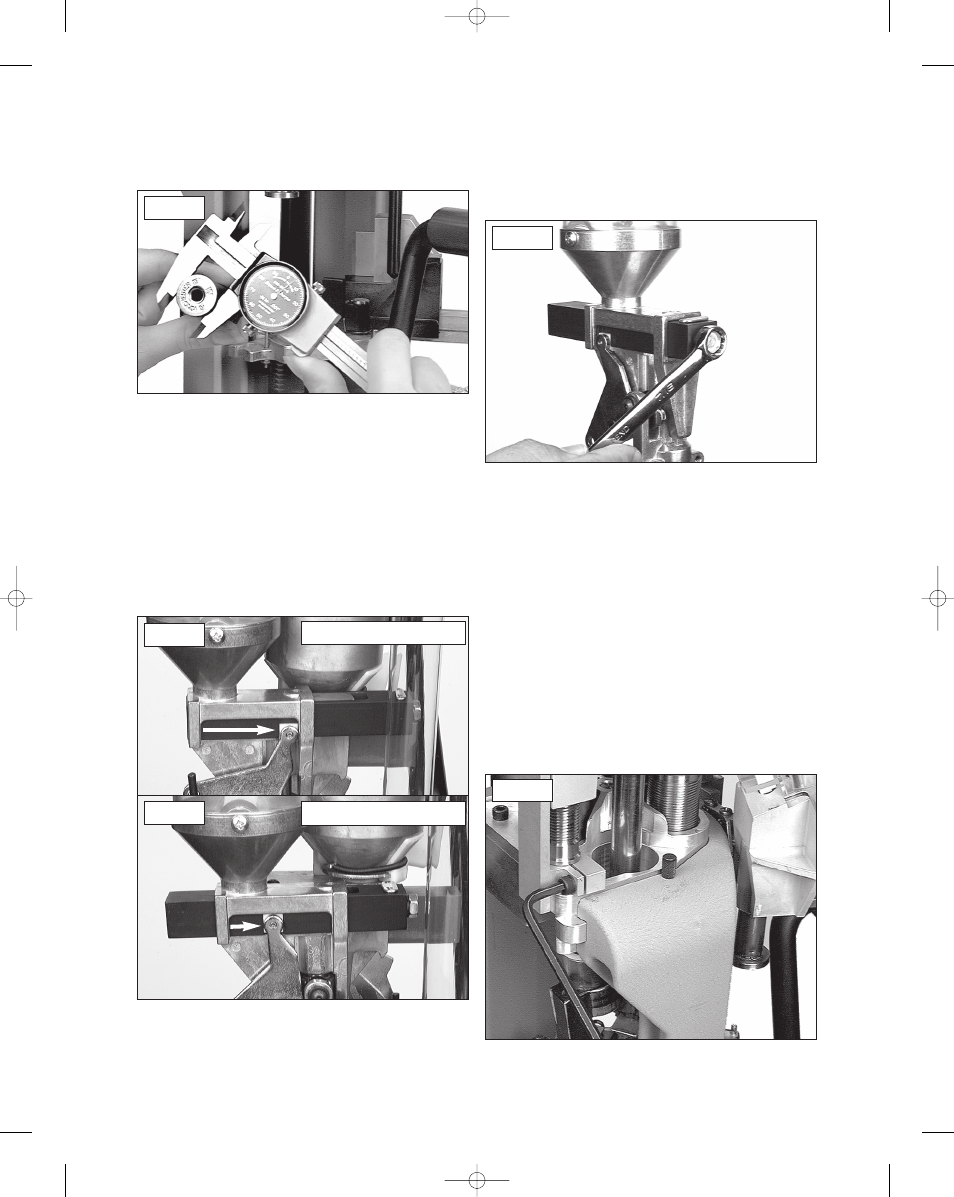
2. Powder Die/Funnel Adjustments – When a powder
charge is dropped into a hull, it is very important that
the bell crank also makes a complete stroke
simultaneously. Fig 59 Turning the powder die
(#16744) clockwise lowers the powder system and
increases the stroke of the bellcrank. Be careful not to
go down too far or you may crush a hull. Turning the
powder die (#16744) counterclockwise will raise the
powder system, reducing the amount of stroke the
bellcrank has. Fig. 60
3. Adjusting the Automatic Powder System Powder
Charge Weight – Place a hull at station two and cycle
the handle. Weigh the powder charge from the hull
and write that weight down. Using a 7/16” wrench,
rotate the bolt located on the end of the powder bar.
Fig. 61 Counterclockwise will reduce the powder
charge weight, adjust as needed. Helpful hint: operate
the powder bar a minimum of four times so you are
assured of a uniform powder charge, then weigh the
fifth charge.
4. Adjusting the Wad and Shot Station – Shot charge
weight adjustments: Weigh the shot charge from a
hull and write that weight down. Refer to your
loading manual to decide whether you need to
increase or decrease the shot charge weight. Using a
7/16” wrench, rotate the bolt on the shot bar (#16738)
clockwise to increase the weight or counterclockwise
to reduce the weight. Adjust as needed.
Adjusting the Plastic Wad Depth – A sample
plastic wad was included with your SL 900 machine
Fig. 61
Fig. 58
Fig. 59
Complete Stroke
Fig. 60
Incomplete Stroke
Fig. 62
30
SL 900, May 2007 5/21/07 11:51 AM Page 30