Using auxiliary wood facing, Constructing a featherboard – Delta N028314 User Manual
Page 26
26
Fig. 65
Fig. 64
E
d
USINg AUXILIARY WOOd FACINg
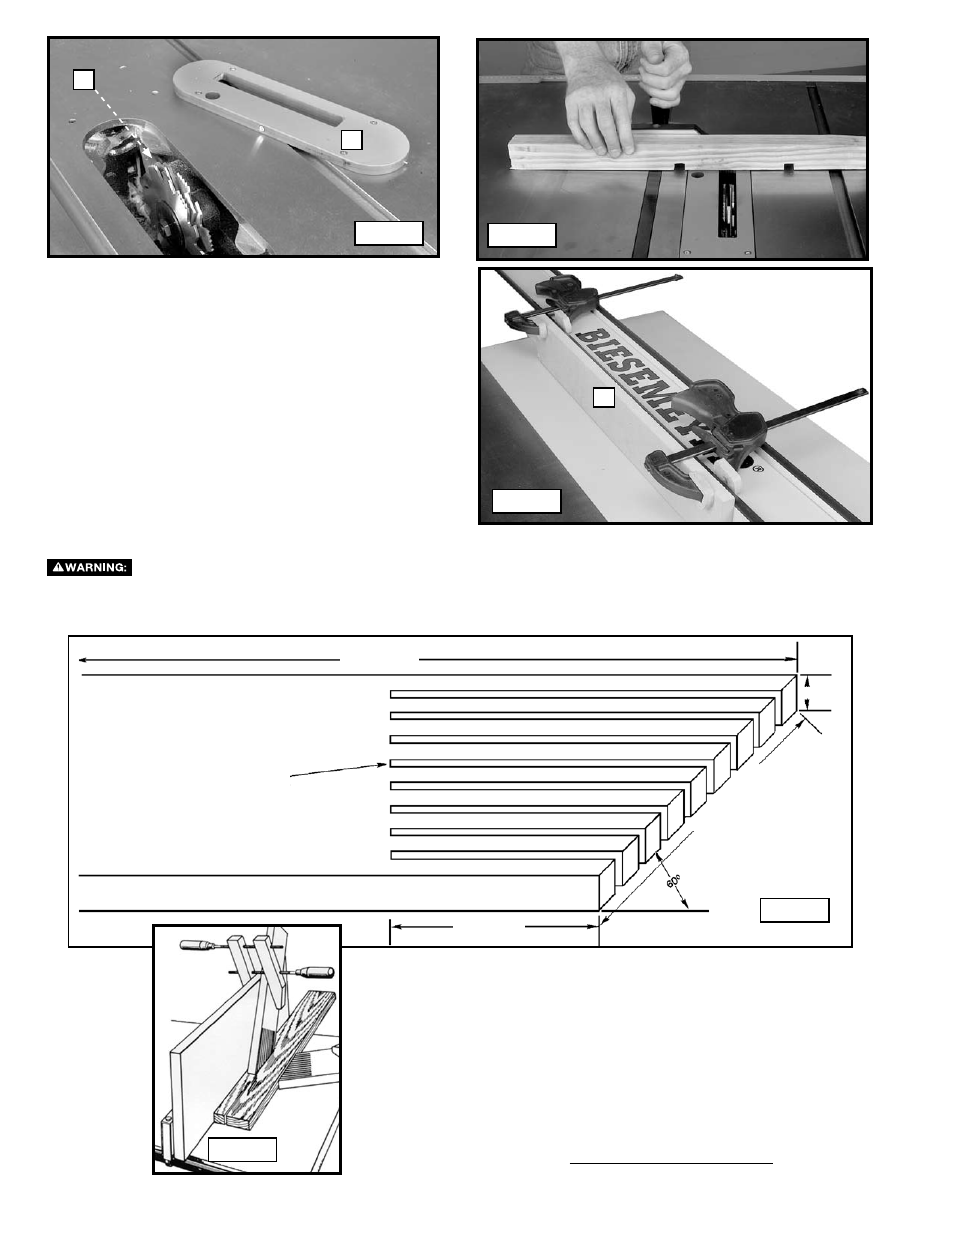
Add a wood facing (A) Fig. 66 to one or both sides of the
rip fence when you perform special operations (moulding
cutterhead, etc.). Depending on the fence, attach the wood
facing or the fence either with wood screws through holes
drilled in the fence, or with two clamps. For most work, 3/4"
(19 mm) stock is suitable, although an occasional job may
require 1" (25.4 mm) facing.
Featherboards are used to keep the work in contact with
the fence and table (Fig. 68), and help prevent kickbacks.
Dimensions for making a typical featherboard are shown in
Fig. 67. Make your featherboard from a straight piece of wood
that is free of knots and cracks. Clamp the featherboard to the
fence and table so that the leading edge of the featherboard will
support the workpiece until the cut is complete. An 8" (203 mm)
high flat board can be clamped to the rip fence and the featherboard can be clamped to the 8" (203 mm) high board.
Use featherboards for all non-through-cutting operations where the guard and splitter assembly cannot be
used. Always replace the guard and splitter assembly when the non-through-cutting operation is complete. Make sure the
featherboard presses only on the portion of the workpiece in front of the blade.
Additional Information on table saw safety, including
a table saw safety video, is available from the
following:
POWER TOOL INSTITUTE
1300 Sumner Avenue
Cleveland, OH 44115-2851
www.powertoolinstitute.com
CONSTRUCTINg A FEATHERBOARd
A
Fig. 66
Kerf should be about
1/4" (6.4 mm)
24" (610 mm)
3/4" (19 mm)
4-1/2"
(114
mm)
5" (127 mm)
Fig. 67
Fig. 68