Delta N028314 User Manual
Page 22
22
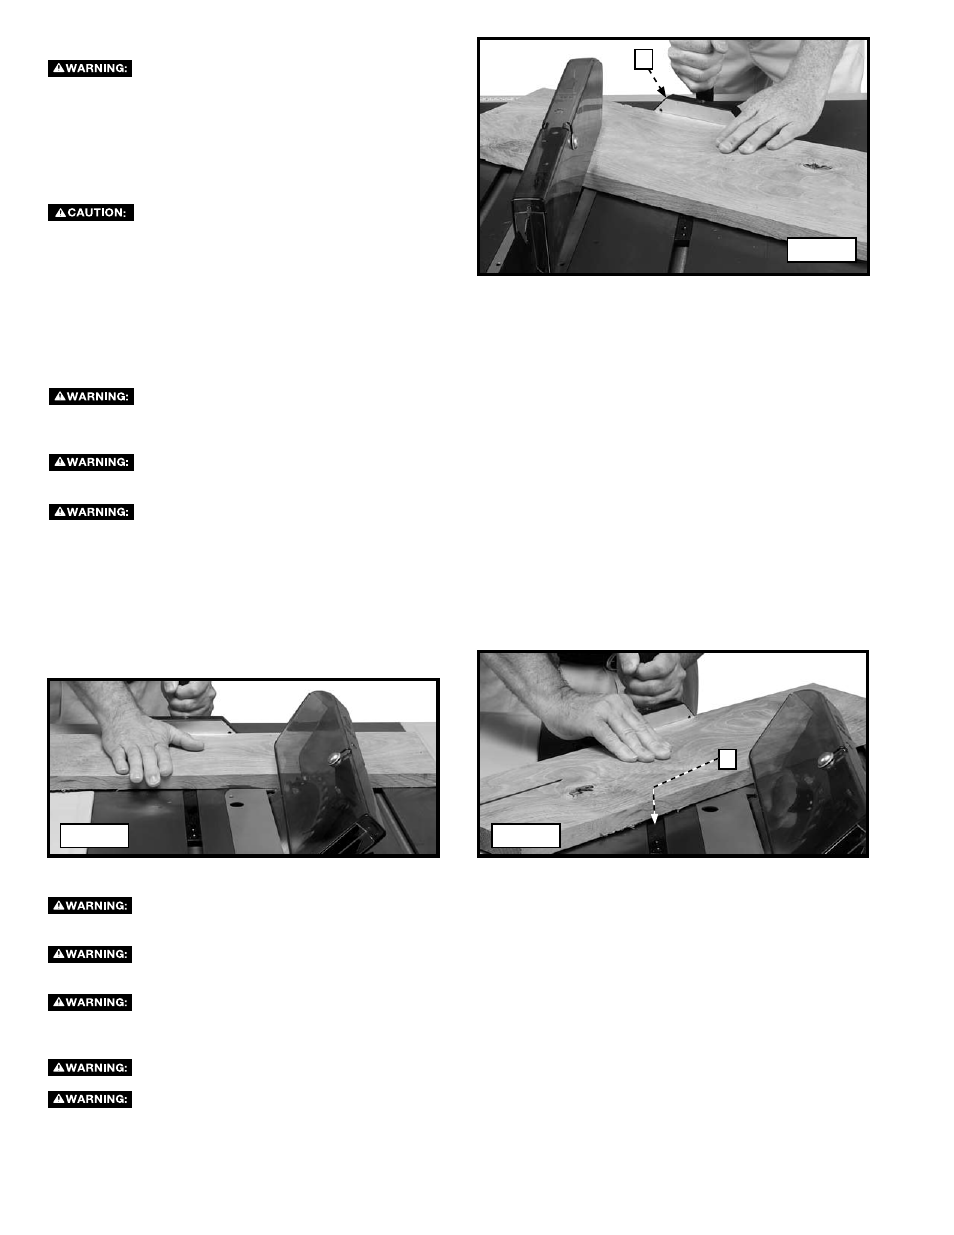
BEVEL CROSSCUTTINg
Before connecting the table saw to the power source or operating the saw, always inspect the blade
guard assembly and splitter for proper alignment and clearance with saw blade. Check alignment after each change
of bevel angle.
When possible, use the right miter gauge slot when bevel crosscutting so that the blade tilts away from
the miter gauge and your hands.
Use caution when starting the cut to prevent binding of the guard against the workpiece.
Bevel crosscutting (Fig. 50) is the same as crosscutting except the bevel angle is set to an angle other than 0°.
COMPOUNd MITERINg
Compound Mitering (Fig. 51) is a combination of bevel crosscutting and mitering, where the blade is beveled to an angle other than
0° and the miter gauge is locked at an angle other than 0°. Always use the miter slot (D) which allows the blade to tilt away from
the miter gauge and hands.
d
RIPPINg
MITERINg
Miter angles greater than 45˚ may force
the blade guard assembly into the saw blade causing
damage to the blade guard assembly and personal
injury. Before starting the motor, test the operation by
feeding the workpiece into the blade guard assembly.
If the blade guard assembly contacts the blade, place
the workpiece under the blade guard assembly, not
touching the blade, before starting the motor.
Certain workpiece shapes, such as molding
may not lift the blade guard assembly properly. With the
power off, feed the workpiece slowly into the blade
guard area until the workpiece touches the blade. If
the blade guard assembly contacts the blade, place
the workpiece under the blade guard assembly, not
touching the blade, before starting the motor.
Never touch the free end of the workpiece or a free piece that is cut off, while the power is "ON"
and/or the saw blade is rotating. Piece may contact the blade resulting in a thrown workpiece or possible injury.
A rip fence should ALWAYS be used for ripping operations to prevent loss of control and personal
injury. NEVER perform a ripping operation freehand. Always lock the fence to the rail.
When bevel ripping and whenever possible, place the fence on the side of the blade so that the
blade is tilted away from the fence and hands. Keep hands clear of the blade and use a push stick to feed the
workpiece if there is less than 6" (152 mm) between the fence and the blade.
Keep hands clear of the blade.
Use a push stick to feed the workpiece if there is 2" to 6" (51 to 152 mm) between the fence and the
blade. Use a narrow rip auxiliary fence and push block to feed the workpiece if there is 2" (51 mm) or narrower
between the fence and the blade.
Ripping (Fig. 52) is cutting lengthwise through a board. The rip fence (A) is used to position and guide the work. One edge
of the work rides against the rip fence while the flat side of the board rests on the table.
Fig. 50
Fig. 51
Mitering (Fig. 49) is the same as crosscutting except the miter gauge (C) is locked at an angle other than 0°. Hold the workpiece
firmly against the miter gauge and feed the work slowly into the blade to prevent the workpiece from moving.
Fig. 49
C