Buttons, Attaching a button – SINGER 1050 User Manual
Page 73
Attention! The text in this document has been recognized automatically. To view the original document, you can use the "Original mode".
buttons
•
stitch: overedge stretch stitch ^
•
Stitch width: to suit button
•
Stitch length: digitally fine tuned at
0
•
Button foot
•
Snap-on feed cover (To attach feed cover see page 7)
Attaching a Button
• Attach button foot and snap-on feed cover to machine
and turn on machine.
• Select overedge stretch stitch.
• Turn hand wheel
toward you
until needle moves to left side.
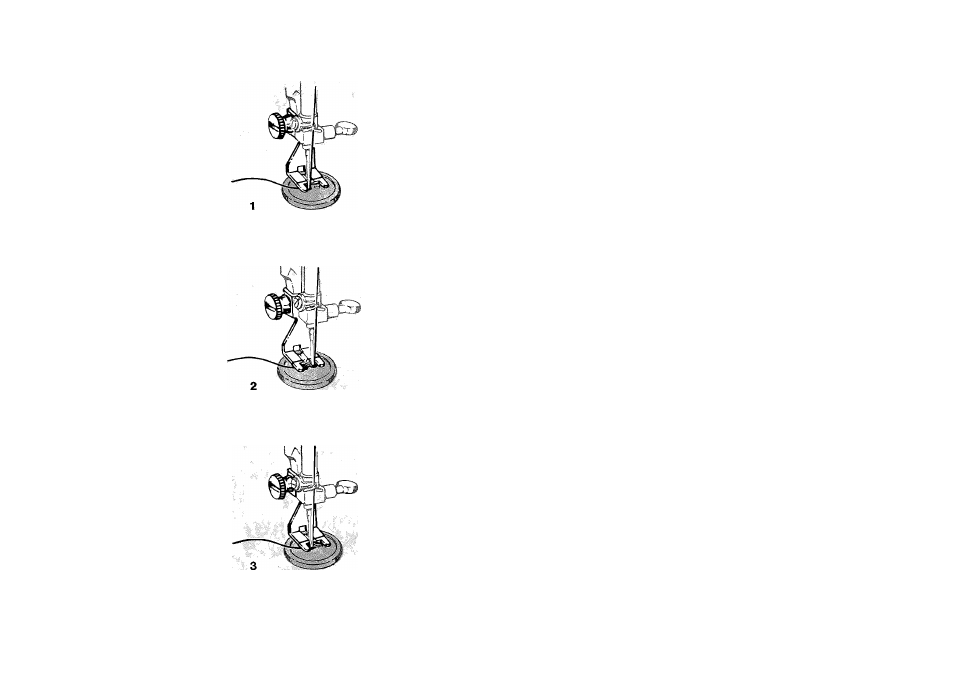
• Place garment underfoot, then position button on garment.
1. Turn hand wheel again to lower needle into left hole of
button, and lower button foot.
2. Turn hand wheel again carefully until needle is just above
right hole. Adjust stitch width, if required, so that needle
will enter right hole of button. Refer to page 38 for infor
mation on stitch width.
3. Run machine slowly. Allow at least three groups of cross
over stitches to enter right hole of button. Finish sewing on
left side, taking two or three tying stitches.
• Remove work from machine leaving 10 cm (4 inches) of
thread. Pull thread ends through to inside of garment, and
knot them close to fabric to form a secure finish.
72