Adjusting upper thread tension, Lower thread tension – SINGER 1050 User Manual
Page 40
Attention! The text in this document has been recognized automatically. To view the original document, you can use the "Original mode".
Adjusting Upper Thread Tension
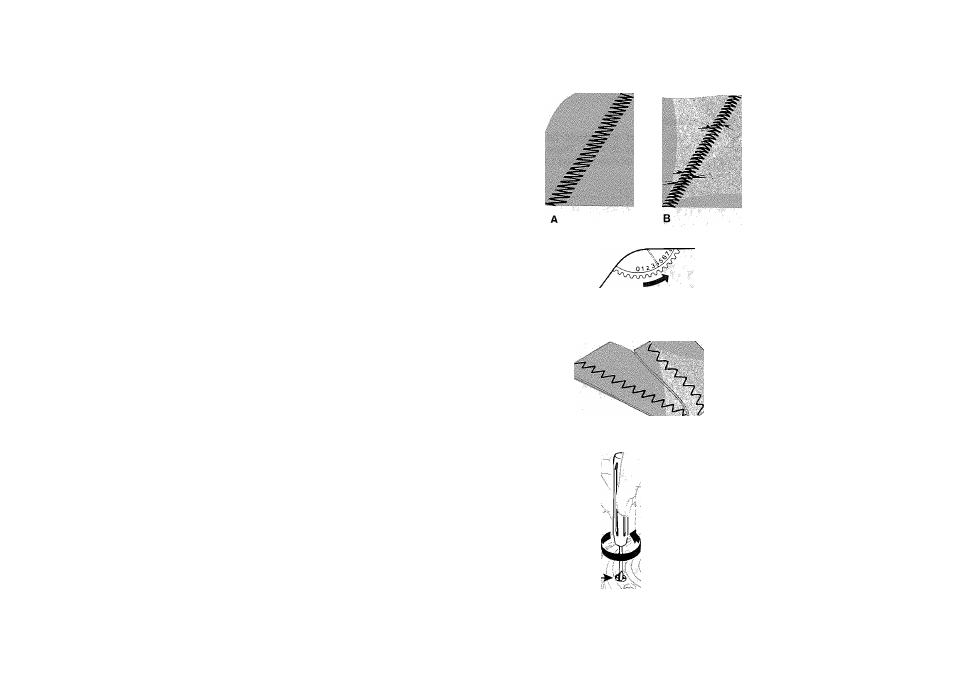
Zig-Zag stitching usuaily requires iess upper thread tension
than straight stitching. Be sure your machine is threaded
correctly and make a test sample with the fabric and thread
you plan to use so that you can adjust tension to suit the stitch
pattern you have chosen. The stitches should lie flat against
the fabric without causing the fabric to pucker, illustration
A.
If the stitches are not flat and the fabric is puckered, illustration
B,
lower the upper thread tension by turning the dial to a
lower number.
Lower Thread Tension
Lower thread tension has been set at the factory for most
types of stitching.
Adjusting Lower Thread Tension for
Balanced Open Zig-Zag Stitching
A balanced open zig-zag stitch where both lower and upper
threads lock at the corner of each stitch in the fabric as shown,
can be achieved by turning screw
A
to the left (counterclock
wise) as far as it will go, using the small screwdriver in your
accessory box.
® Set upperthread tension dial on 1.
• Using two layers of scrap fabric, sew slowly stitch by stitch,
gradually rotating tension dial to higher number until the
upper and lower threads lock at the corner of each stitch
and the stitch formation is the same on both sides of the
fabric.
When stitching is completed, return screw
A
to position for
regular sewing by turning to right (clockwise) as far as it will go.
\
39