Zig-zag stitching, Adjusting stitch width, Adjusting stitch length – SINGER 1050 User Manual
Page 39: Adjusting stitch width and length
Attention! The text in this document has been recognized automatically. To view the original document, you can use the "Original mode".
-v' >J3
ij
la&ic
Wi
S t i f f
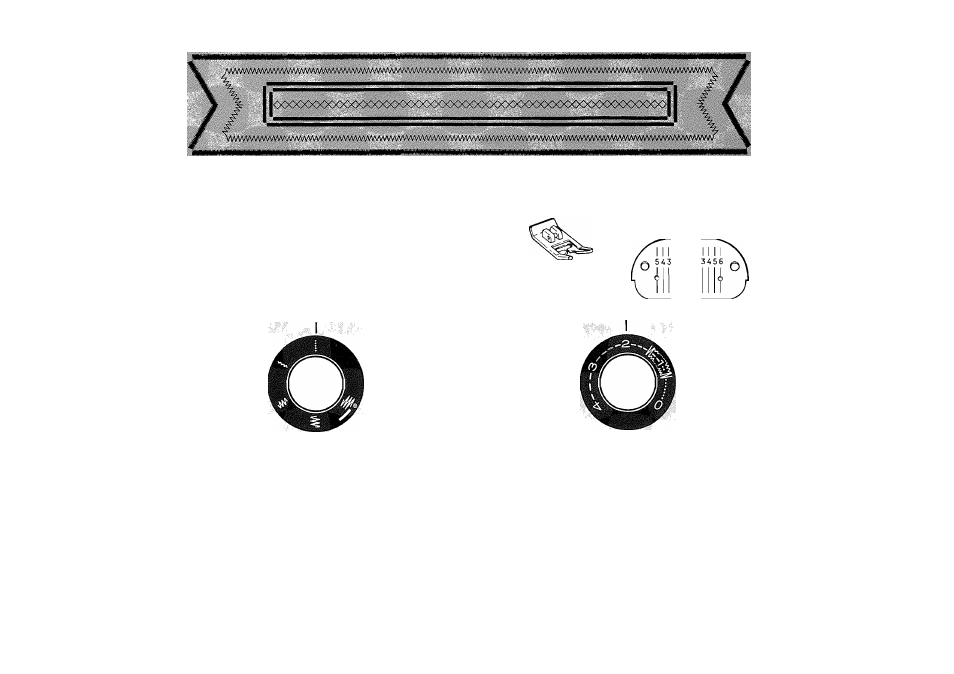
Zig-Zag Stitching
* •
• stitch:
zig-zag ^
• Stitch width; to suit application or fabric
• Stitch length: to suit application or fabric
• General purpose needle plate
• General purpose foot
D
Adjusting Stitch Width
Before starting to sew, adjust the stitch width of your pattern
on a scrap of fabric.
Turning the stitch width control toward the largest zig-zag
symbol increases the width of your stitch, and turning the
control toward the straight stitch symbol decreases the width.
Turn the control until the desired width is obtained.
Note:
When sewing
Flexi-Stitch
patterns, set stitch width con
trol on yellow
Flexi-Stitch
dot ».
38
Adjusting Stitch Length
Before starting to sew, adjust the stitch length of your pattern
on a scrap of fabric.
Turning the stitch length control toward 4 increases the length
of your stitch, and turning the control toward 0 decreases the
length. Turn the control until desired length is obtained.
Note:
When sewing
Flexi-Stitch
patterns, adjust stitch length
control within yellow
Flexi-Stitch
area--.