Figure 1d, Figure 2 – Tuffy Security 286 User Manual
Page 5
Page 5 of 7 – 8/8/2014 – Rev A
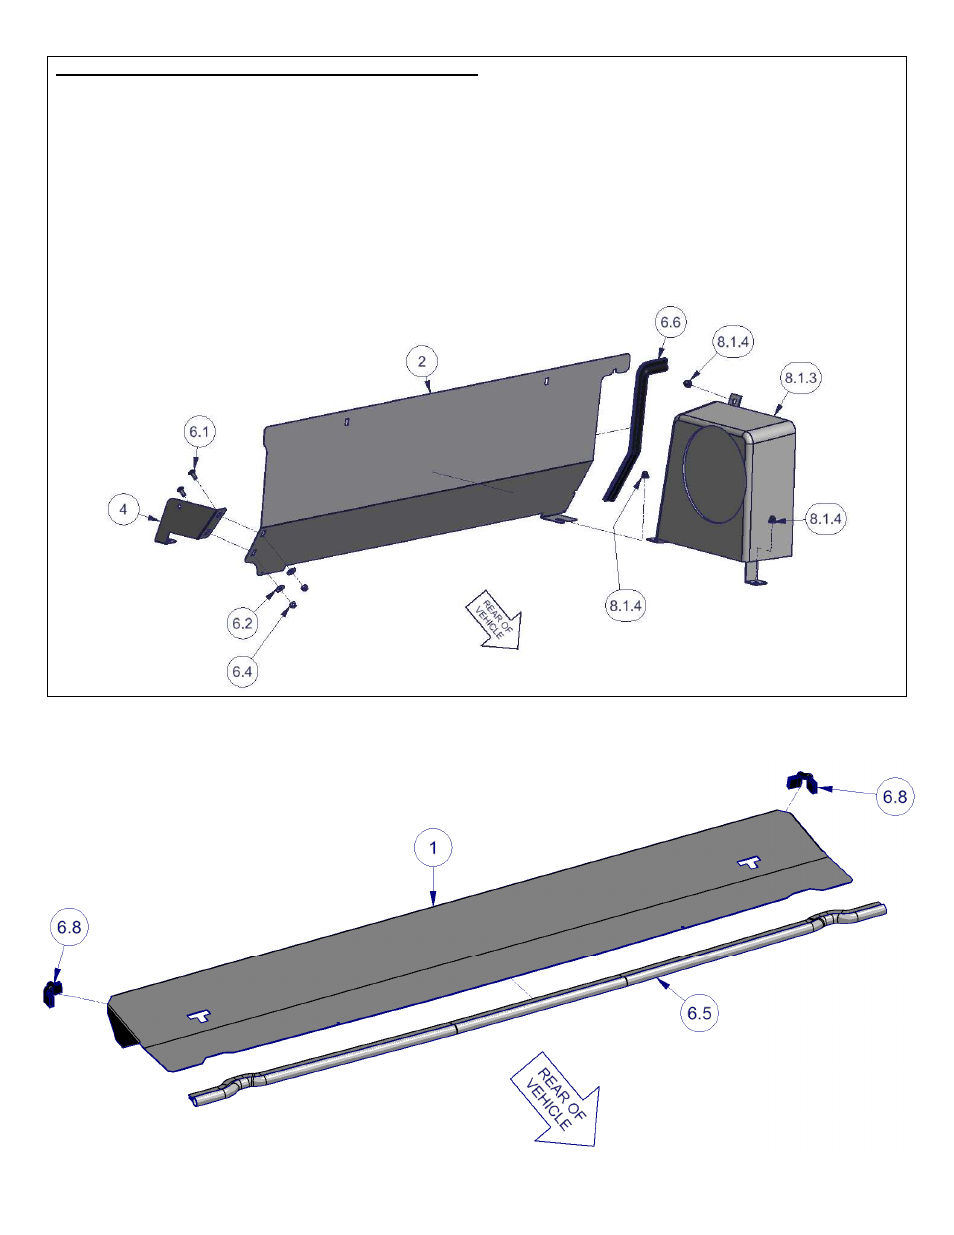
INSTALLATIONS IN A 4-DOOR WITH OEM SUB-WOOFER
10. Remove or sufficiently loosen the (3) #8.1.4 OEM Sub-woofer mounting acorn nuts with a 15mm socket and wrench.
11. Loosely assembly the #2 Front Panel and #4 Left Mounting Bracket using the supplied #6.1 bolts, #6.2 washers, and
#6.4 nuts, as illustrated. Leave all fasteners hand tight at the point. Install the #6.6 Rubber Edge Trim to the sub-
woofer notch of the #2 Front Panel. Sliding the sub-woofer mounting foot on the #2 Front Panel under the sub-
woofer, install the assembled parts in the vehicle. **Note the bottom bolt flange on the #4 Mounting Bracket may
need to be bent inboard away from the fender wells to allow the #2 Front Panel to sit flush to the cargo floor. (Figure
1d)
12. Re-install the (3) #8.1.4 sub-woofer acorn nuts. Tighten fasteners hand tight at this time.
FIGURE 1d
13. Install the #6.5 Rubber Edge Trim onto the rear edge of the #1 Lid. Install the #6.8 Small bulb Rubber Edge Trim
pieces onto the left and right side roll bar notch, as illustrated. The grip side on each trim piece mounts to the vertical
edges with the bulb center running along the horizontal edge. (Figure 2)
FIGURE 2