Figure 1b – Tuffy Security 286 User Manual
Page 3
Page 3 of 7 – 8/8/2014 – Rev A
INSTALLATIONS IN A 2-DOOR WITH OEM SUB-WOOFER
6. Remove the (1) #9.5 OEM Rear seat belt securing nut ON THE DRIVER’S (LEFT) SIDE with an 18mm socket and
wrench. Remove or sufficiently loosen the (3) #8.1.4 OEM Sub-woofer mounting acorn nuts with a 15mm socket and
wrench.
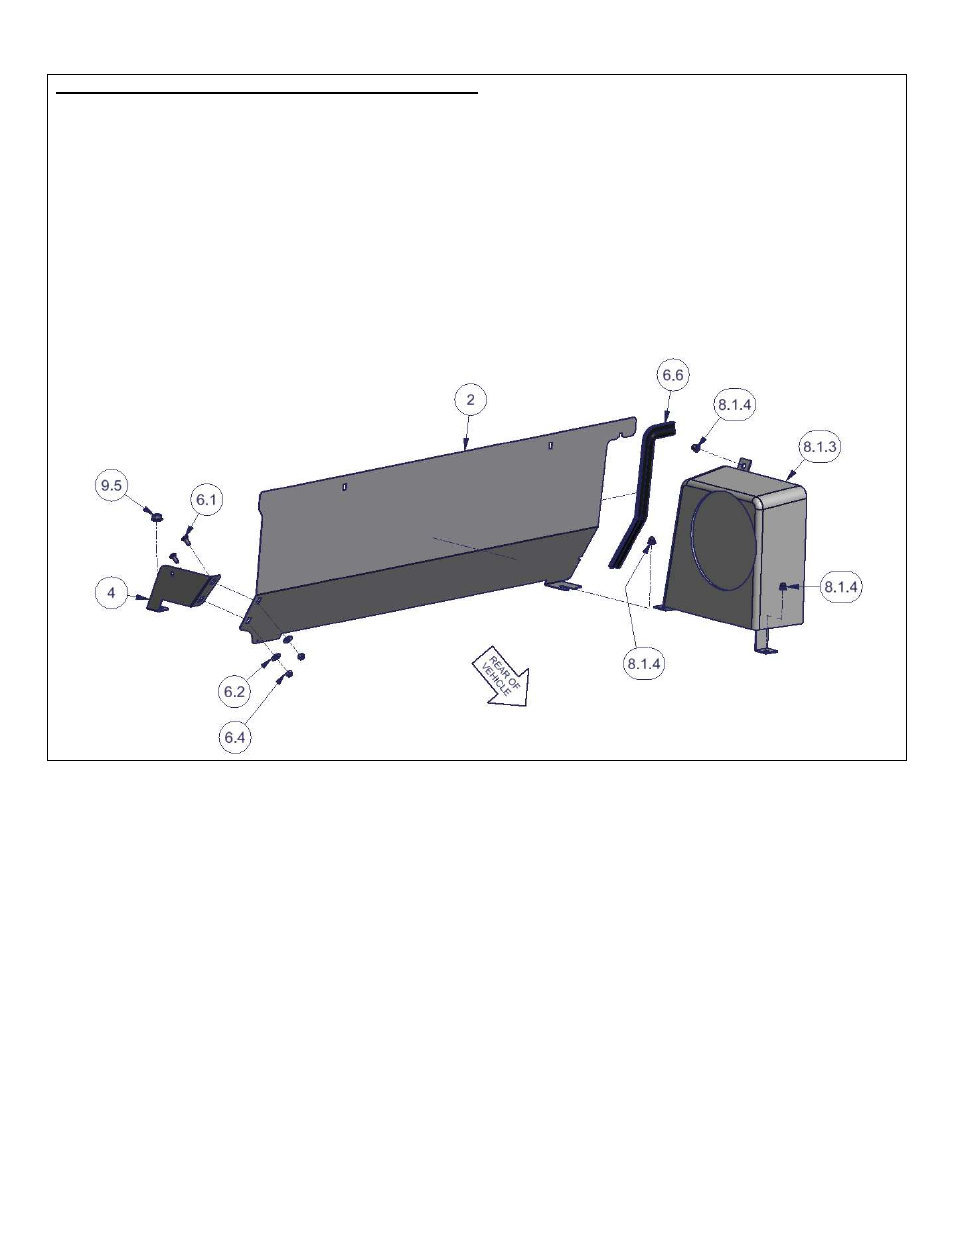
7. Loosely assembly the #2 Front Panel and #4 Left Mounting Bracket using the supplied #6.1 bolts, #6.2 washers, and
#6.4 nuts, as illustrated. Leave all fasteners hand tight at the point. Install the #6.6 Rubber Edge Trim to the sub-
woofer notch of the #2 Front Panel. Sliding the sub-woofer mounting foot on the #2 Front Panel under the sub-
woofer, install the assembled parts in the vehicle with the #4 mounting bracket positioned on the rear seat belt body
mounted studs. Be sure the #4 mounting bracket is installed on top of the seat belt mounting tabs. (Figure 1b)
8. Re-install the #9.5 OEM Rear seat belt nut and the (3) #8.1.4 sub-woofer acorn nuts. Tighten fasteners hand tight at
this time.
FIGURE 1b