Fieldware, Tools, Positioning the sample points – TeeJet Fieldware Tool User Manual
Page 47
43
Fieldware
®
Tools
98-05048 R3
Positioning the Sample Points
After the grid orientation process is complete, the next step is to position the sample points within the grid.
Pressing the NEXT button in the Grid Orientation page brings you to the Position Points page (Figure 50).
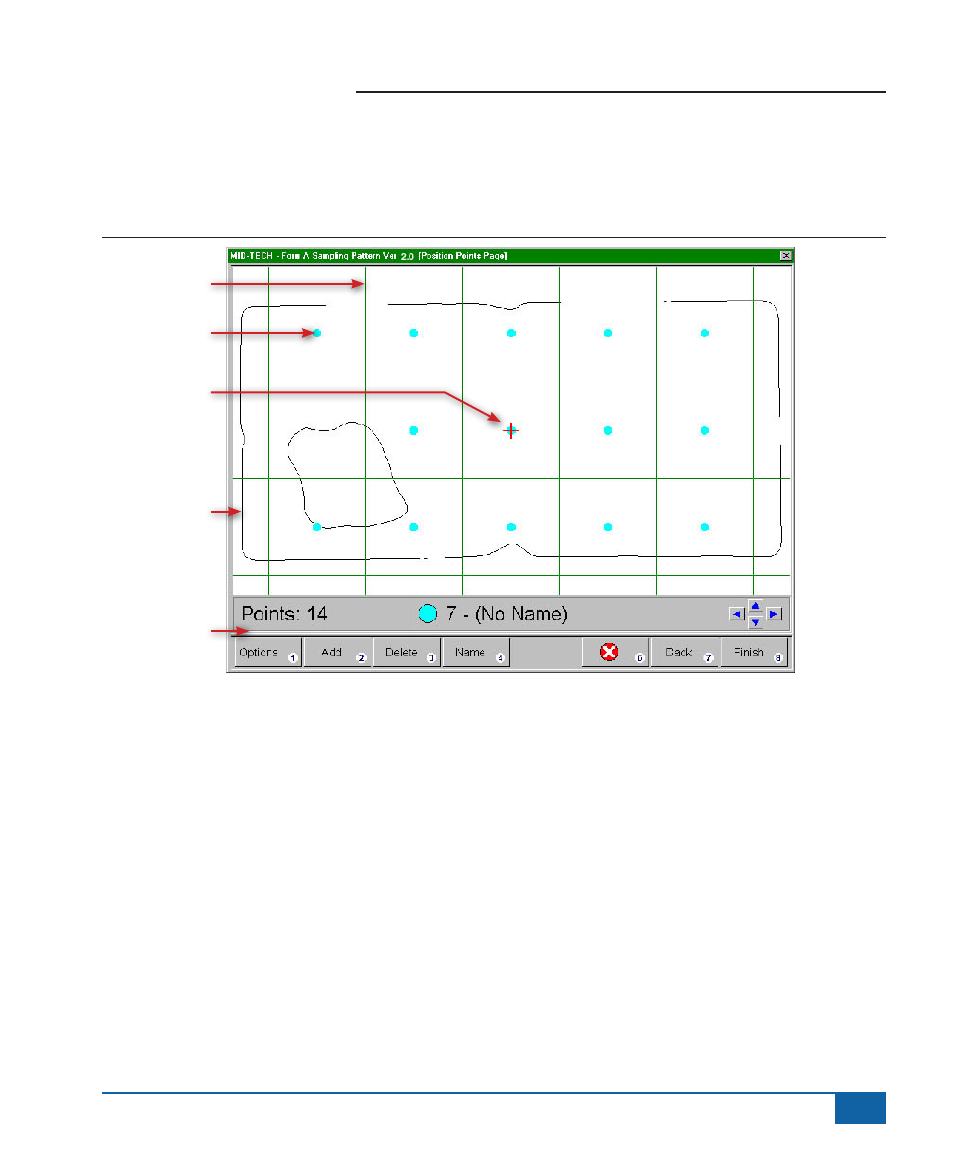
Figure 50: The Position Sample Points Page
Sample Points
Sampling Grid
Editing Cursor
Button Bar
Field Boundary
The sample points are distributed within the sample grid based on the Grid Setup menu selections. In (Figure 50),
the grid menu selections were 5.0 Acre square grids and the point sample pattern was REGULAR. The grid had
been oriented to align with the South and West edges of the field boundary.
The Position Point page allows you to perform some basic point editing tasks such as deleting and adding points.
You can also select a point and enter a specific point name as an attribute. Points can be selected by positioning
the Red editing cursor over a point. The editing cursor can be positioned using the arrow keys located on your
computer keyboard, or by using the mouse. To add a point, position the editing cursor over the desired location
and press the ADD button. To delete a point, position the editing cursor over the point you want to delete and
press the DELETE button.
Once you are satisfied with the sample point distribution with in the sample grid, press the FINISH button to
complete the Form a Sampling Pattern process.