Fieldware, Tools, Configuring a field transfer – TeeJet Fieldware Tool User Manual
Page 37
33
Fieldware
®
Tools
98-05048 R3
In (Figure 40) we see the Field Transfer dialog. This
dialog is used to configure a single field transfer.
The left-hand portion of the dialog defines a source
field which will be transferred to the destination field,
defined to the right. Each field setting on the left is
followed by an arrow button and a matching field
setting on the right. When active, the arrow button may
be used to transfer the contents of the left setting to
the right. Pressing the Copy button at the bottom of the
screen is equivalent to pressing all of the active (not
grayed out) arrow buttons.
The top pair of settings are used to define the names
of the fields. These settings may take the form of a
combo box or an edit box. If a combo box is present,
you may select one of the names from its list. The
list contains all the names located in or compatible
with the field. If an edit box is present you must type
in the name of the field. In (Figure 40), we selected
ELEVATION as the source field’s name and entered
ALTITUDE as the destination field’s name.
The second pair of settings define the field’s types.
These settings take the form of either a combo box or
a text box (can’t edit). If a combo box is present, you
may select the type you wish to associate with the
field. This affect how the field is written to the file when
the conversion is performed. If a specific TYPE
is listed in the box on the left it is best to
chose the same for the box on the right.
In (Figure 40), we selected Double as the destination
field’s type.
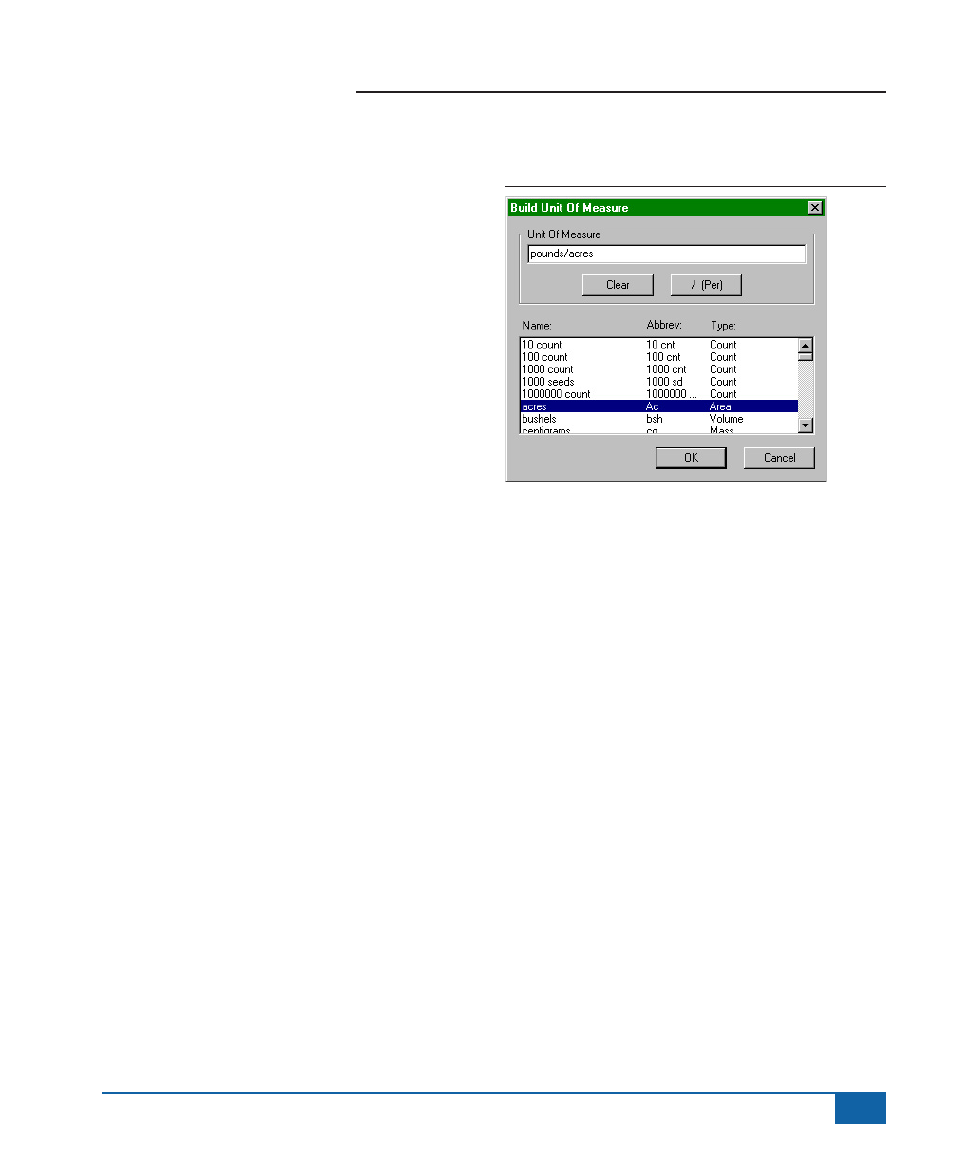
Figure 41: The Build A Unit Of Measure Dialog
The final pair of settings assign units of measure to
the fields. These settings take the form of either a
combo box or a text box (can’t edit). If a combo box
is present, you may select the unit of measure the
field is (or will be) stored in. Take care in selecting a
unit of measure. If the field defines a name or some
other non-numeric value, specify
unit of measure. If you don’t know the field’s unit
of measure, select
transferred, all necessary unit of measure conversions
are automatically performed. Therefore, it is important
that the source field’s and destination field’s units
of measure are compatible. If you have entered
incompatible units of measure, you are presented
with an error when you press OK. In (Figure 40), we
selected feet as the destination field’s unit of measure.
If the Unit Of Measure setting has a Browse button to
its right, you may opt to build a unit of measure for the
field. Pressing the button brings up the Build Unit Of
Measure dialog (see (Figure 41)). This dialog allows
you to select or compose a UOM (unit of measure)
from a long list of options. If you wish to select a UOM
from the list, you may type the UOM’s name in the
“Unit Of Measure” edit box or find the UOM in the list.
Configuring A Field Transfer