Haltech IQ3 Data Logger Dash User Manual
Page 61
IQ3 Data Logger Dash Installation Manual
61
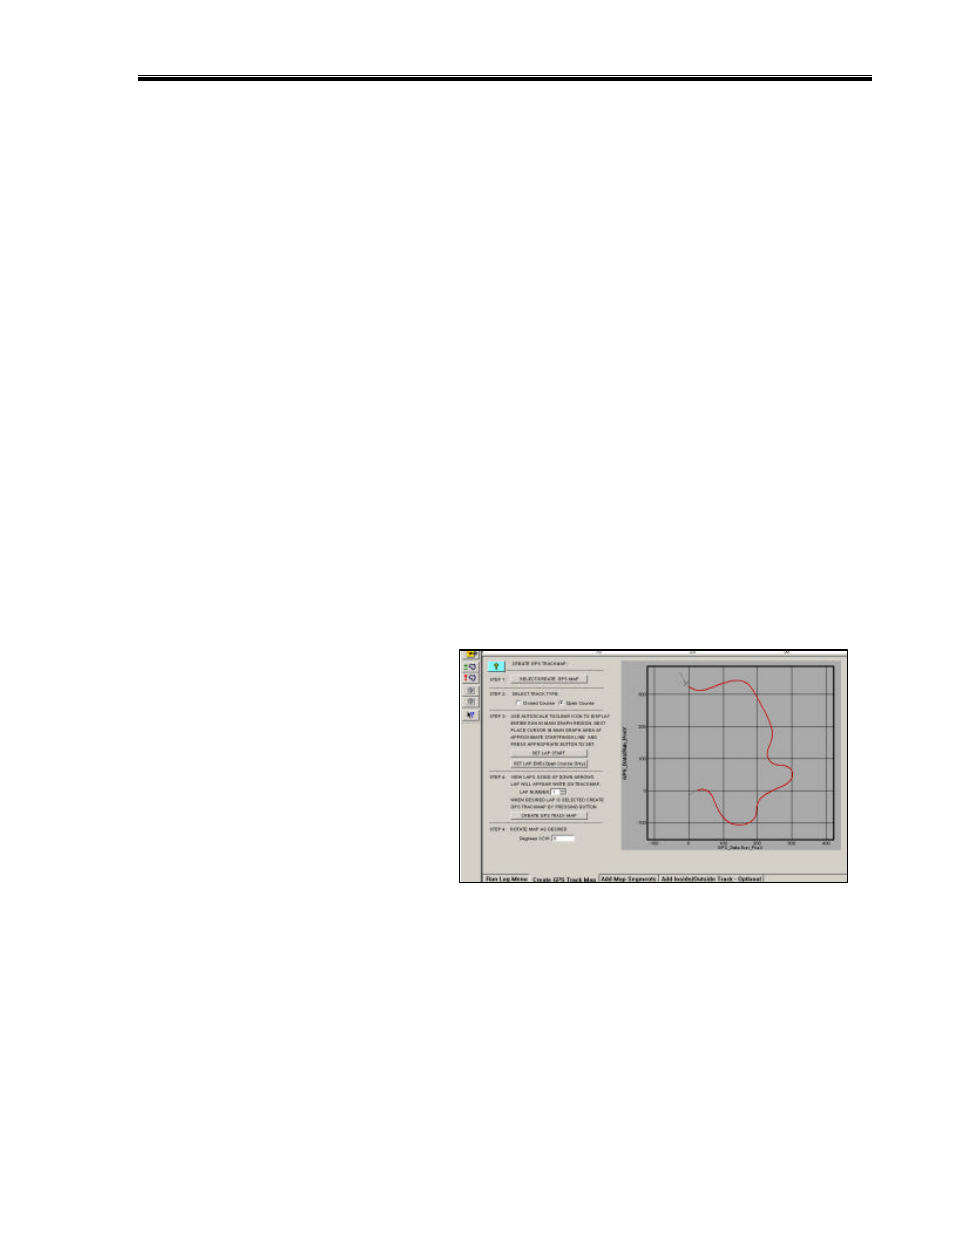
Track Map Creation (Open - Autocross, Solo & Hill Climb)
Through the use of GPS signals, it is possible to create a track map, even if the start and finish
line are located at two different locations. In the previous section, we located the vehicle at the
desired start / finish and selected the Set Lap Start button. For open course, we need to also
establish an end point of the lap, also. To create an open course track map, we will refer to the
previous section and follow the same instructions for Step 1. Resuming at Step 2:
Step 2: Select Track Type
For open course, select Open Course.
Step 3: Set Lap Start
Set Lap End / Open Course Only
As discussed in the previous section, the current data in view represents the GPS position of the
vehicle from the start until the end of recording. If you were to place the mouse cursor in the
Main Graph area, (insure GPS_MPH is still graphed and the entire run is in view) then left click
and drag the mouse curser through the Main Graph area, you can follow the location of the
vehicle in the GPS driving line data.
To Set Lap Start, place the mouse
cursor in the Main Graph area, left click
and move the vehicle location (as noted
by the small X) in the GPS map data
until the approximate start area is
located. Next, select the Set Lap Start
button. Then, move the cursor to the
desire end of the course and select the
Set Lap End button.
Step 4: Create GPS Trackmap
Finally, select the Create GPS Trackmap button. This action now completes the GPS track
mapping process.