Table 3-2 – Cisco 5000 Series User Manual
Page 72
S e n d c o m m e n t s t o n 5 k d o c s @ c i s c o . c o m
3-8
Cisco Nexus 5000 Series Hardware Installation Guide
OL-15902-01
Chapter 3 Installing the Cisco Nexus 5500 Platform or 5000 Series Switch
Installing the Cisco Nexus 5020 Chassis in a Cabinet or Rack
To install the switch in a cabinet or rack using the rack-mount kit provided with the switch, follow these
steps:
Step 1
Install the front rack-mount brackets as follows:
a.
Position a front rack-mount bracket against the chassis and align the screw holes as shown in
. Then attach the front rack-mount bracket to the chassis with six of the M4 screws.
b.
Repeat with the other front rack-mount bracket on the other side of the switch.
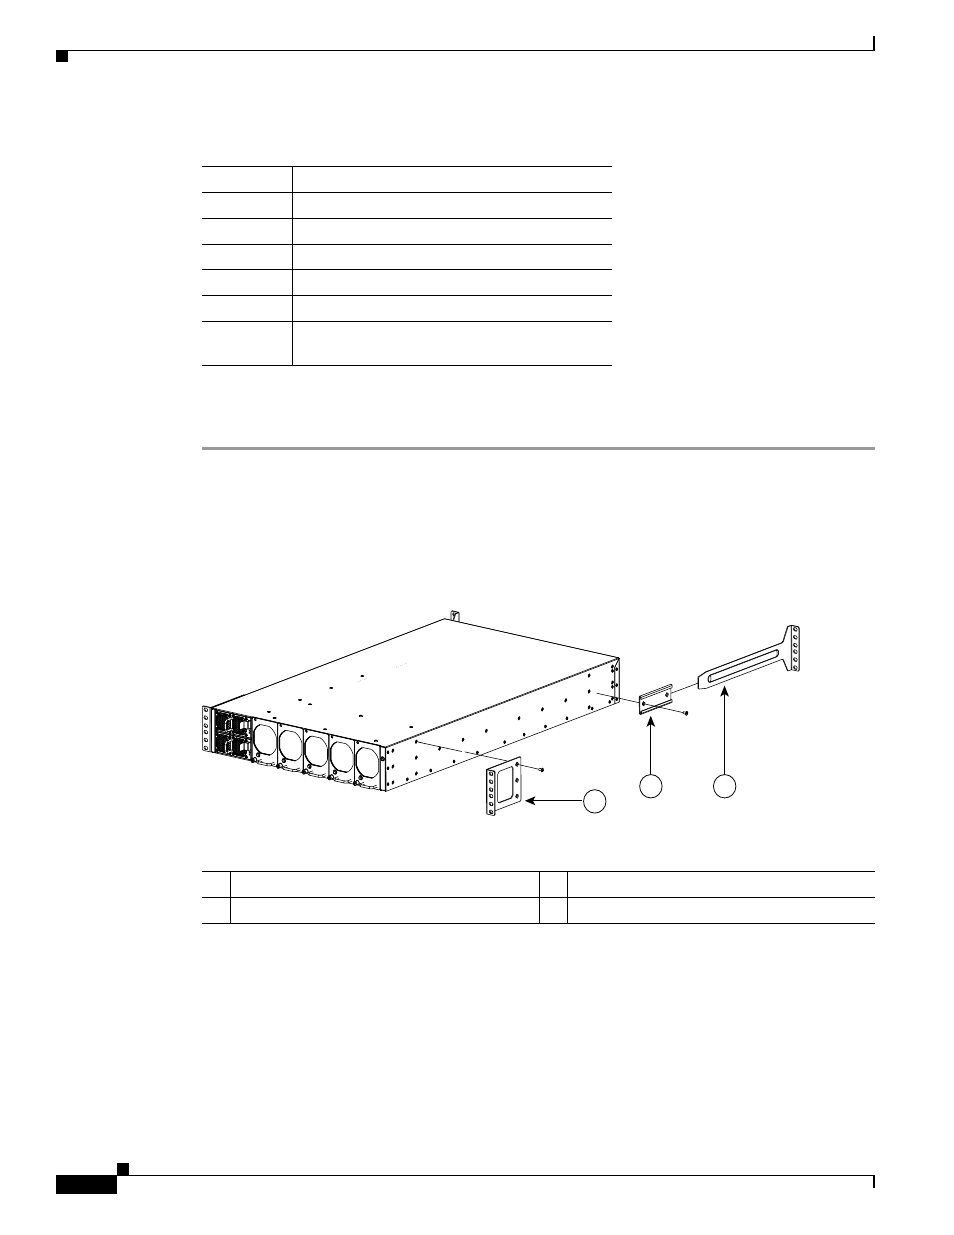
Figure 3-3
Attaching Front Rack-Mount Bracket to the Cisco Nexus 5020 switch
Step 2
Install the rack-mount guides on the switch as follows:
a.
Position one of the rack-mount brackets against the side of the switch and align the screw holes as
shown in
. Then attach the bracket to the switch with two of the flat-head
M4
screws.
b.
Repeat with the other rack-mount bracket on the other side of the switch.
Table 3-2
Cisco Nexus 5020 Switch Rack-Mount Kit
Quantity
Part Description
2
Rack-mount brackets
16
M4x0.7 x 8-mm Phillips countersunk screws
2
Rack-mount guides
12
10-32 Rack Nuts
12
10-32 x 3/4-inch Phillips countersunk screws
2
Slider rails
(22 inch minimum to a 36 inch maximum)
2
3
1
186363
1
Front rack-mount bracket
3
Slider rail
2
Rack-mount guides