Kenmore 19501 User Manual
Page 75
Attention! The text in this document has been recognized automatically. To view the original document, you can use the "Original mode".
Hemming and Edging Stitches H
• Cut-Out Work Edging and Applique
SECTION 5, liEAHN THE STITCHES
11
(Continued)
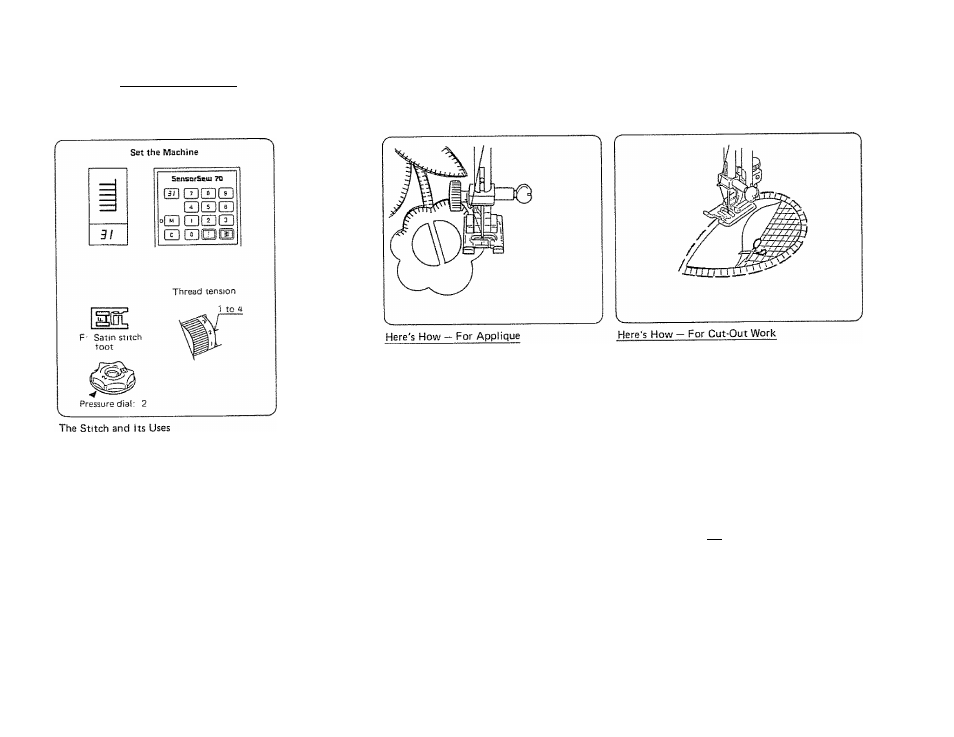
Cut-Out Work and Applique are the major
uses for this stitch, but it can also be used to
provide edging on many sewing projects,
including piacemats, blankets, collars, cuffs
and pockets.
1.
Use a fusible heavy weight interfacing
behind each piece of your applique.
2.
Cut the interfacing slightly smaller than
the design pieces.
3.
Tape or baste the applique in place and
sew around each piece with stitch
pattern [sij
NOTE; You may also use a satin stitch.
4.
When sewing curves, leave the needle in
the fabric, raise the presser foot and
turn the fabric.
5.
Lower the presser foot and stitch.
1.
Choose a simple design and trace the outline
on the right side of the fabric.
2.
Place a piece of tulle or organdy under the
design and pin in place.
NOTE; You may want to use a contrasting
insert fabric to accent your work.
3.
Baste the layers together, stitching just
outside the outline. Remove the pins.
4.
Stitch around the design, using stitch pattern
S3 ■
NOTE; You may also use a narrow satin stitch
I see p. 60).
5.
Remove basting and cot the fabric inside the
design dose to the stitching, using an
embroidery scissors.
74