Sew a button – Kenmore 19501 User Manual
Page 40
Attention! The text in this document has been recognized automatically. To view the original document, you can use the "Original mode".
t
Sew a Button
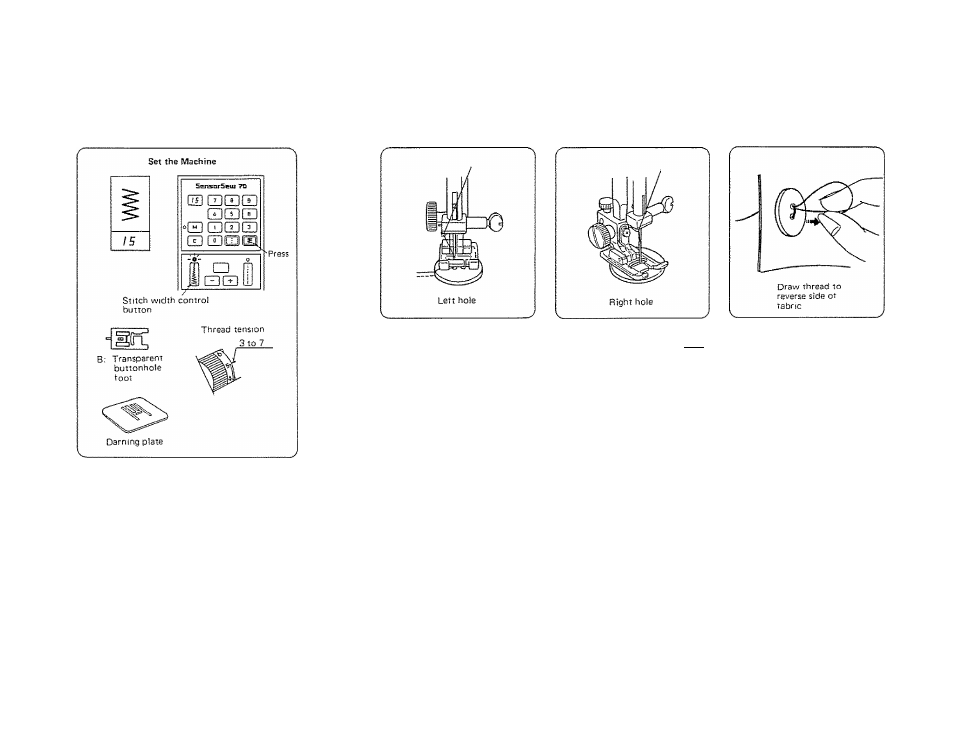
SECTION 4. PRACTICE COMMON STITCHING SKILLS,
Use the darning plate for button sewing (see p. 36).
1.
Match the button holes to the horizontal slot
on the presser foot.
2.
Lower the foot to hold the button in place.
3.
Turn the hand wheel by hand until the needle
point is just above the button.
4.
Press the stitch width button (+ or —) so the
needle will enter the left hole of the button.
5.
Turn the hand wheel so the needle will enter
the right hole of the button. Readjust the
stitch width if necessary.
6 . Stitch several times.
7.
After you finish sewing, cut the thread but
leave 3 to 4 inches of thread at the button.
8 .
Draw the thread to the reverse side of the
fabric and knot the threads.
39