Horizontal stabilizer construction (5 steps) – Carl Goldberg GBGA0055 User Manual
Page 6
6
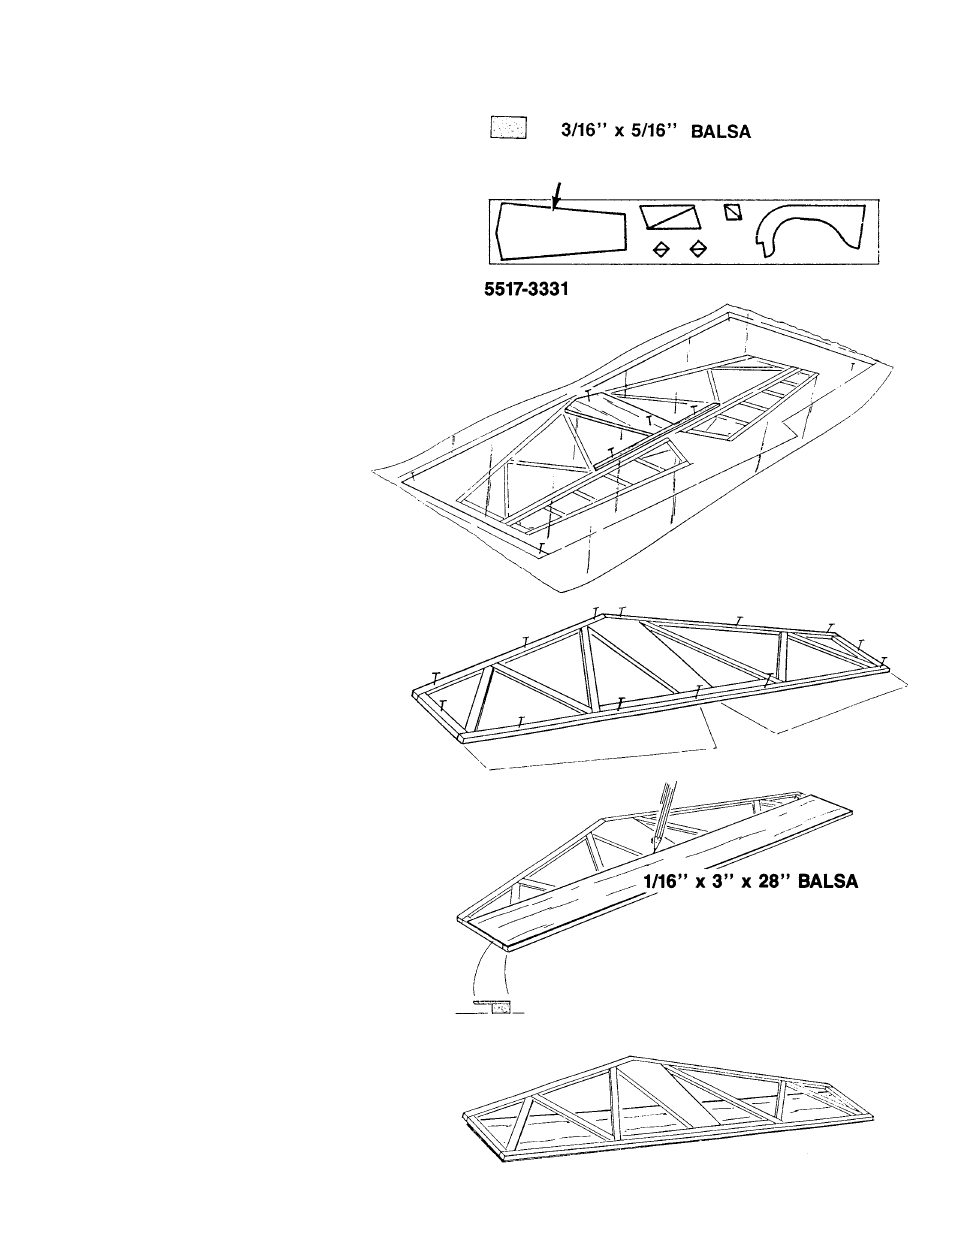
HORIZONTAL STABILIZER CONSTRUCTION (5 Steps)
1.
Collect all of the items you will need to construct the
HORIZONTAL STABILIZER. They include:
(1) D/C SHEET 5517 3/16” BALSA
PT. # 1331
Includes:
CENTER PLATFORM
(5) 3/16 x 5/16 X 28” BALSA STICKS
PT. #4371
(4) 1/16 x 3 x 30” BALSA SHEETING
PT. #4539
2.
■
■
Lay the horizontal stabilizer portion of the plan over the
building board and place the waxed paper over the
plan. You will also need “T” pins, an X-Acto
®
knife with
a #11 blade, and a razor saw.
■
■
Pin the CENTER PLATFORM over the plan.
■
■
Cut a 3/16 x 5/16” balsa stick and glue it to the platform
with medium CA, pinning it over the plan.
3.
■
■
Trim the remaining 3/16 x 5/16” balsa sticks to fit the
plan, pinning and gluing as you go. In cutting the
diagonal trusses for the tail, trim them to fit well. If a bit
oversize, don’t force them in place. The pieces should
fit before gluing
4.
■
■
Place a 1/16 x 3 x 28” balsa sheet flush to the trailing
edge (T.E.) of the stabilizer and mark the sheet width
onto the stab sticks.
HINT:
In selecting the sheeting for the stab, choose the firmer
or heavier wood. whenever sheeting any surface, is
helpful to lightly sand both sides of the sheet before
using medium C/A. Also, whenever joining sheeting,
“truing” the edges to be glued with a long sanding block
and prefitting can make a big difference.
■
■
Remove the sheet and apply medium C/A to the stab
sticks up to the sheet-width mark
■
■
Place the glued stab frame over the 1/16” sheeting,
making sure that the trailing edge is flush with the
sheet.