Assembling the wheel pants (6 steps) – Carl Goldberg GBGA0055 User Manual
Page 37
37
4.
■
■
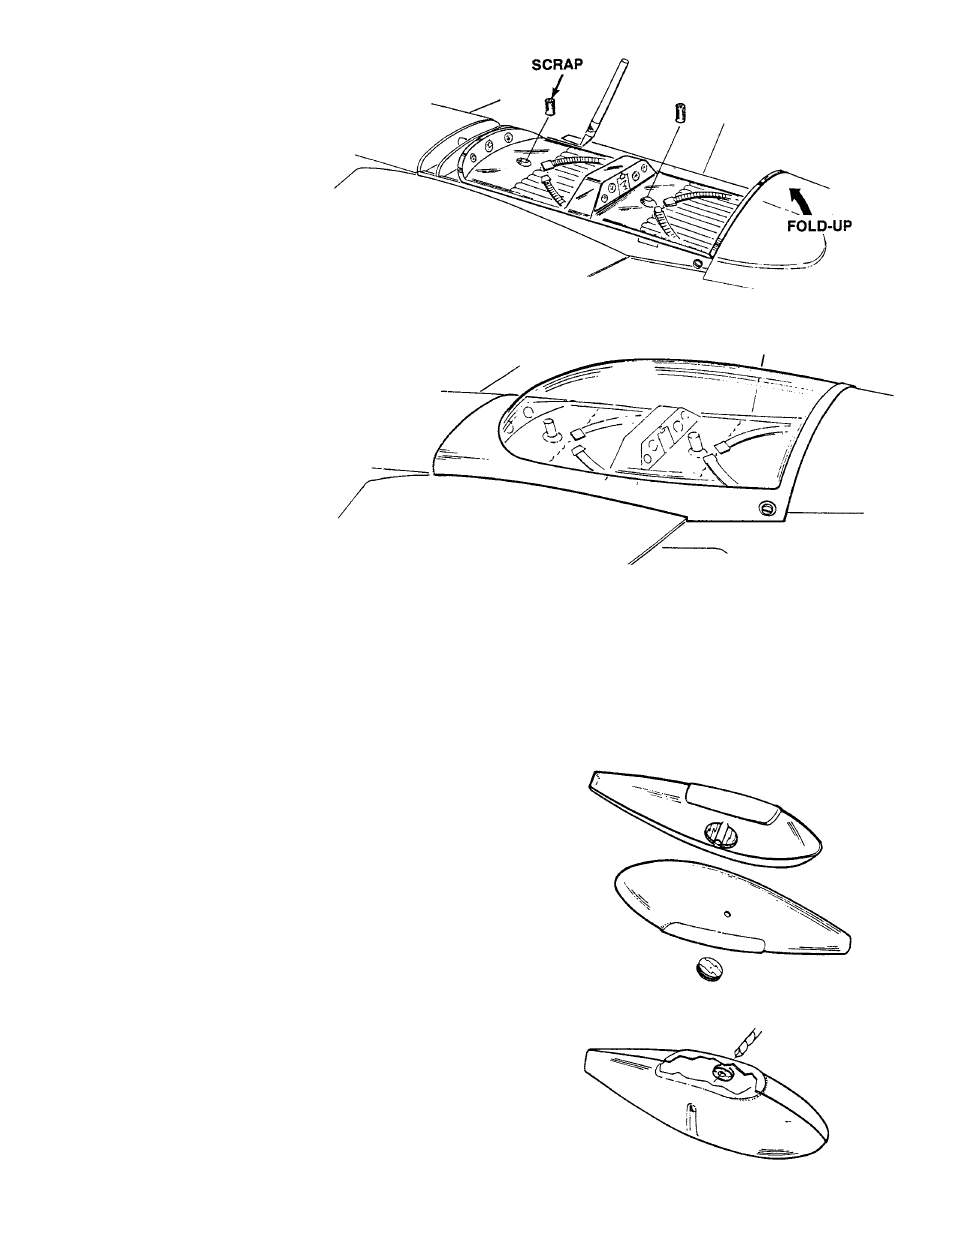
Pretrim the back flip-up portion of the cockpit insert.
■
■
Glue the top of the frame and place the insert in
position.
■
■
Trim the insert flush with the outside of the rails.
■
■
Add control sticks and pilot (both not included in kit), if
desired. Also, paint the interior at this time.
5.
■
■
Trim the canopy along the scribe line. You may want to
trim it a little long and precisely fit it to the wing and
fuselage.
6.
■
■
Paint the canopy deck up to the canopy crease.
ASSEMBLING THE WHEEL PANTS (6 Steps)
1.
■
■
Clean up the edges of the pant halves by gently sliding
them over sandpaper on a flat surface.
2.
■
■
On both the outer and the inner pant half, drill a 3/16”
hole at the axle location.
■
■
Glue the two support plates to the inner pant half.
■
■
Glue the axle support plate to the outer pant half,
aligning the center mark on the plate concentric with
the hole.
3.
■
■
Rough-cut the wheel opening in all four pant halves.
Then glue an outer half to an inner half, forming a lap
joint. Align the outer half edge to the scribe line on the
inner half all around.