Constructing the canopy frame (6 steps) – Carl Goldberg GBGA0055 User Manual
Page 36
36
1.
■
■
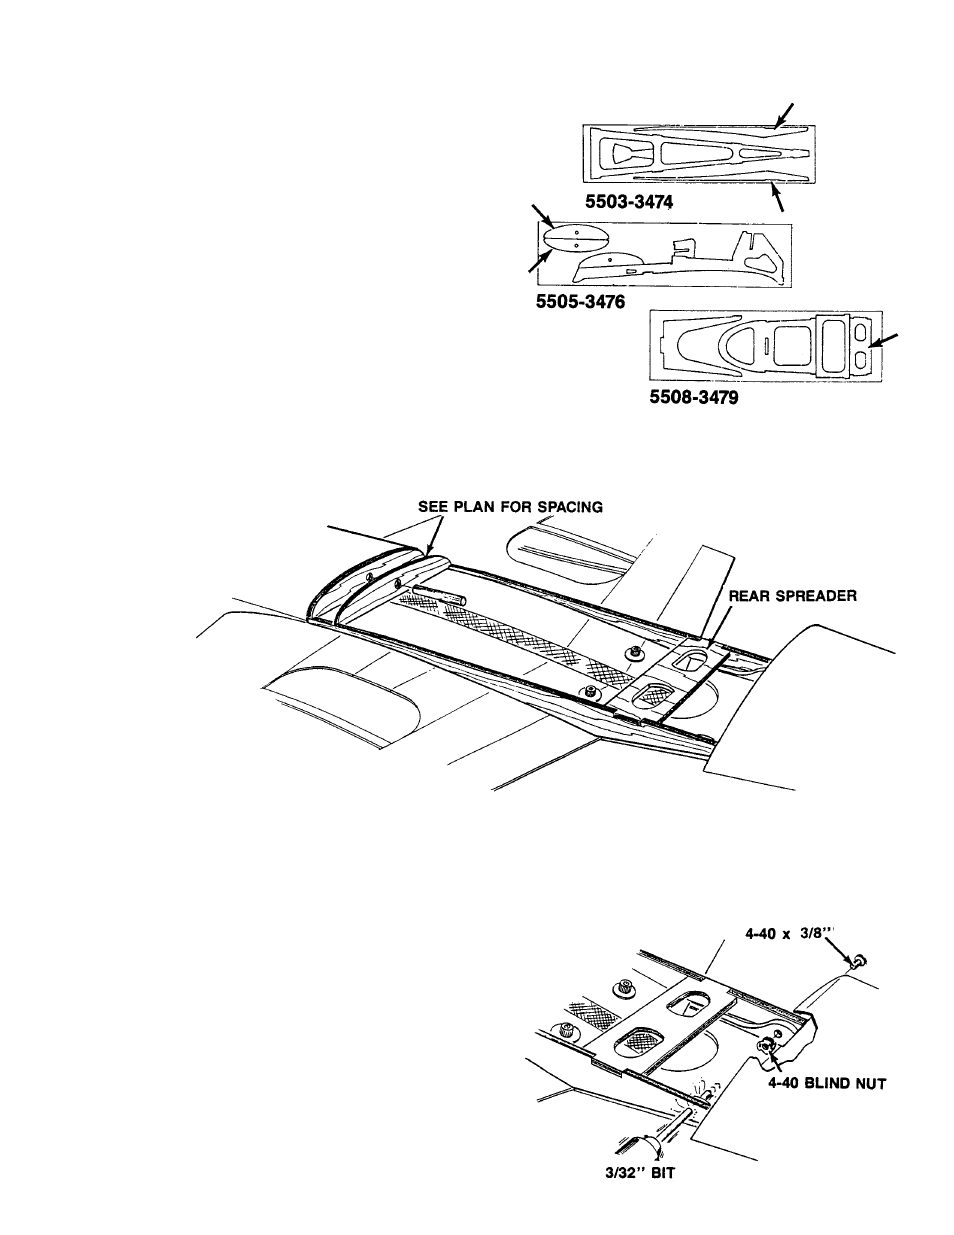
Collect the following parts.
(1) D/C SHT. #5503 (REMAINDER) PLY
PT. #3474
CONTAINING (2) RAILS
(1) D/C SHT. #5505 (REMAINDER) PLY
PT. #3476
CONTAINING (2) FORMER “CC”
(1) D/C SHT. #5508 (REMAINDER) PLY
PT. #3479
CONTAINING (1) SPREADER
(1) DOWEL 1/4 x 1-3/4” BIRCH
PT. #1755
(1) CANOPY
PT. #9515
(1) COCKPIT INSERT
PT. #9518
(2) 4-40 BLIND NUT
PT. #1125
(2) 4-40 x 1/2” PAN HEAD SCREW
PT. #1048
(2) #2 WASHER
PT. #1139
2.
■
■
Mount the wing to the fuse.
■
■
Position the two rails on top of the wing, as shown.Tape
to the wing, if you wish.
■
■
Referring to the plan for the distance between the two
Formers “CC” , glue them to the rails. Use the 1/4” dowel
as an alignment pin to the fuselage Former “BB.”
■
■
Install the rear spreader into the slots in the rails and
glue.
3.
■
■
Drill a 3/32” hole through the rail and the fuselage tab.
■
■
Press a blind nut into each tab and, temporarily, bolt
the canopy frame to the fuselage.
CONSTRUCTING THE CANOPY FRAME (6 Steps)