Covering – Carl Goldberg GBGA0040 User Manual
Page 25
COVERING
INTRODUCTION
There are several ways to cover the frame of a model
airplane. Years ago, the open framework of most air-
planes was covered with a combination of tissue (or
silk) and dope; the solid structures were painted.
Today, most models are covered with polyester films
that resemble either a painted finish or a fabric finish.
These films are easy to apply and actually increase the
strength of the aircraft. The following instructions
describe the general procedure for covering a model.
However, it is important to carefully read the instruc-
tions that come with the film, as different products are
applied in somewhat different ways.
PREPARATION
Any irregularities in the wood surface will show on the
covering, so a good covering job MUST be preceded
by careful sanding, filling of nicks and dents (we rec-
ommend JET Model Mate™ balsa filler), and then more
sanding. For the final sanding, use fine sandpaper
(240-320 grade) and a sanding block.
COVERING THE MODEL
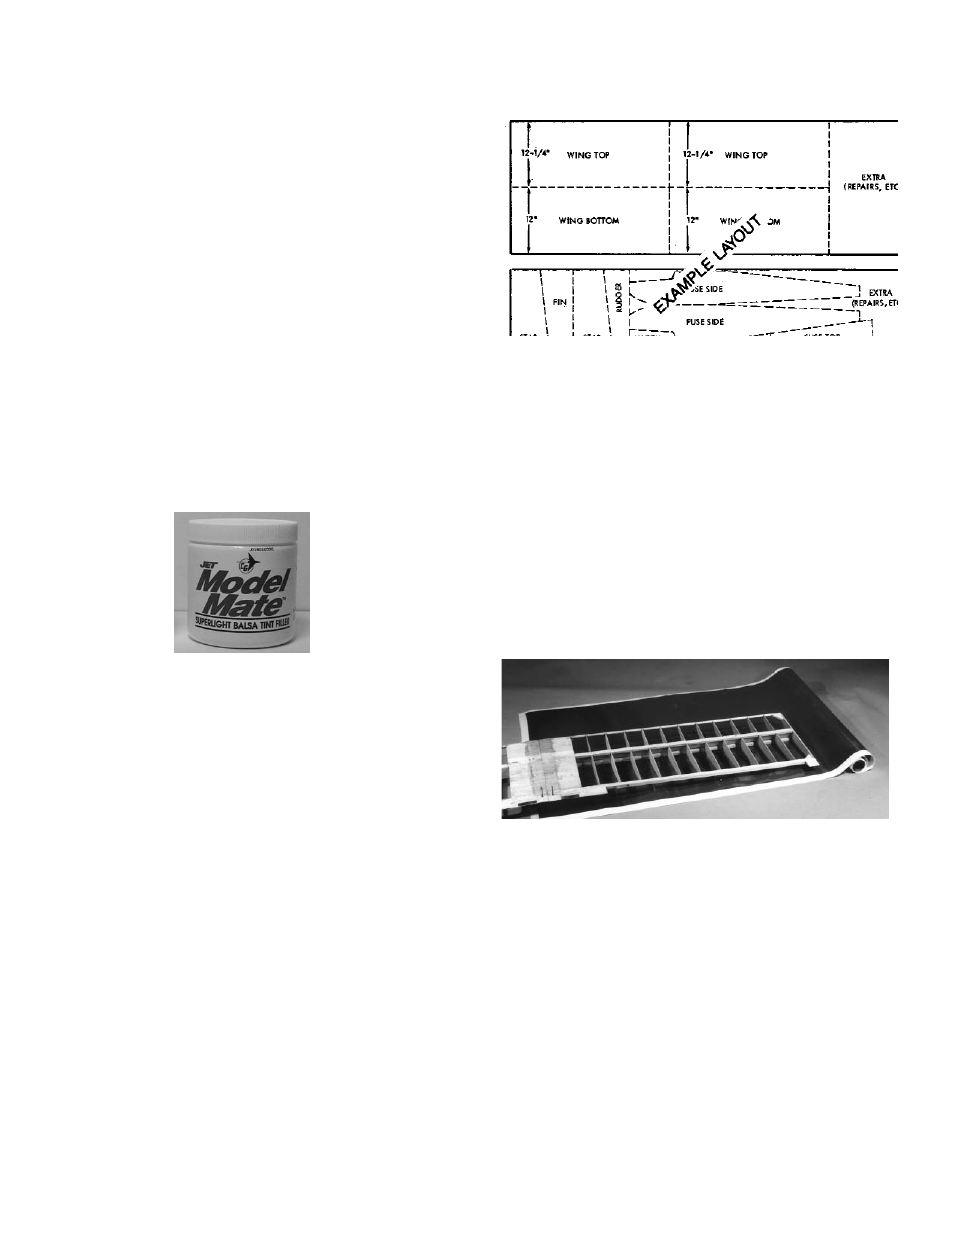
IMPORTANT: Before starting, it's a good idea to do a
lay out of the covering pieces you will need to cut from
the covering rolls, so that you make efficient use of
your material. You can draw patterns on UltraCote's
paper backing. BE SURE TO LEAVE EXTRA MATE-
RIAL (1½" to several inches) around all pieces, so you
will have plenty of covering to go around the edges of
each section.
Generally, one first covers the wing, then the tail, and
finally the fuselage. Other small parts (such as the
hatch) are covered separately.
Set the covering iron to the proper temperature. Test
it by laying a small strip of covering over a scrap piece
of balsa and firmly pressing with the iron. Make sure
the iron is hot enough to activate the adhesive, but not
so hot that it burns the covering.
COVERING THE WING
Using a fresh model knife blade or razor blade, cut a
piece of covering material at least 1" larger than one-
half of the inboard wing bottom panel.
Remove the protective backing paper and lay the cov-
ering over the bottom of the wing, making sure there
is enough excess material for wrap-around at the L.E.,
T.E., and wing tip.
HINT: Leave a minimum of 3" excess at the wing
tip.
25