Carl Goldberg GBGA0040 User Manual
Page 21
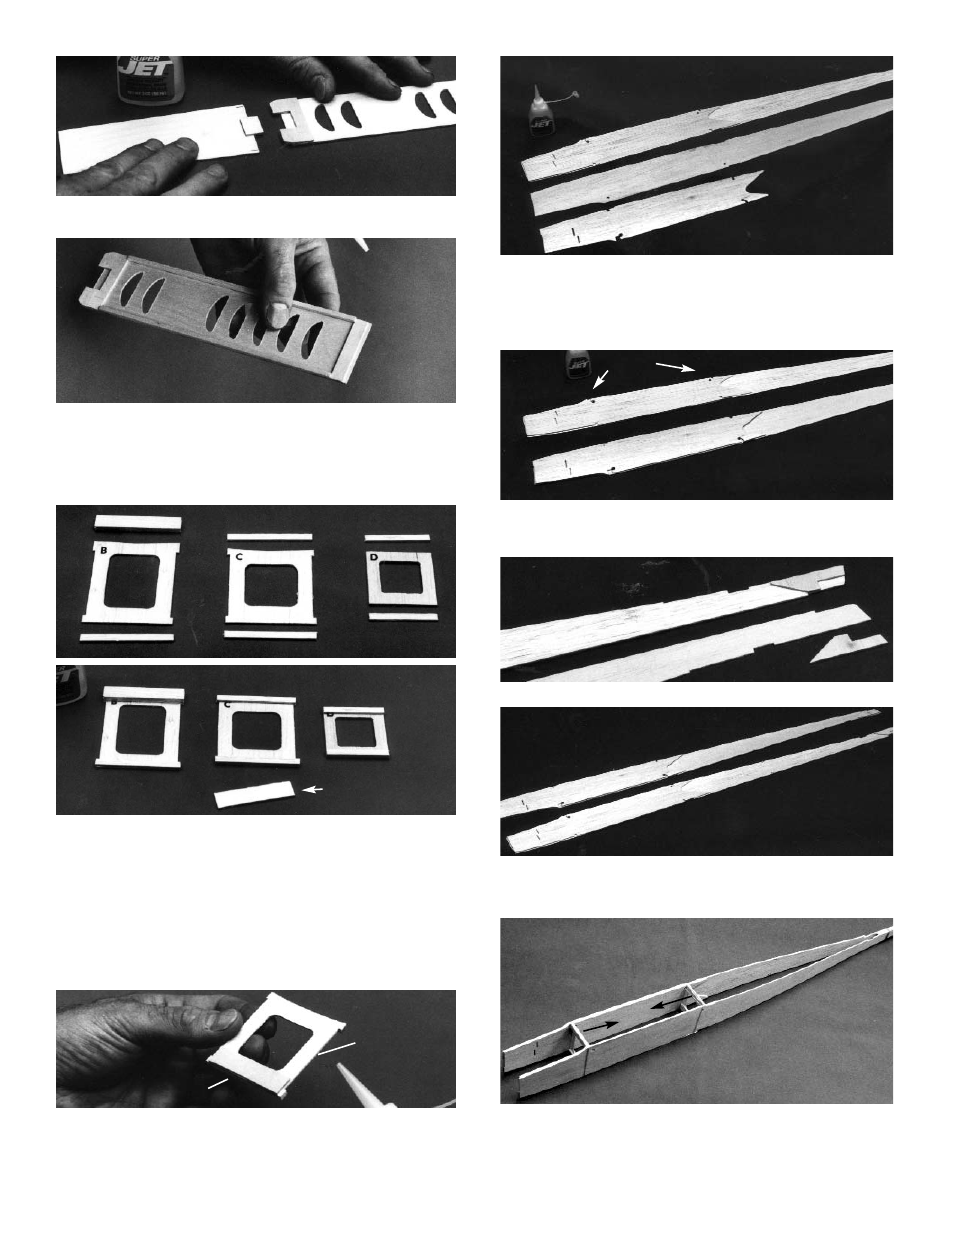
When dry, gently slide the hatch away from the
fuse bottom sheet.
4. Position 1/8” square x 7-3/8” bass rails behind
the hatch tongue and flush with the hatch sides.
Glue in place.
Positiion the 1/16” ply doubler at the end of the
hatch, as shown. Glue in place.
5. From 3/16 x 3/8” scrap material (from stab), cut
and glue a strip to match the top of Former “B”.
From 5/64 x 3/16” scrap (stab trussing materi-
al), cut and glue a strip to match the bottom of
Former “B”.
Using additional 5/64 x 3/16” material, cut and
glue strips to match the tops and bottoms of
Former “C” and Former “D”, as shown above.
Turn Form er “C” over and glue the die-cut
(D/C Sht. 4011) 1/16” ply doubler flush with the
bottom edge.
6. Lay out the fuselage, as shown, so that there
is a left and a right side.
Temporarily position the front and rear dou-
blers on each fuse side to check for fit.
Making sure all holes are aligned and edges
are flush, glue the front doublers to the fuse
sides.
Next, glue the rear doublers in place.
7. Place the doubled fuse sides over the side
view on the plan and mark the location of
Former “D.”
8. Using no glue, place the fuse sides together
and loosely rubberband the two pieces togeth-
er at the tail. Make sure “V” cuts are facing in.
21
FLUSH
FLUSH
FLUSH
LEAVE STRIP TOPS STRAIGHT.
D/C PLY DOUBLER
ALIGN
HOLES
DOUBLER
V-CUTS FACE IN