Operation panel, Special function buttons – Canon L240 User Manual
Page 26
2-12
Setting Up
Chapter 2
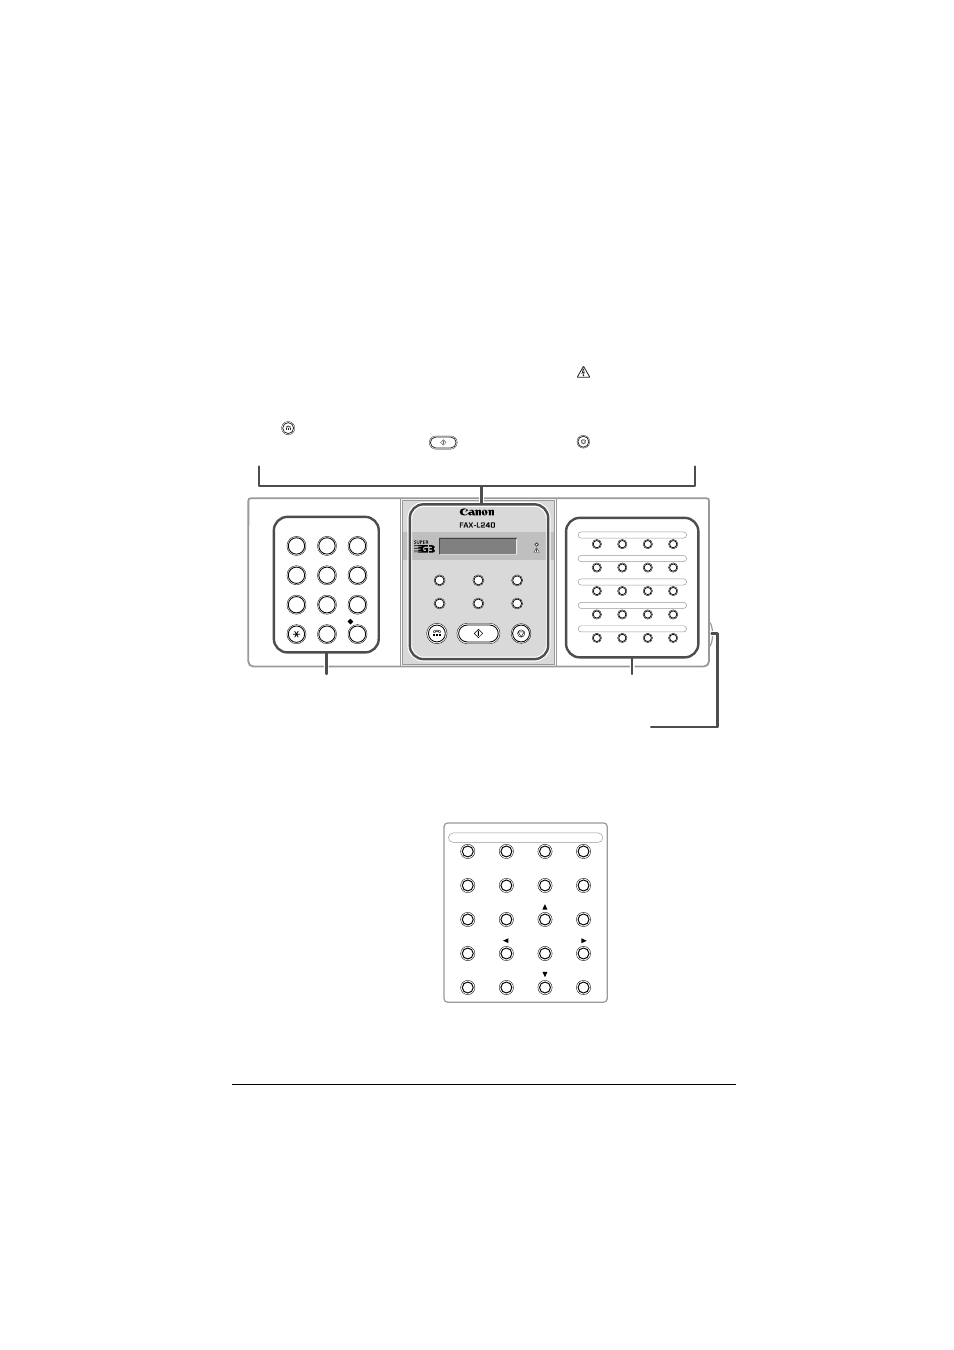
Operation Panel
The language used for the Operation Panel varies depending on the country of
purchase. The following illustration shows the Operation Panel in English.
Special Function Buttons
GHI
JKL
MNO
ABC
DEF
TUV
WXYZ
PQRS
01
02
03
04
05
06
07
08
09
10
11
12
13
14
15
16
17
18
19
20
1
0
#
7
8
9
4
5
6
2
3
T
•
Receive Mode Button
(
Chapter 8)
•
R Button
(
p. 3-9)
•
Hook Button
(
pp. 6-17, 7-6, 9-3)
•
LCD
•
Resolution Button
(
pp. 7-2, 10-2)
•
Coded Dial Button
(
pp. 6-2, 6-16, 6-17)
•
Start/Copy
Button
(
pp. 10-2, 10-3)
•
Alarm Light
•
Set Button
(
p. 14-3)
•
Redial/Pause Button
(
pp. 7-9, 9-2)
•
Stop Button
(
p. 14-3)
•
Numeric Buttons
(
p. 3-2)
•
One-Touch Speed Dialling
Buttons (
pp. 6-2, 6-16, 6-17)
•
One-Touch Speed Dial Panel
Open the one-touch speed dial panel to
expose the special function buttons below.
SUPER
Receive Mode
Resolution
Set
R
Coded Dial
Redial/Pause
21
22
23
24
+
•
Data Registration
Button (
p. 14-3)
•
Delayed Transmission
Button (
pp. 7-14,
7-16, 7-17)
•
Report Button
(
pp. 6-18, 11-3, 14-2)
•
+ Button
(
p. 3-7)
•
O, P Buttons
(
pp. 3-3, 3-4
•
Clear Button
(
p. 3-4)
•
Polling Button
(
pp. 9-11, 9-15)
•
Memory Reference
Button (
pp. 9-5,
9-6, 9-7, 9-9)
•
M, N Buttons
(
p. 14-3)
•
D.T. Button*
(
p. 9-4)
•
Space Button
(
pp. 3-3, 3-4)
Data
Registration
Delayed
Transmission
Polling
Memory
Reference
Report
D.T.
Space
Clear
* This feature is available for certain countries only.