Storix Software SBAdmin Linux System Recovery Guide User Manual
Page 15
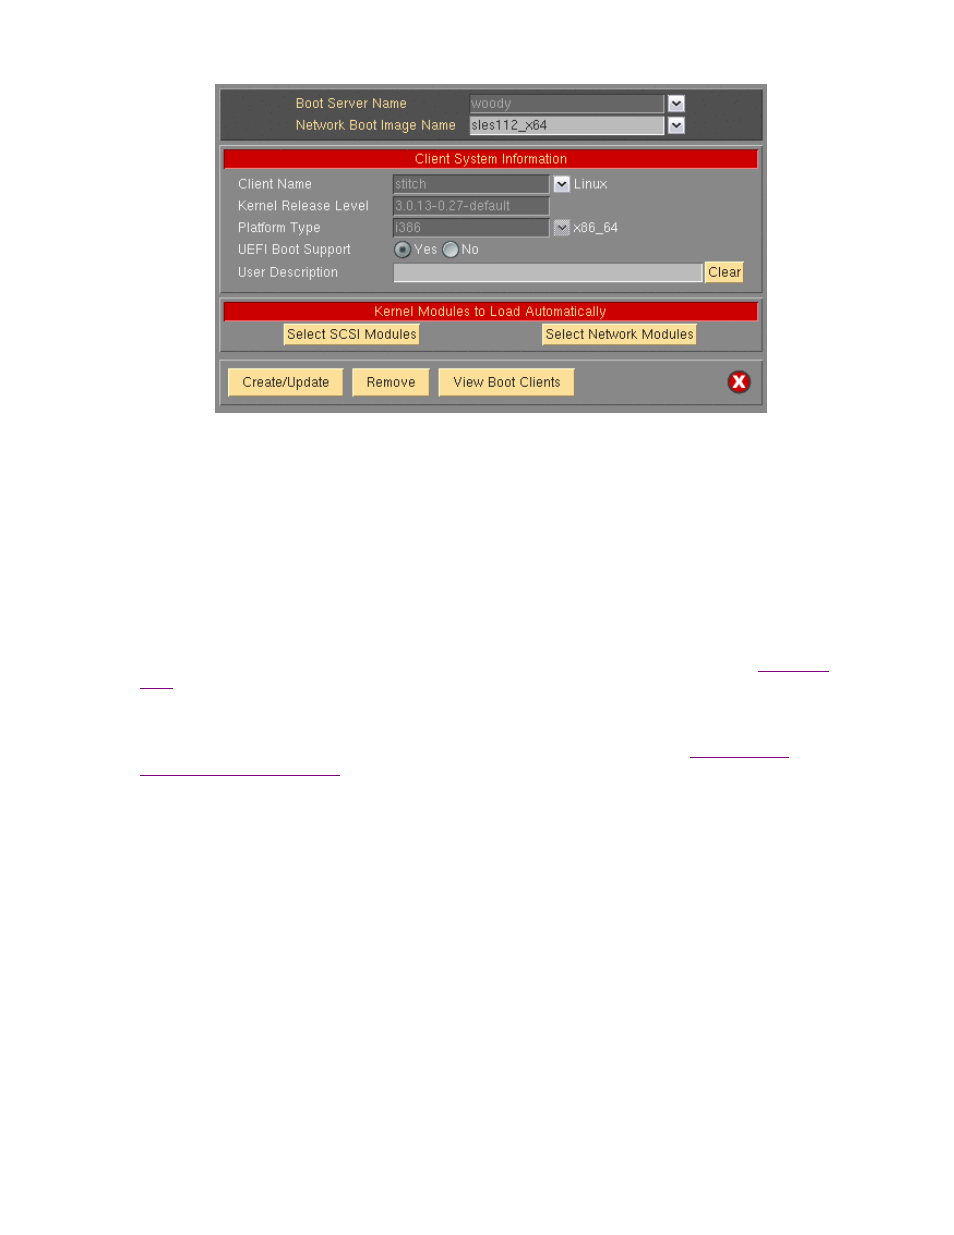
Select the
Boot Server Name
. This is the server on which the network boot image will be stored after it is
created. The network boot server may be the same system from which the network boot image is created.
Next, type the name of the boot image in the
Network Boot Image Name
field or select the name of an
existing image to overwrite by pressing the arrow button to the right of the entry field. If you enter a unique
name, a new image will be created using that name. Note that the network boot “image” actually consists of
several files on disk, but will always be referred to within the application as a single image by a unique boot
image name. The files are copied into the directory specified as the Client Directory for CDROM &
Network Boot Images directory when the server was configured. You may also use the select button to the
right to choose an existing name. The named image will be overwritten.
Finally, select the
Client name
for which boot media is to be created using the drop down arrow to the right
of the
Client Name
field. Kernel Release Level and Platform Type will be automatically populated with the
appropriate information from the client. The
UEFI Boot Support
will be enabled if the client has
. The boot media will always support booting from BIOS firmware. However, if you wish to create the
Network boot images capable of booting from both BIOS and UEFI firmware, then select “Yes”.
Upon successful completion, the network boot image will be created and transferred to the boot server. It
will now be possible to configure any client to boot from this image using the option “
Network Installation of a Client
” below.
When all selections are complete, press the
Create/Update
button. A new window will appear with the output of
the command to create the media and any error message if they should occur, such as in the following
example:
Storix System Backup Administrator
15
Version 8.2 Linux System Recovery Guide