Connecting the spirometer components – Welch Allyn CP 200 Spirometry Option - User Manual User Manual
Page 41
Directions for Use
Chapter 4 Performing Spirometry Tests
37
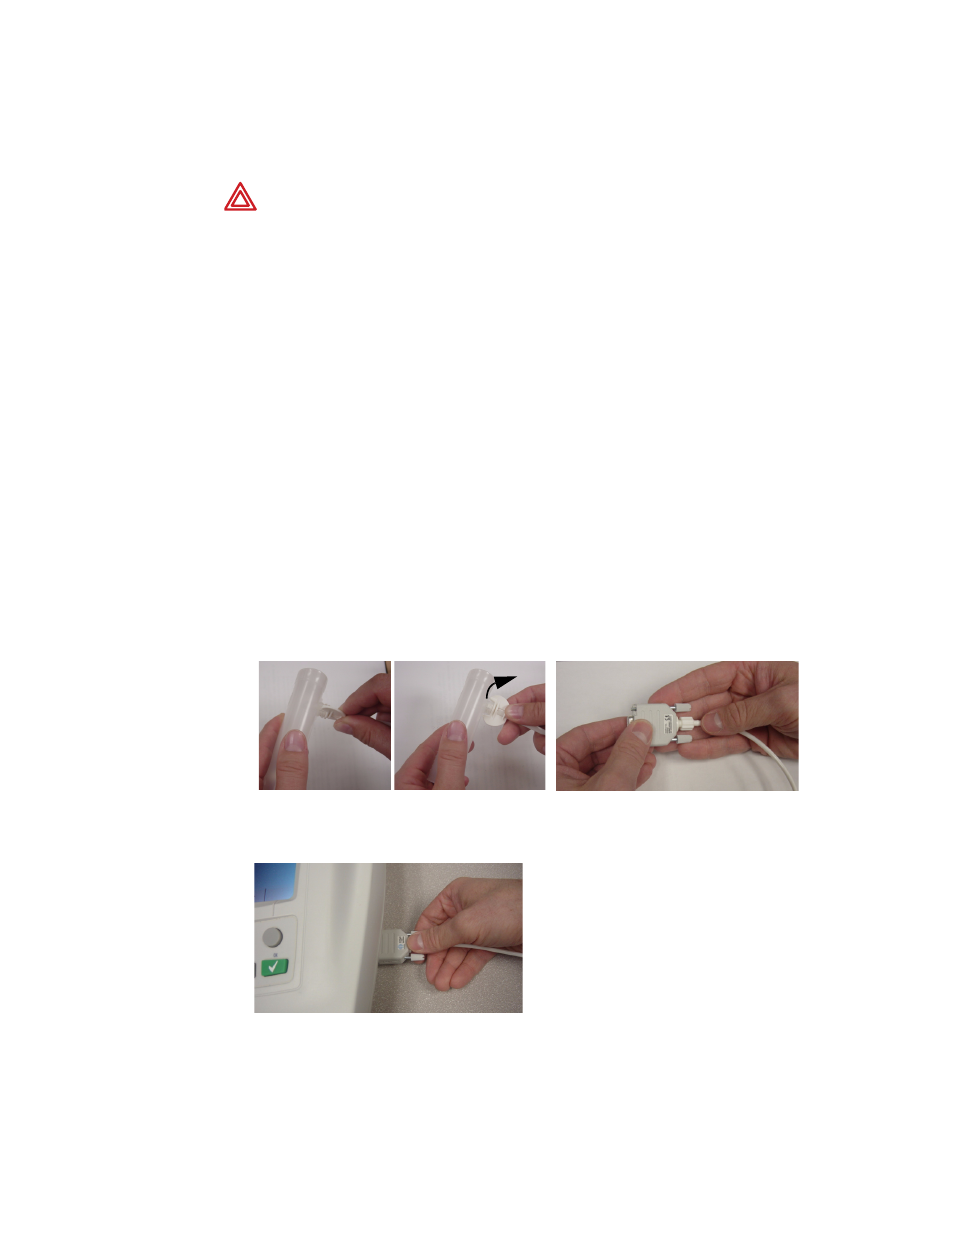
Connecting the Spirometer Components
1.
Verify that the sensor and pressure tubing are clean and undamaged. Look for signs
of deterioration, including but not limited to cracks, cuts, discoloration, or oxidation.
If any part exhibits any of these symptoms, replace it. See
2.
Attach a flow transducer to the pressure tubing. See
3.
Attach a sensor to the other end of the pressure tubing. See
4.
Connect the sensor to the electrocardiograph’s spirometry port. Hand-tighten the
sensor connectors. Do not overtighten the connectors, or they may become stripped.
See
Figure 26
.
The CP 200 software automatically activates the spirometry functions throughout the
software.
Figure 26. Connecting the Sensor to the Spirometry Port
WARNING To prevent the spread of infection, use a new flow transducer for
each patient. Use rubber gloves when replacing used flow transducers, and wash
hands after touching them. Discard flow transducers after a single patient use.
Note
Bacteria filters are unnecessary.
Figure 24. Attaching a Flow Transducer
to the Pressure Tubing
Figure 25. Attaching the Sensor to the
Pressure Tubing