Kontron NSC2U IP Network Server User Manual
Page 54
NSC2U Server—Optional Component Installations
Kontron IP Network Server NSC2U
Product Guide, rev. 1.4
December 2009
54
4.2.4
Installing an Add-in Card in the Riser Card Assembly
Caution:
When handling an add-in card, observe the normal safety and ESD precautions. (See
Appendix A, “Safety Information”
for more information.)
See
Section 4.2.1, “Riser Card Options” on page 52
for information about what cards
can be used with the two riser cards in this assembly.
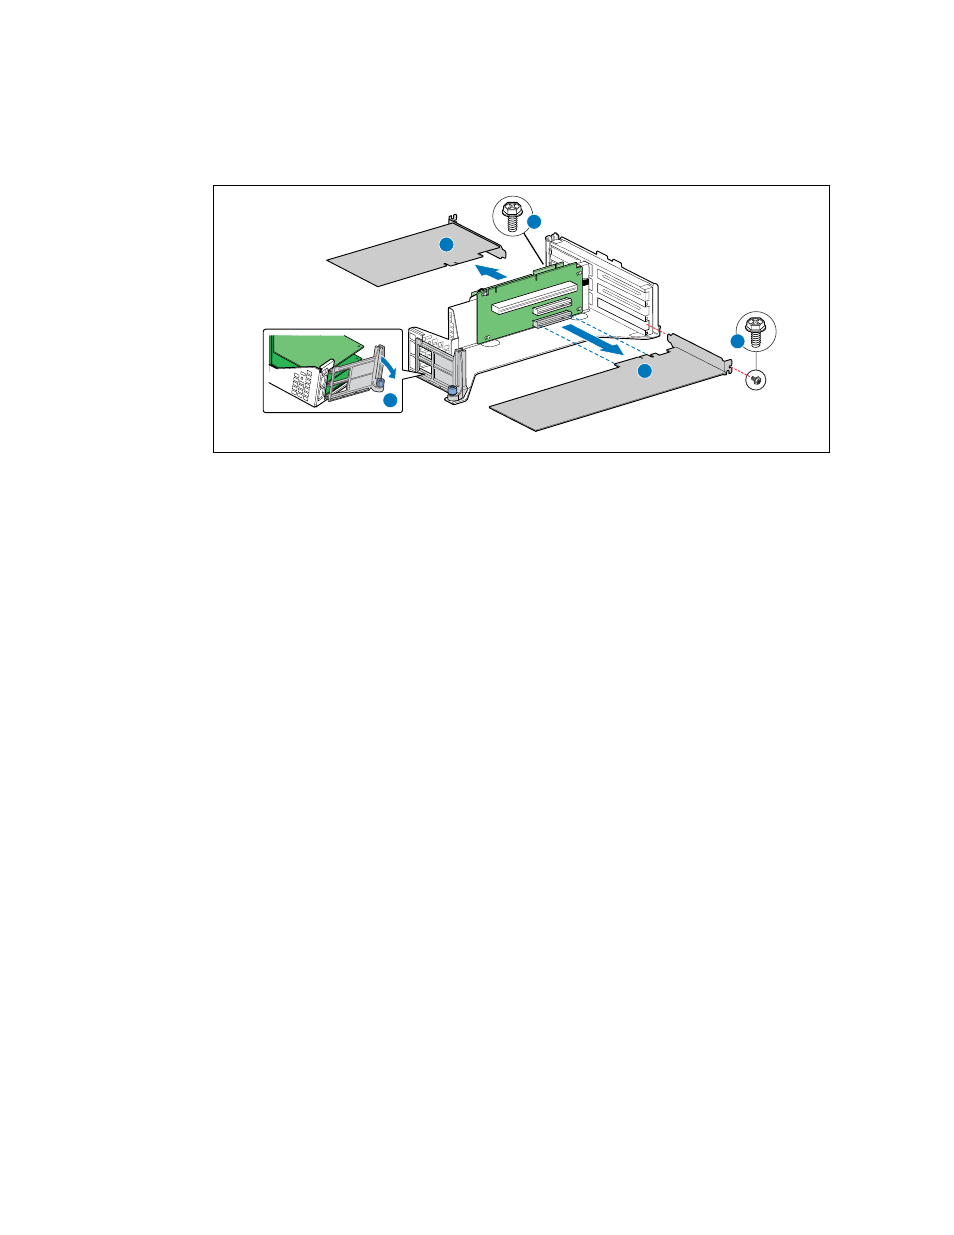
1. If the add-in card slot was empty before installing the new card, remove the add-in
card filler panel.
2. For a full-height card, remove the front retention clip by loosening the blue captive
thumbscrew and rotating the clip outward. (
, “D” and “C”)
Disengage the three plastic tabs from the metal sidewall.
3. With the riser card assembly upside-down, slide the add-in card onto the sheet
metal and attach it to the appropriate riser card connector. (“B”)
Be sure that the add-in card edge connector is seated in the riser card connector
correctly.
4. Fasten the add-in card to the riser card assembly bracket using the rear retention
screw and for full-height cards, by also replacing the front retention clip and
tightening the captive thumbscrew. (“D”)
Figure 35.
Removing an Add-in Card from the Riser Card Assembly
Full-height Add-in Cards
TS000280
A
B
C
D
E