4 installing the front bezel, 5 removing the processor air duct, Installing the front bezel – Kontron NSC2U IP Network Server User Manual
Page 27: Removing the processor air duct
Kontron IP Network Server NSC2U
December 2009
Product Guide, rev. 1.4
27
Server Component Installations and Upgrades—NSC2U Server
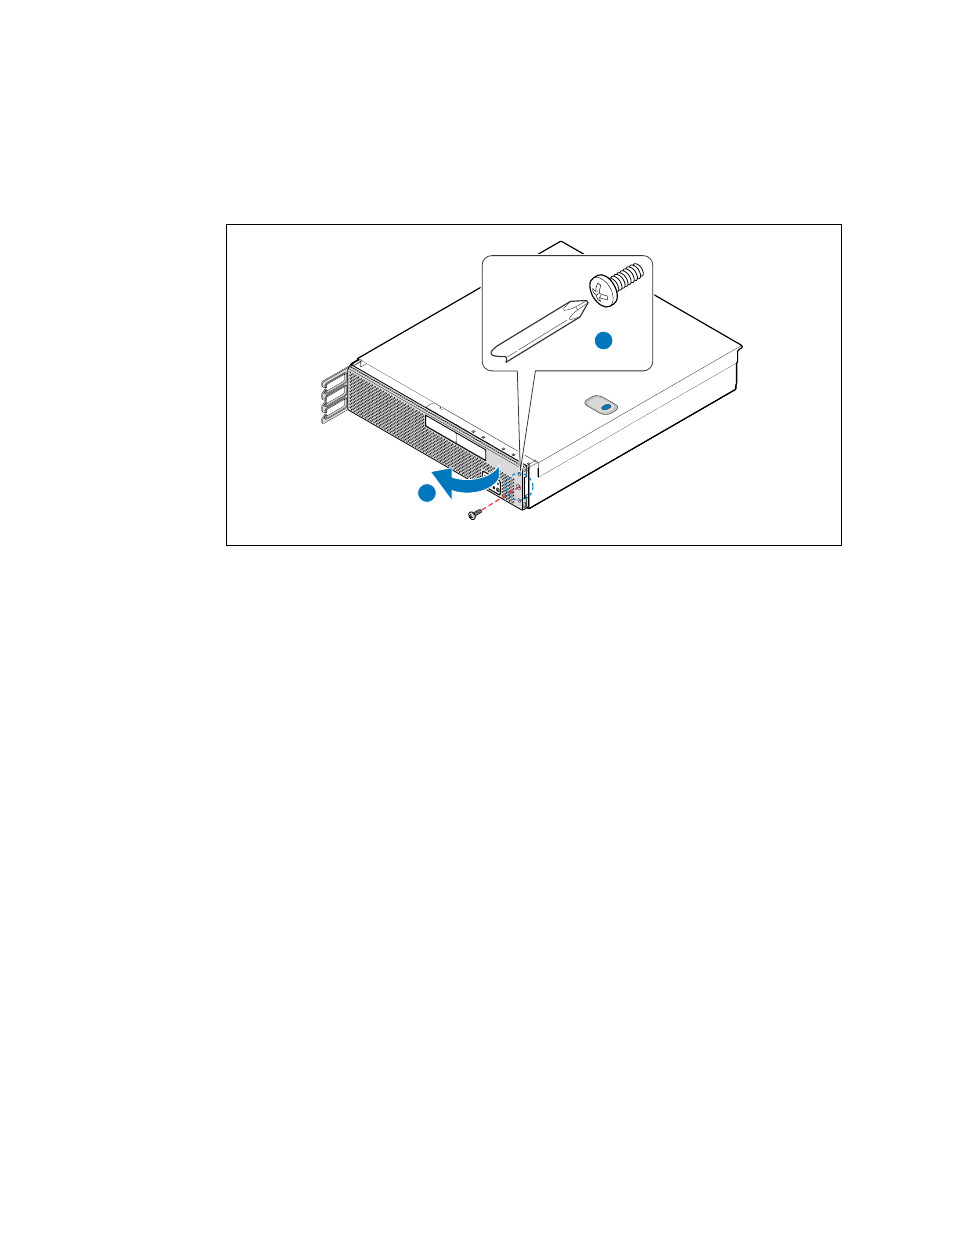
2. Remove the bezel retention screw (right side, if present). (“A”)
3. Rotate the bezel outward as shown and remove. (“B”)
3.2.4
Installing the Front Bezel
1. Align the four tabs on the left of the bezel with the slots in the front panel and then
rotate the free end of the bezel to the closed position.
2. Snap the front bezel into place and tighten the screw at the right edge of the bezel
(if used).
3. Re-connect the 4xGbE cables if they are used.
3.2.5
Removing the Processor Air Duct
The air duct must be removed to access the processors, memory DIMMs, CPU fan
assembly, the SFP board, or the inside of the front panel. The processor air duct is
required for proper airflow within the chassis. Be sure the air duct is in place again
before installing the chassis cover.
1. Power down the server system and unplug all peripheral devices and the AC power
cable.
2. Remove the chassis cover. For instructions, see
.
3. Slide the duct several millimeters toward the rear panel until it stops. (“A”)
4. Lift the air duct straight up and remove it from the chassis. (“B”)
Figure 10.
Removing the Front Bezel
TS000272
A
B