Cooling shroud, Removing the cooling shroud – Dell PowerEdge M820 (for PE VRTX) User Manual
Page 29
3.
PCIe mezzanine card 2 - Fabric B
4.
PCIe mezzanine card support bracket
5.
PCIe mezzanine card 3 - Fabric C
6.
cooling shroud
7.
PCIe mezzanine card 4 - Fabric B
8.
processor/DIMM blank
9.
heat sink (processor 2)
10.
processor socket 3
11.
memory sockets (48)
12.
hard-drives (4)
13.
memory modules (48)
14.
heat sink (processor 1)
Cooling shroud
Removing the cooling shroud
CAUTION: Many repairs may only be done by a certified service technician. You should only
perform troubleshooting and simple repairs as authorized in your product documentation, or as
directed by the online or telephone service and support team. Damage due to servicing that is
not authorized by Dell is not covered by your warranty. Read and follow the safety instructions
that came with the product.
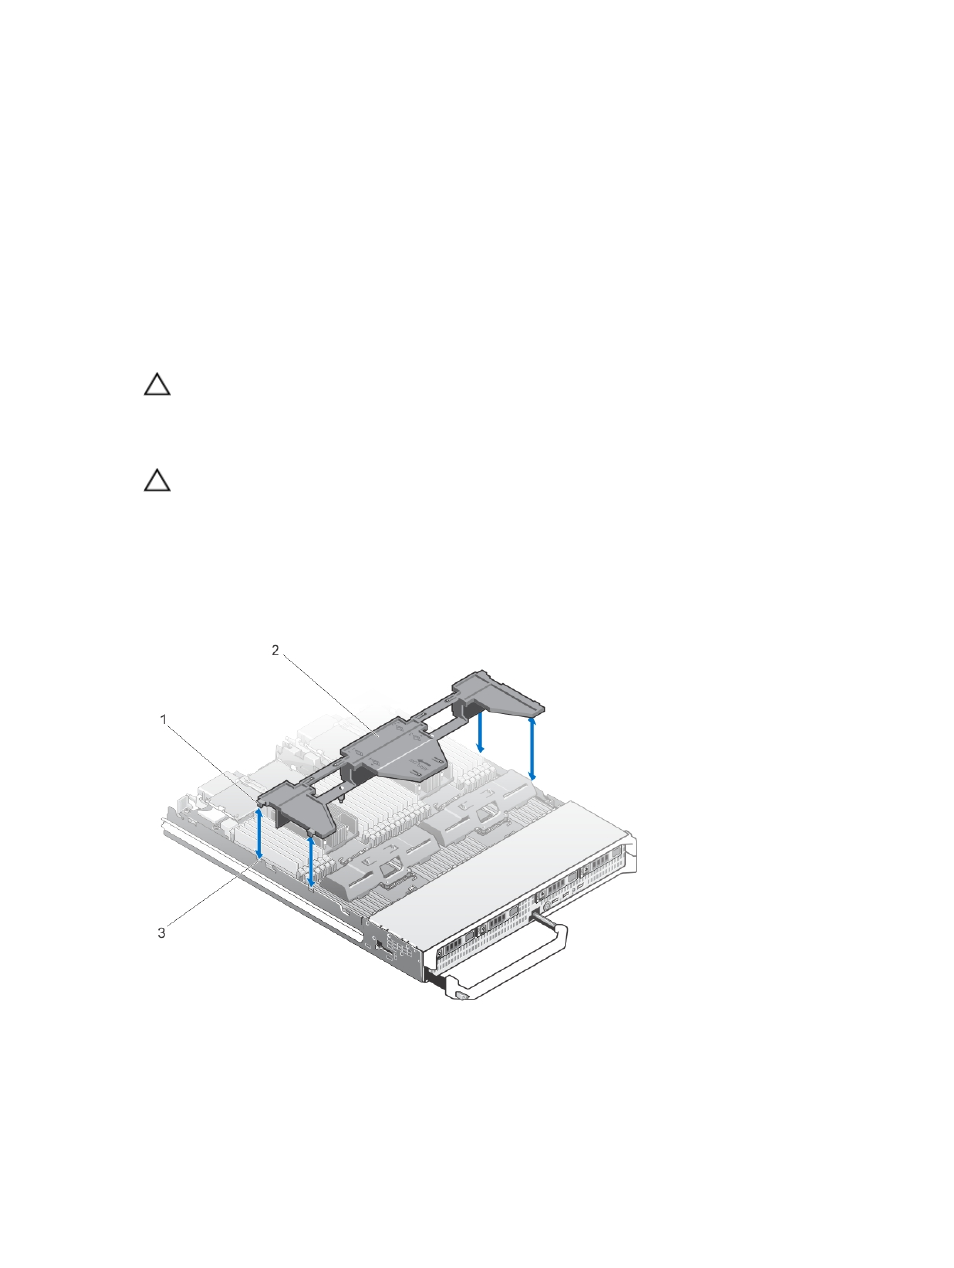
CAUTION: Never operate your system with the cooling shroud removed. The system may get
overheated quickly, resulting in shutdown and loss of data.
1.
Remove the server module from the enclosure.
2. Open the server module.
3. Hold the cooling shroud at both ends near the server module chassis and lift it up and away from the
server module.
Figure 7. Removing and installing a cooling shroud
1.
tabs (4)
2.
cooling shroud
29