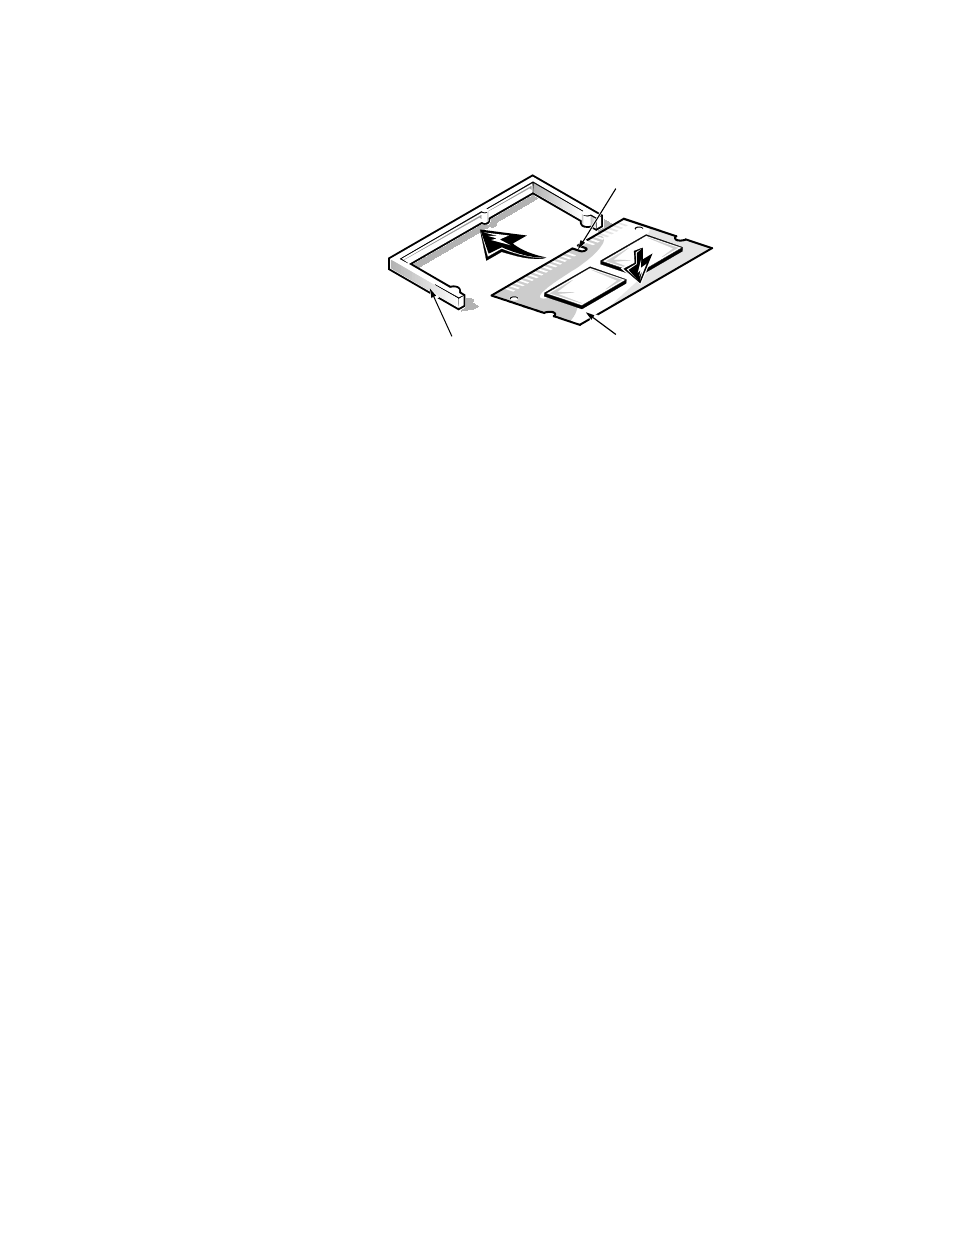
Figure 6-9, Installing a video-memory upgrade module -11 – Dell OptiPlex E1 User Manual
Page 101
Installing System Board Options
6-11
)LJXUH ,QVWDOOLQJ D 9LGHR0HPRU\ 8SJUDGH 0RGXOH
5HSODFH WKH H[SDQVLRQFDUG FDJH DV GHVFULEHG LQ ´5HSODFLQJ WKH
([SDQVLRQ&DUG &DJHµ LQ &KDSWHU
5HSODFH WKH FRPSXWHU FRYHU UHFRQQHFW \RXU FRPSXWHU DQG SHULSKHUDOV
WR WKHLU HOHFWULFDO RXWOHWV DQG WXUQ WKHP RQ
As the system boots, it detects the presence of the new video memory and auto-
matically changes the system configuration information in the System Setup
program.
(QWHU WKH 6\VWHP 6HWXS SURJUDP DQG FRQILUP WKDW WKH DPRXQW RI YLGHR
PHPRU\ GLVSOD\HG LQ WKH 9LGHR 0HPRU\ RSWLRQ LV 0%
See Chapter 2, “Using the System Setup Program.”
If the video memory total is incorrect, turn off the system, remove the computer
cover, and reseat the video-memory upgrade module in its socket.
5XQ WKH 9LGHR 7HVW *URXS LQ WKH 'HOO 'LDJQRVWLFV WR WHVW WKH QHZ YLGHR
PHPRU\
For information on using the diagnostics and troubleshooting any problems that
occur, see the chapter titled “Running the Dell Diagnostics” in your
Diagnostics
and Troubleshooting Guide.
video-memory
upgrade socket
video-memory
upgrade module
notch