Et. see figure 3-16, In figure 3-16, to allow the memory mo – Dell PowerEdge C6100 User Manual
Page 81
Installing System Components
81
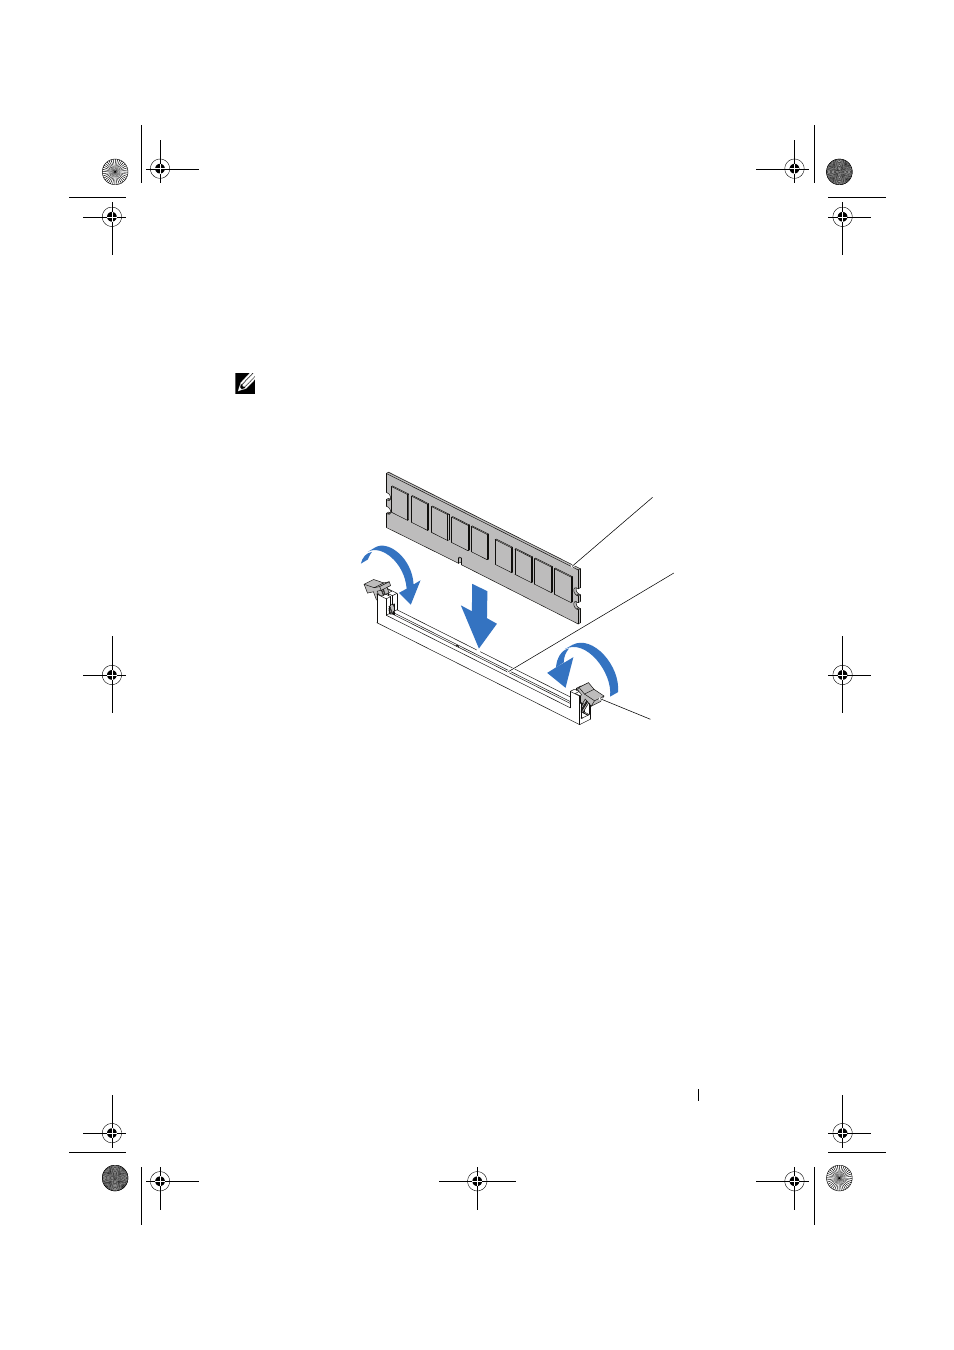
7 Align the memory module's edge connector with the alignment key of the
memory module socket, and insert the memory module in the socket.
See Figure 3-16.
NOTE:
The memory module socket has an alignment key that allows you to install
the memory module in the socket in only one way.
Figure 3-16.
Inserting and Removing a DIMM
8 Press down on the memory module with your thumbs to lock the memory
module into the socket. See Figure 3-16.
When the memory module is properly seated in the socket, the ejectors on
the memory module socket align with the ejectors on the other sockets
that have memory modules installed.
9 Repeat step 5 through step 8 of this procedure to install the remaining
memory modules in the approved configurations. See Table 3-2.
10 Replace the cooling shroud. See "Installing the Cooling Shroud" on
11 Replace the system-board assembly. See "Installing a System-Board
1
memory module
2
memory module socket
3
memory module socket ejector (2)
1
2
3
book.book Page 81 Thursday, March 4, 2010 4:38 PM