Install the lamp – Edge Lighting Lyra 120 User Manual
Page 3
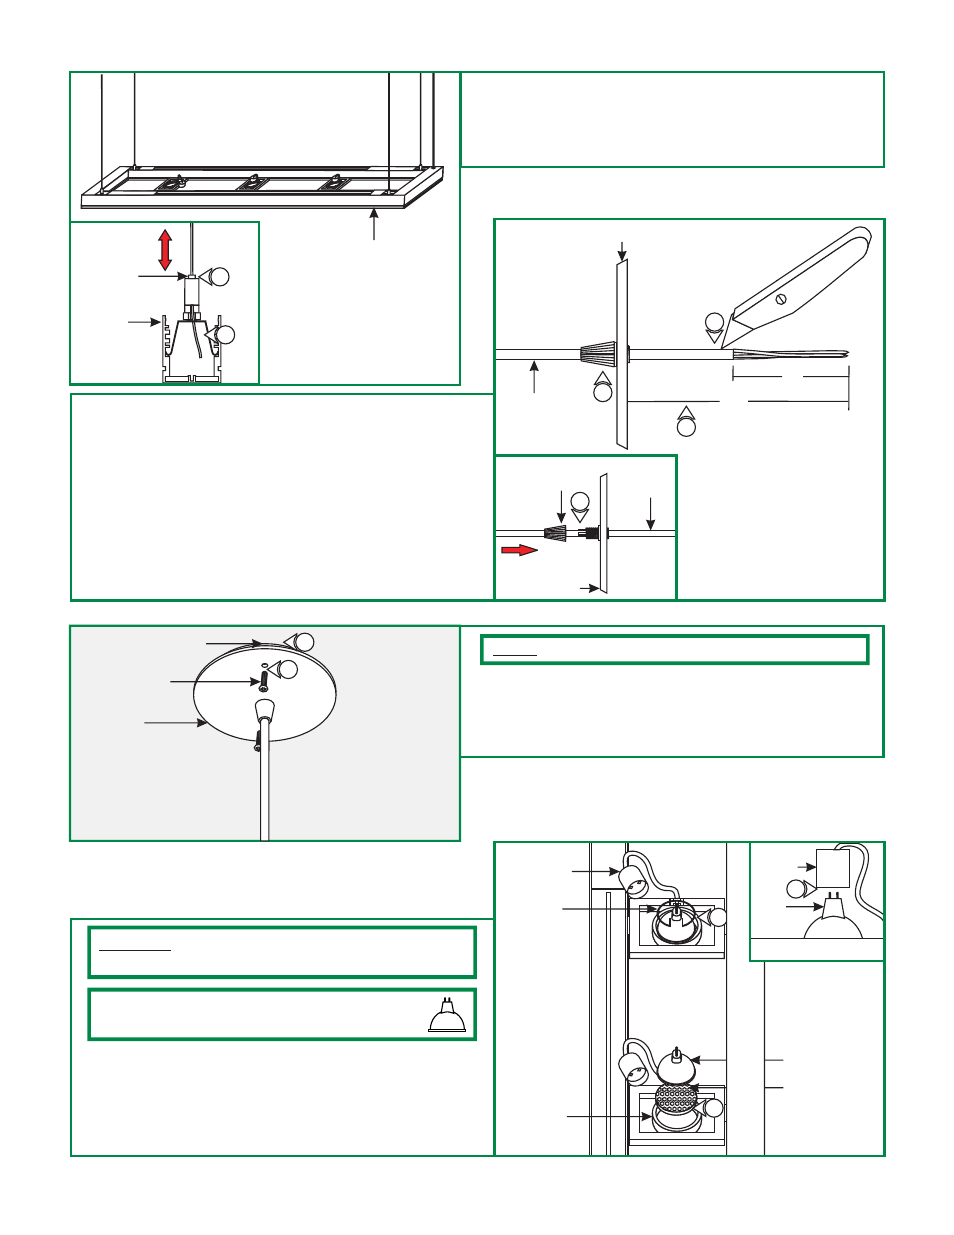
14: Slide the fixture frame up and down by pushing the tab on
each support clip until desired height is achieved. Release
the tab to lock the aircraft cable in place.
15: Trim off excess aircraft cable with a sharp cutter.
I
FIXTURE
FRAME
SUPPORT
CLIP TAB
FIXTURE
FRAME
14
15
J
8"
16: Loosen the cord strain relief on the canopy and push the
excess clear cord into the canopy.
17: Leave 8" of the clear cord exposed behind the canopy for
power connection. Tighten the cord strain relief on the
canopy to lock the clear cord in place.
Trim off the excess clear cord.
19: From the end of the clear cord, strip 4" of the outer
insulation using a sharp knife. Make sure not to nick the
inner wires. Trim off the cut out insulation.
18:
17
CORD
CORD STRAIN
RELIEF
CANOPY
16
CANOPY
CORD
4"
17
19
K
20: Place all wires and wire nuts connections inside electrical
box.
21: Align the canopy holes to the crossbar center holes and
secure using the two #8-32 screws.
NOTE:
For wiring details refer to page 4.
3
CANOPY
#8-32 SCREW
CROSSBAR
Install the Lamp
L
CAUTION:
To reduce risk of a burn or electrical shock during
lamping, disconnect the power to the fixture.
1: Place a lamp and lens or louver (optional) into each fixture
ring.
2: Replace and tighten the lamp holder rings.
3: Align and push each socket completely onto lamp pins.
Use
MAX
50
Watt, Type MR16 Front Glass Cover
Halogen Lamp, For Each Socket.
FIXTURE
RING
LOUVER
LAMP
LAMP
HOLDER
RING
SOCKET
SOCKET
LAMP
20
21
2
1
3