Fertilizer applicator adjustments (option), Applicator release height, Applicator release angle – Great Plains YP625PD Operator Manual User Manual
Page 49: Applicator release height applicator release angle
Great Plains Manufacturing, Inc.
Adjustments
45
02/23/2011
401-754M
Fertilizer Applicator Adjustments (Option)
There are two inter-related adjustment for applicators:
1.
release height
2.
release angle
Note: Make coulter adjustments before making applicator
adjustments.
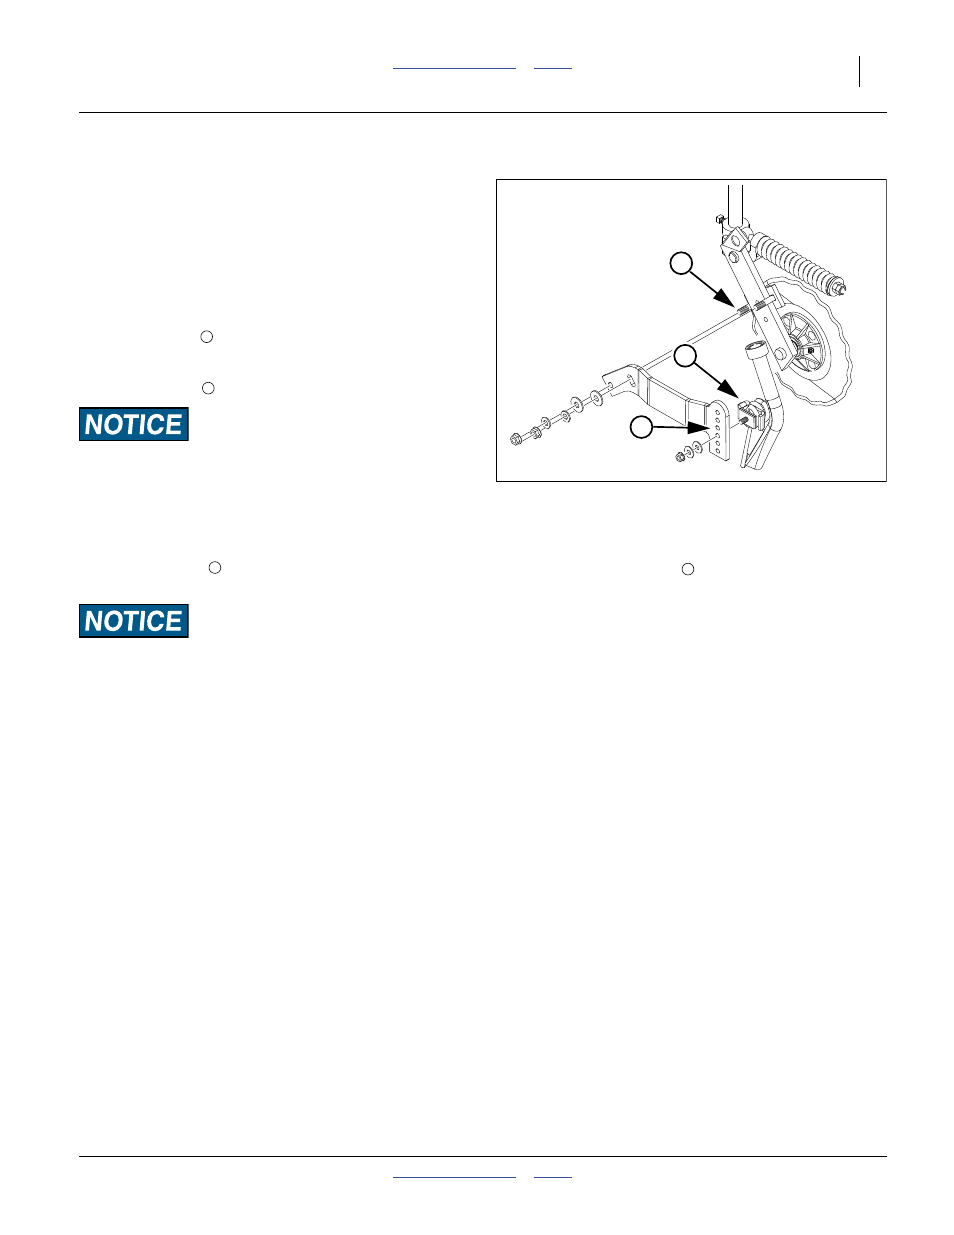
Applicator Release Height
The primary adjustment for release height is the lower
four (of six) holes
at the rear end of the applicator arm.
Re-position the applicator mounting bolt to any of the
lower four hole. Before tightening the nut, make sure the
torsion spring leg
is also in an arm hole.
Machine Damage Risk:
Do not position the applicator mounting bolt in either of the
top two holes. This would leave the torsion spring leg
unsecured. The applicator angle could vary. The applicator
might strike the coulter disk.
A secondary adjustment for release height is to loosen
the clamping bolts
, and slide the applicator arm up or
down the coulter arm.
Machine Damage Risk:
Be sure to leave at least 13 mm clearance between the
applicator torsion spring and the coulter disk. If the clearance
is too small, the spring could strike the coulter disk when it
snaps forward after striking field obstructions.
Applicator Release Angle
Loosen the clamping bolts
, and rotate the applicator
arm at the coulter arm.
Note: Changing applicator angle also changes
applicator release height.
Figure 38
Dry Fertilizer Applicator
31872
5
7
6
5
6
7
7